|
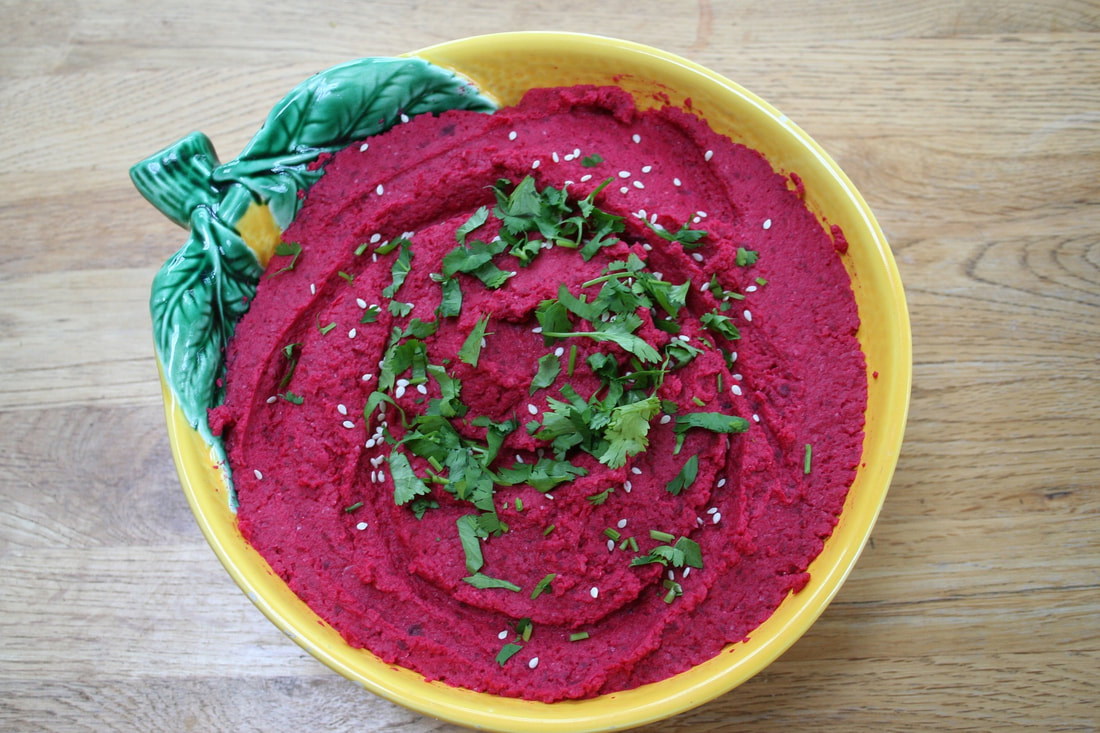
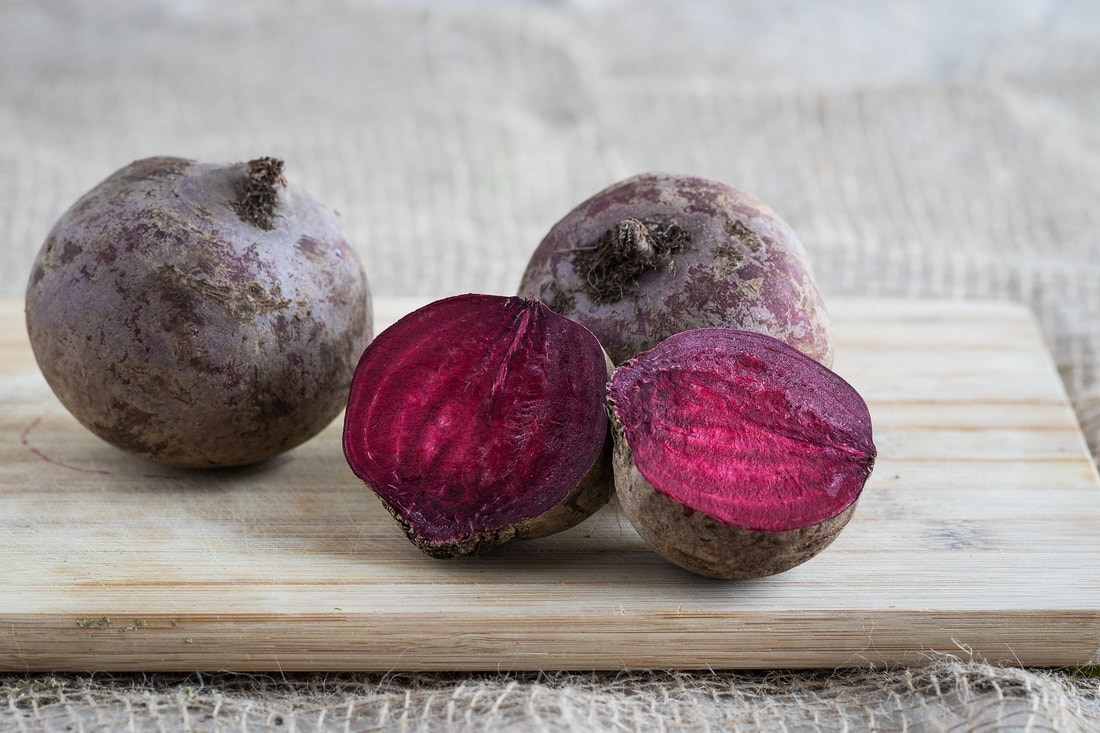
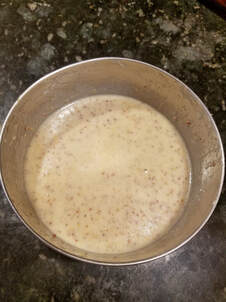
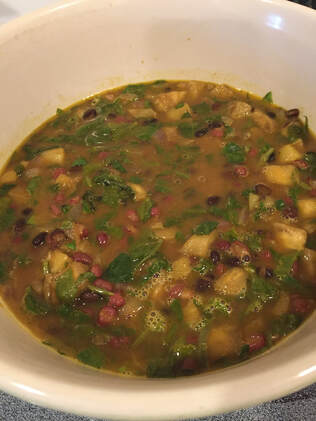
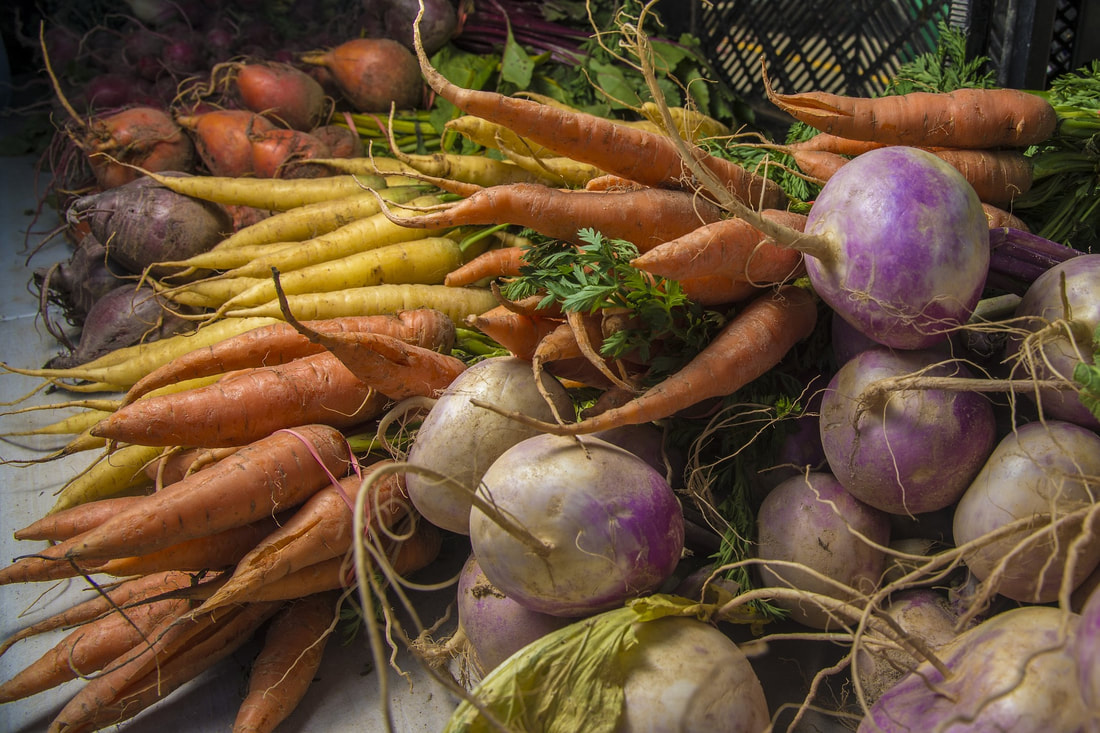
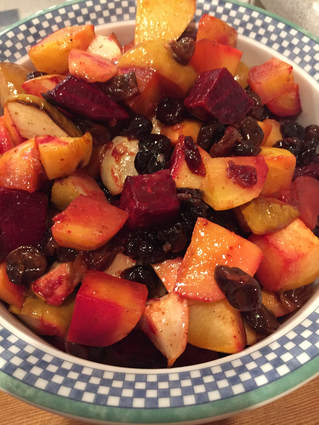
This hummus recipe can’t be beet! This recipe is a treat if you’re looking for a creative way to use your fall farmers market find! In the past couple of weeks while walking around the Edmonds farmers market, I’ve noticed that the season is changing and more winter squashes and root vegetables are making an appearance. One of these being my least favorite...beets. Growing up with a mother that was absolutely smitten for this veggie and knowing the wonderful nutritional benefits truly made me want to love them too. I tried them pickled, roasted, blended, powdered...you name it. Every time, their “earthy” flavor just did not sit well with my pallet. I held out hope that my taste buds would change with age and one day I would be able to share my mom’s passion. When just about all hope was lost, pink hummus became a trend. I love hummus and I thought that beets might make a decent addition to this savory snack. Whether you’re like me and want to love beets or you are like my mom and are bursting with excitement when they hit the market, you will enjoy this recipe! Hummus is a traditional Middle Eastern/Mediterranean spread. A basic hummus recipe includes just 5 ingredients: chickpeas, tahini, lemon, garlic, and olive oil. There are countless hummus variations - you just have to get creative with spices, herbs, and veggies!
Beet Hummus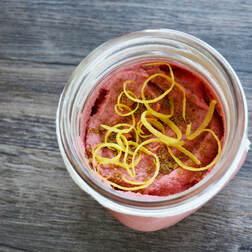 Ingredients:
Toppings:
Directions:
*To make pita slices: Slice store bought pita bread into triangles and spread on a parchment lined baking sheet with some olive oil, salt and pepper. Bake at 350 F for 8-10 minutes or until crisp. ~Gillian Schultz, RD
0 Comments
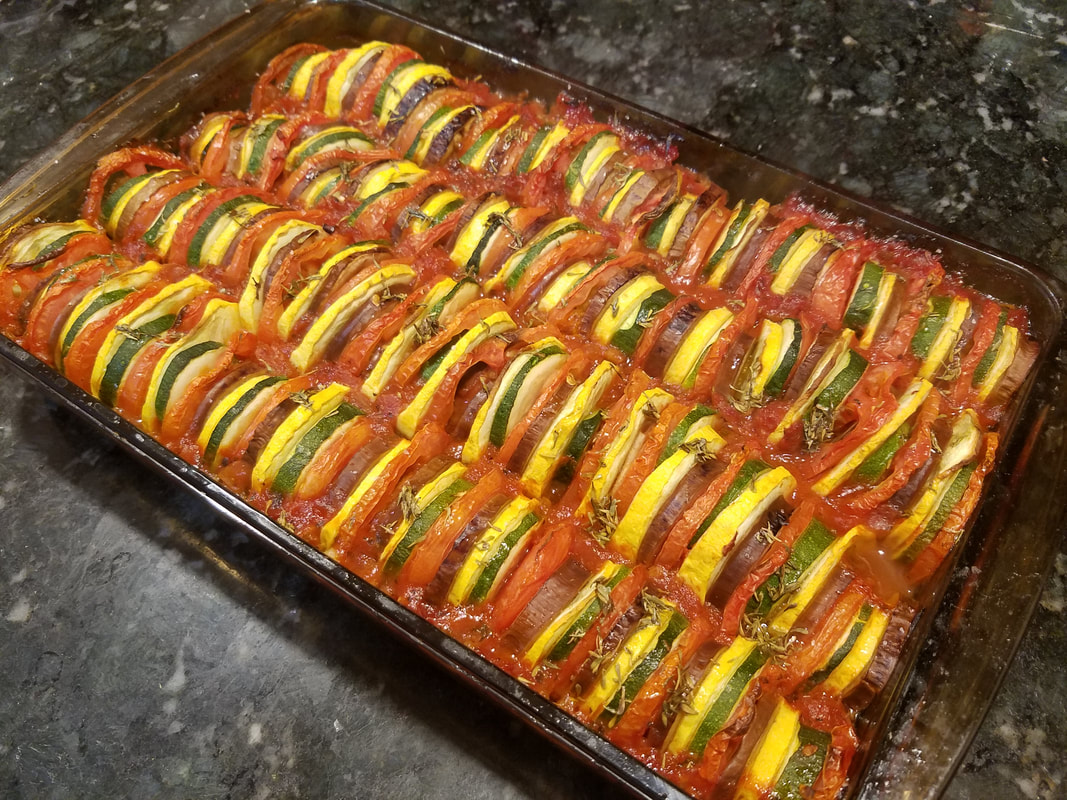
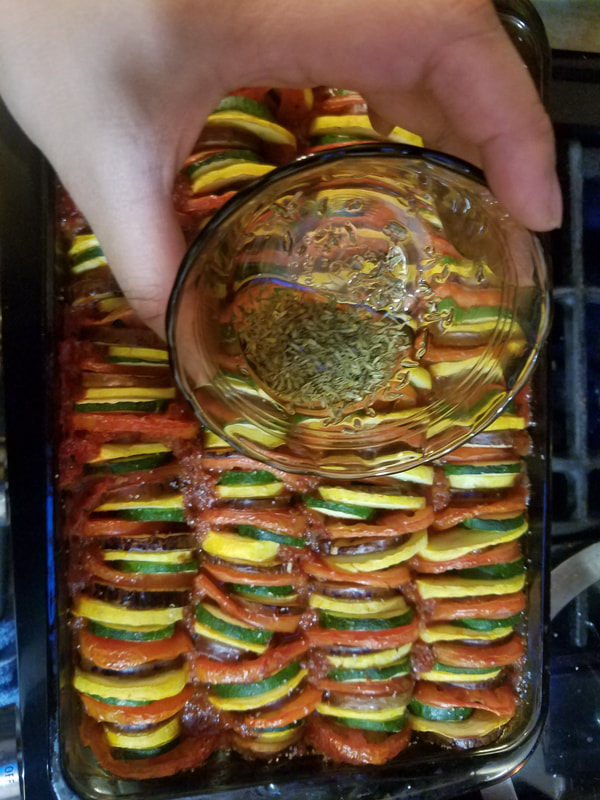
Although we're nearing the end of July, the bounty of summer produce is still in full swing! Check out the ratatouille recipe below to utilize those juicy garden tomatoes, plentiful zucchini, and fresh herbs. Mix up your staple grains with fluffy whole grain couscous and try making your own nutritious salad dressing! RatatouilleRatatouille is a French dish featuring vividly colored vegetables layered over a richly flavored tomato sauce baked in a casserole dish or cast iron skillet. It can also be made as a stew. This dish is best made in the summertime when all of the ingredients are in season and their flavor and nutrient profiles are at their peak. Farmers markets will often carry heirloom varieties of vegetables in different colors, adding more visual appeal to the dish. For those with little ones, try including them in the vegetable layering steps. This is a great way to increase their curiosity of the rainbow colors of fresh ingredients and entice them to try a delicious vegetable packed dish they helped create! Makes 12 side servings Recipe adapted from Allrecipes Ingredients: For the sauce
Directions: Sauce-
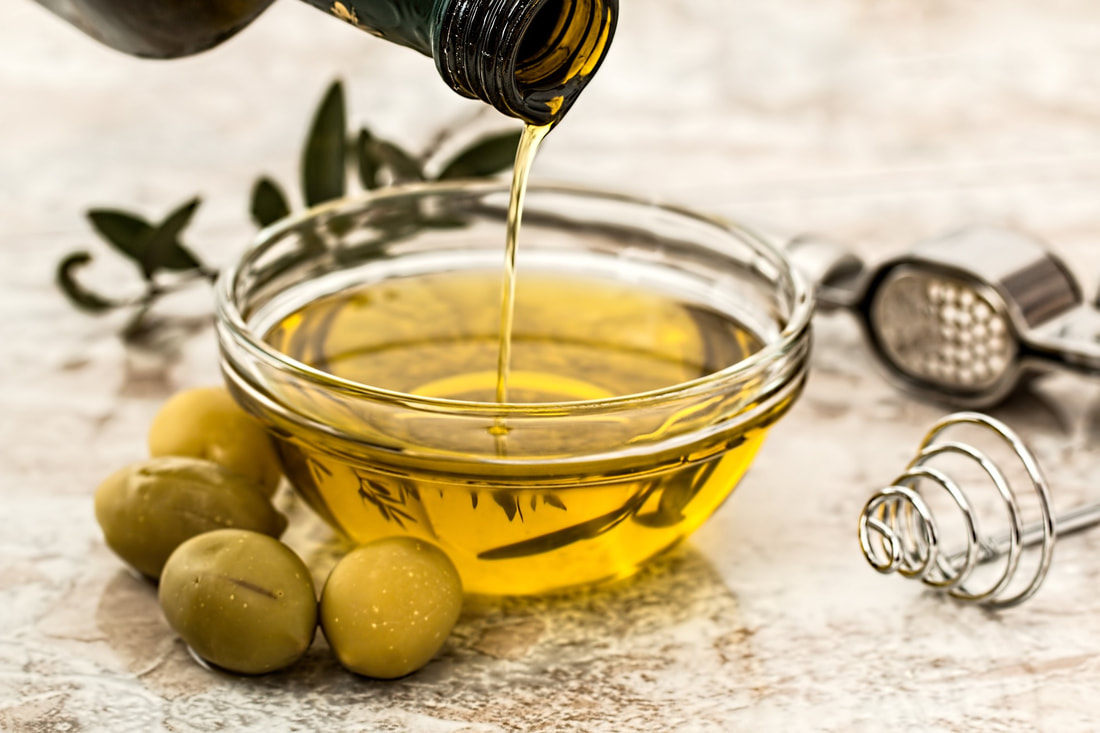
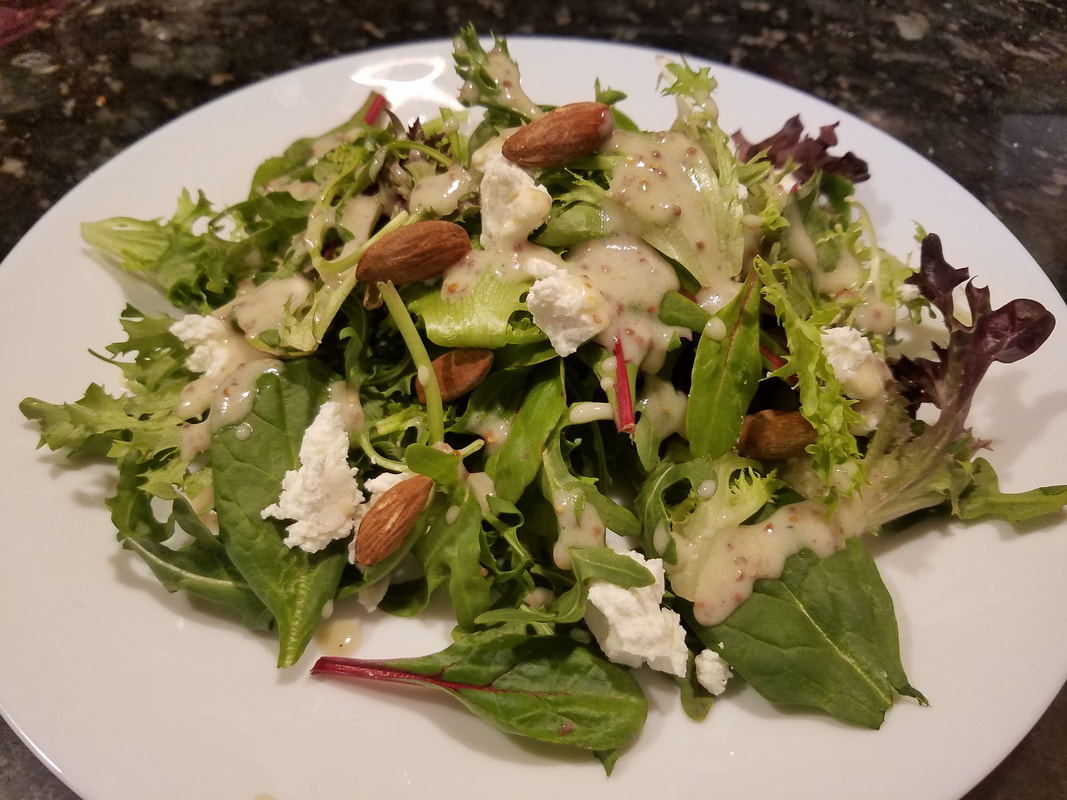
Nutrition Facts per Serving (1/12th of recipe): 78 calories, 15g carbs, 4.5g fiber, 2g fat, 3.3g protein, 276mg sodium, 655mg potassium Tangy Honey Mustard DressingStore bought salad dressings are convenient, but they often have a lot of added sodium and sugars to make them taste good. Making dressings yourself can help to reduce sodium intake if salads are a part of your daily routine. The best part about making your own is that it's very easy and you can customize your dressing to your desired taste and texture! Simple ingredients like olive oil, vinegar, and herbs can turn into a vibrant dressing with a little know-how. This honey mustard recipe features the use of probiotic filled yogurt as a way to add creaminess to the dressing without adding the extra calories from mayonnaise. It also uses fresh lemon juice for extra tanginess and stone ground/dijon mustard for a nice kick.
Directions:
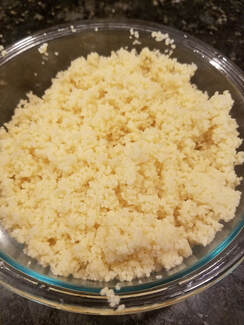
Nutrition Facts per Serving (2 Tablespoons): 68 calories, 6g carbs, 0g fiber, 5g fat, 1g protein, 107mg sodium, 40mg potassium Perfect Whole Wheat CouscousCouscous is often thought of as a grain, but it is actually a pasta. It is a wonderful starch to have on hand, especially if time is running short. All you need is boiling water and 10 minutes. That’s all it takes to put this wonderfully fluffy pasta on the table. It goes great with rich stews and saucy main dishes because it soaks up flavor so well. Be sure to get whole wheat couscous to increase the fiber content of your meal.
Nutrition Facts per Serving (1/2 cup): 88 calories, 18g carbs, 1g fiber, 0g fat, 3g protein, 72mg sodium, 6mg potassium
~Genesis, MS Nutrition, Dietetic Intern
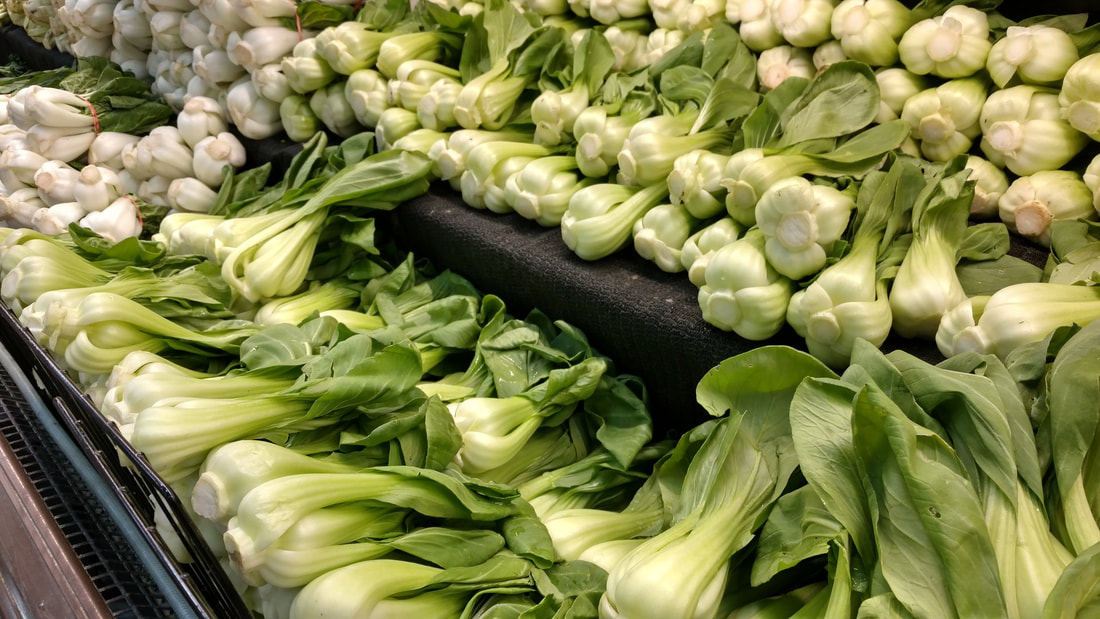
What does bok choy taste like?
How do you prepare bok choy?
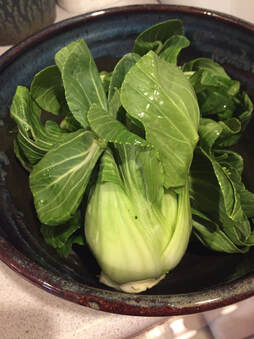
How nutritious is bok choy? Bok choy is a nutrient-packed vegetable that has a glycemic load of only 1 (how much carbohydrate is in the food) and only 20 calories in one cup (sliced and cooked). It is low in sodium and is a moderate source of dietary fiber. It is a good source of iron, vitamin B6, folate, calcium, potassium, and manganese. It is an excellent source of vitamins C, K and A (3). Bok choy is also rich in antioxidants and sulfur-containing compounds, which are known to play a role in cancer prevention, among other benefits (1). When eaten raw or lightly-cooked, it is higher in vitamin C and vitamin K than when eaten cooked. The recipe below is a simple vegetable dish that is colorful and fresh for the summer. Colorful Bok Choy Vegetable Mix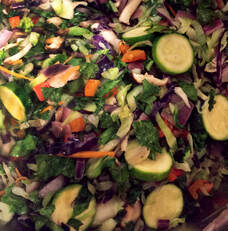 Serves 6-9 Inspired by a vegetable mix found in the produce section at Whole Foods Ingredients:
Directions:
~ Nancy Miller, MS, RDN
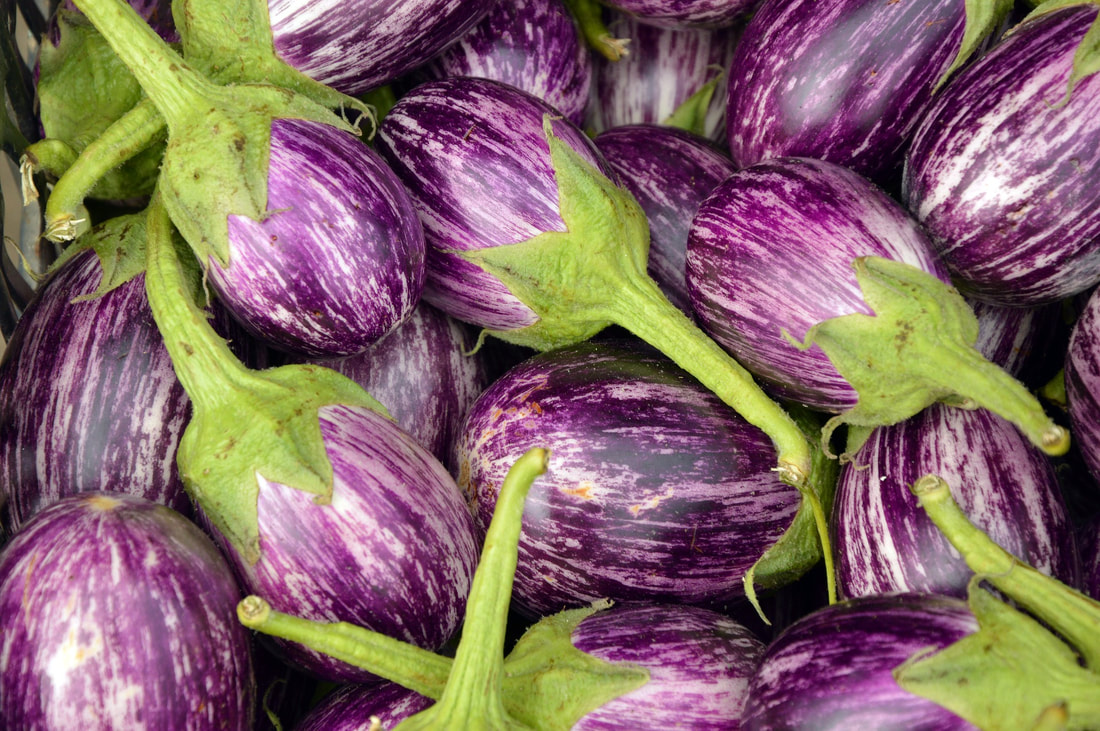
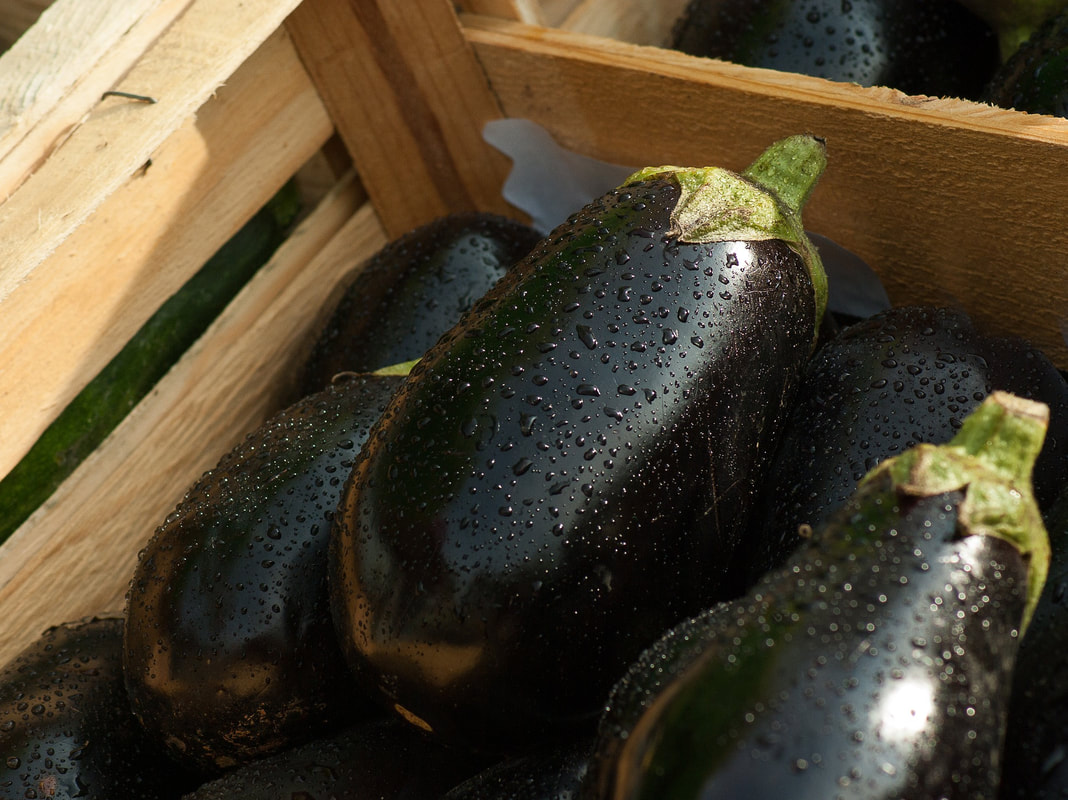
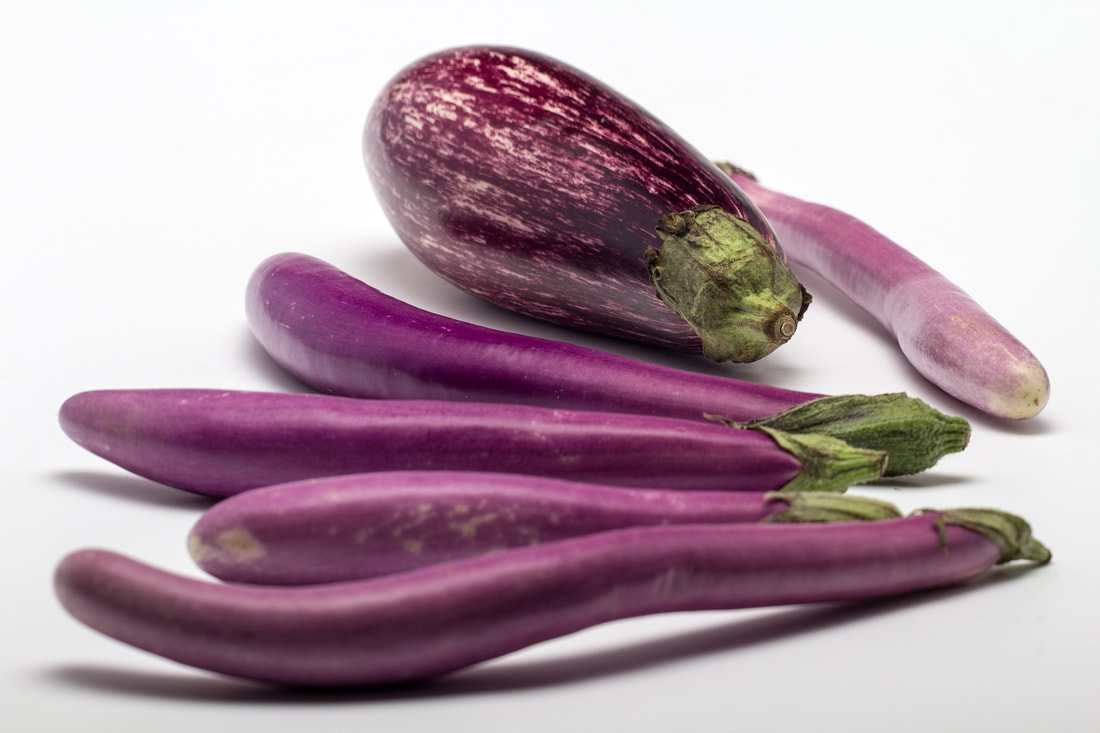
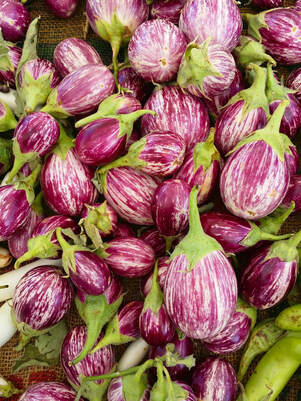
References: 1. http://www.whfoods.com/genpage.php?tname=foodspice&dbid=152 2. https://www.wholefoodsmarket.com/blog/whole-story/enjoy-bok-choy (you can find many recipe options here, too!) 3. https://nutritiondata.self.com/facts/vegetables-and-vegetable-products/2378/2 Do you like eggplant? Have you ever eaten eggplant? I know that many vegetables we think we do not like we’ve either never eaten or they have been poorly prepared. I encourage you to give eggplant another try, using one of the recipes below. Eggplant, also known as aubergine, melongene, guinea squash or “garden eggs,” are from the same family as peppers, tomatoes and potatoes, known as the nightshade family. Like tomatoes, eggplants are actually a fruit because they grow from a flowering plant and contain seeds. Eggplants grow in hot weather, so should be available in the Pacific Northwest starting in July. I wanted to introduce you to them this month, so you can begin anticipating their arrival and look for them to appear in the farmer’s markets. You are likely familiar with the deep purple “globe” eggplants at the grocery store. At the Asian markets and at farmer’s markets, you can find all kinds of shapes, colors, and sizes. They can be round, very thin and long, plump at one end, etc. And their colors range from white to stripy purple or from deep purple to green. The shinier eggplants are, the fresher they are. The fresher and younger they are, the sweeter they are. Be sure to choose ones that are heavy, which means they haven’t started to dry out inside. What does an eggplant taste like?
How do you prepare eggplant? 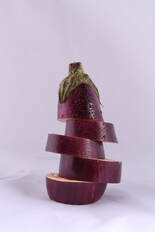 Eggplant is bitter when eaten raw. It should be cooked to fully enjoy the mild flavor. It can be substituted for meat in vegetarian dishes because of its texture and flavor. Eggplant can be baked, roasted, grilled, or mixed in a soup/stew. If you are going to peel the eggplant, it’s easier to cut them first into rounds and then peel the rounds. The eggplant can then be cubed, sliced or left in rounds. How nutritious is eggplant?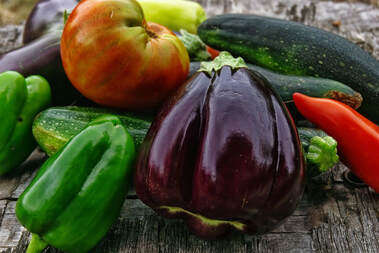 Eggplant is low in calories (about 30 calories to one cup cooked) and is also a good source of various vitamins and fiber (2). Studies show that it may contribute to brain and cardiovascular health, among other benefits. If you want to read more about the “super food” capabilities of eggplant, check out the following two articles: Leave a comment below and let me know how you enjoy this versatile vegetable! My family’s favorite eggplant dish, to use up all of those summer tomatoes, is this tomato eggplant chutney recipe. It freezes very well, so we can enjoy it during the cold winter months. The recipe below is a simple, one-pot dish that serves a crowd. You can include eggplant or mushrooms for a hearty meal. Enjoy! Eggplant and White Bean Stew 8-10 servings (about 10 cups) The amounts in this dish are very flexible, as is what you add to the pot. Just add a few ingredients at a time and taste. Adjust amounts and seasonings, as needed. Serve with rice or bread.
Directions:
Very loosely adapted from Healthy Recipes for Your Nutritional Type ~ Nancy Miller, MS, RDN 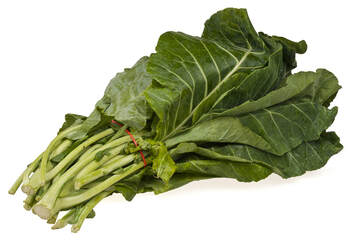 Collards have a reputation for needing to be cooked for hours and end up smelling up the house. This couldn’t be further from the truth. They can be enjoyed raw, steamed or lightly cooked. Or, long-cooked, such as with ham hocks. Collards are one of the oldest vegetables found in the same cruciferous vegetable family as some of the other vegetables I’ve written about in this blog: Turnip, rutabaga, kohlrabi and Brussels sprouts. As well as broccoli and cabbage, among others. Collards are sometimes called “tree cabbage” and “non-heading cabbage.” (1) While collards are hearty enough to grow during the winter, they usually are available year-round. They are a versatile option for recipes, as you can find below. What do collards taste like? 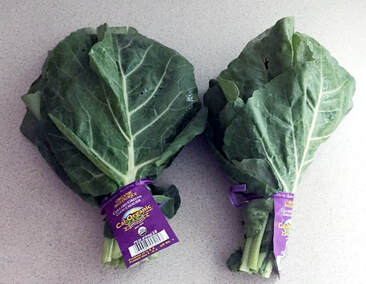 Collard leaves can range from a lighter shade of green to a deep shade. The leaves are flat with a thick rib through the center. Many folk will cut out the ribs and throw them away, but the ribs have good flavor and nutrition. See below for preparation tips. Some say their flavor is bitter, others say they are more alkaline. Some say you must cook them for ages. Others know you do not need to. Now is the time to find some fresh, tender leaves! Avoid the brittle leaves. As with Brussels sprouts, when cooked too long, the sulfur in collards can smell up the kitchen. That smell is a compound that fights cancer. See the section called “How nutritious are collards?” for more details. How do you prepare collards? 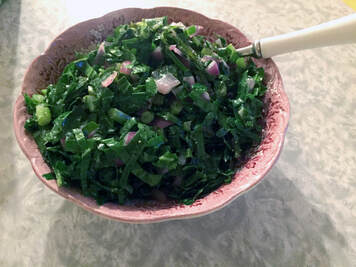 To enjoy them cooked or raw, it’s common practice to cut the ribs out from the leaves first. This is because the ribs and the leaves are different textures and thicknesses. Depending on the dish, finely chop the ribs to use within the dish or save for another dish. One of my favorite ways to use the ribs is to sauté them with chopped peppers and onions. I call it “confetti greens.” Once the ribs are removed, collard leaves are often rolled up and chopped very finely, before sautéing or slow cooking. Leaves can also be used as an alternative to a tortilla wrap. Some steam them before using to aid in rolling; others use the fresh leaves raw. I recommend using the steaming method if the leaves are a bit older. Note: Some folks find cruciferous vegetables a little bitter. If you raise the pH of the dish by adding some vinegar or citrus juice (lemon or lime), this can help tone down the bitterness. How nutritious are collards?Collards are low in calories and are an excellent source of vitamins A, C and K. They are also a good source of fiber (2). Studies show that cruciferous vegetables play a key role in the following: cancer-fighting, detoxification, anti-inflammatory, and heart health, among other benefits. Click here to read more about their “super food” capabilities. Leave a comment below and let me know how you enjoy this delicious vegetable! References: Garlic-Sautéed GreensServes 4-6 Adapted from The Cancer Lifeline Cookbook Ingredients:
Directions:
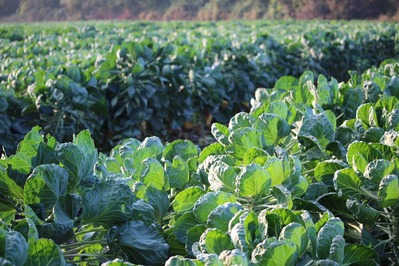
Note: Freezes well; add other colors, such as chopped red peppers, for variety of texture, color and flavor. Adapted from: Cancer Lifeline Cookbook. By Kimberly Mathai, MS, RD with Ginny Smith. Sasquatch Books; 2nd edition (May 11, 2004), page 154. Click here for more recipe ideas! ~ Nancy Miller, MS, RDN 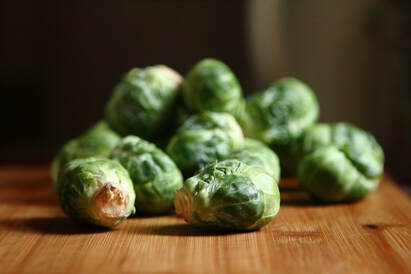 When I was thinking about which vegetable to highlight, as we are leaving the winter season, I thought of the sorely-misunderstood and poorly cooked Brussels sprouts. They are one of my family’s absolute favorite foods – I’m on the third batch in as many weeks - but most folks treat them badly and I wouldn’t like them cooked that way, either! Brussels sprouts are in the same cruciferous vegetable family as some of the other vegetables I’ve written about: turnip, rutabaga, & kohlrabi. As well as other, more commonly-eaten vegetables such as broccoli and cabbage. While a Brussels sprout bud has the many layers like cabbage does, Brussels sprouts buds grow on a stalk and cabbage is a large head that has its own root. You will usually find Brussels sprouts year-round in the grocery store, but they are most abundant in the winter months - think of those large, fresh stalks you can find during the holidays. Those stalks are cheaper, due to less labor to harvest, and they stay fresher longer. Brussels sprouts, in their present form, were cultivated in Belgium, which is where their name originated from. Brussels is the capital of Belgium, so remember the capital “B” and the “s” in the name when you talk about these delicious vegetables! What do Brussels sprouts taste like?
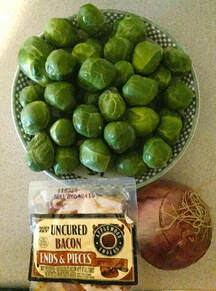
How do you cook Brussels sprouts? 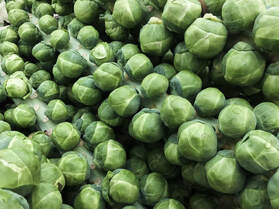 Most folks boil them, sliced in half or whole. Because the buds are round (or half-rounds), some sections are over-cooked and other parts are raw. Consider trying a different cooking method next time you prepare Brussels sprouts! If you do boil or steam your Brussels sprouts, it is vital that you cook them until just bright green. They will continue to cook from residual heat. It’s also important that you slice them the same size so they will cook at the same rate. You can also roast them to bring out their sweet, nutty flavor. Coat them with oil, salt, and pepper first. Click here for more detailed preparation options. How nutritious are Brussels sprouts?Brussels sprouts are low in calories and are an excellent source of vitamin C and vitamin K. They are also a good source of fiber, potassium, vitamin A, folate, manganese and vitamin B6 (1). Studies show that cruciferous vegetables play a key role in cancer-fighting (eaten raw; 2), among other health claims. Click here to read more about their “super food” capabilities. References: Below is my family’s favorite recipe. For many years, we ate the Brussels sprouts thinly sliced, by hand or by food processor. Recently, I accidentally chose the wrong slicing disc for the food processor and ended up shredding them like cheese! We are totally in love with this new texture and how quickly they cook. Note: Amounts don’t need to be exact, so use these amounts as a loose guideline. I hope you will give Brussels sprouts another chance. 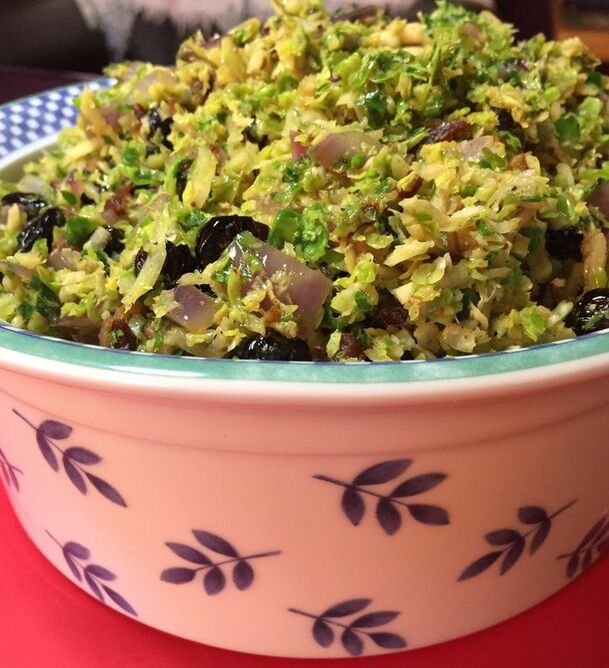 Shredded Brussels Sprouts with Bacon and Cranberries
Directions:
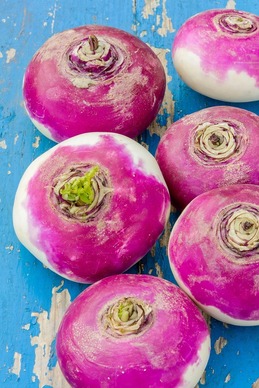
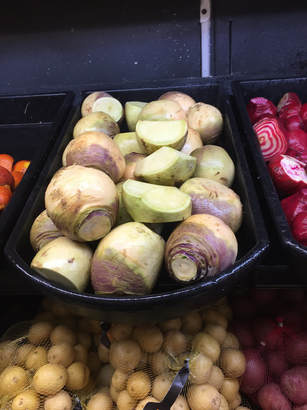
*Trader Joe’s has an affordable bacon option of “ends and pieces.” Use as much or as little or none of this as you’d like. This is an original recipe. Click here for a similar recipe, with different cooking methods and slightly different ingredients. Click here for another delicious-looking recipe. I’m anxious to try it! Leave a comment below if you try it to let me know what you think! ~Nancy Miller, MS, RDN 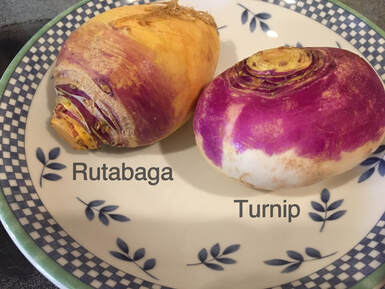 The past few months I’ve been writing about various cruciferous vegetables, such as kohlrabi and rutabaga. The next logical vegetable to write about is turnips. I have always avoided them, saying to myself that I didn’t like them. When, in reality, I had never had a turnip. Have you? How often do we dismiss vegetables because of their reputation or because of their unfamiliarity, saying we don’t like them, when we have never actually eaten them? Turnips, like rutabagas, are root vegetables in the cruciferous vegetable category (Brassica rapa genus). Turnips in the U.S. have purple “shoulders” and a white “body” (rutabagas are creamy colored and have a different color of purple “shoulders”). In other parts of the world, turnips and rutabagas are considered similar (rutabagas are also called yellow turnips or wax turnips). Similar to other root vegetables (like beets and rutabagas), they have a skin that needs peeling to remove a possible wax coating. And, like most root vegetables, their peek season is from late fall through the end of winter. What does a turnip taste like? Similar to other cruciferous vegetables, most turnips have a substance that makes them taste bitter when raw, but mellows when cooked (like Brussels sprouts). Some say that turnips taste like a cross between cabbage and a radish; others say they taste more like a cross between a carrot and a potato. When cooked, they have a smooth texture. Give them a try and leave a comment below to let us know what you think! As a side note, turnip greens are related to mustard greens, so they have a similar flavor. Wikipedia states that rapini (broccoli rabe), bok choy, and Chinese cabbage are all varieties of turnip developed specifically for their leaves instead of the root underneath. How do you eat a turnip?
How nutritious are turnips?Turnip roots are high in vitamin C and are a good source of dietary fiber, folate, copper, potassium, manganese, and vitamin B6. Turnip greens are an excellent source of folate and vitamins A, K and C and are a good source of calcium, Vitamin E, vitamin B6, fiber, potassium, and manganese. There are many different turnip varieties available to grow in your own garden, including heirloom varieties. These come in all shapes, sizes, colors and flavors. Let us know in the comment box below if you have ever tried any non-supermarket varieties! I hope you enjoy the recipe below as much as my family has. In the recipe, I used a mix of cauliflower and turnip as an introduction to this powerhouse of a vegetable. I look forward to cooking with it more in the future. References: White Bean and Bacon with Greens and TurnipsServes 4-6 Recipe adapted from Naturally Ella What’s great about this recipe is that the amounts don’t have to be exact. And you can use canned beans and tomatoes for a quick weeknight dinner. Ingredients:
Directions:
~Nancy Miller, MS, RDN
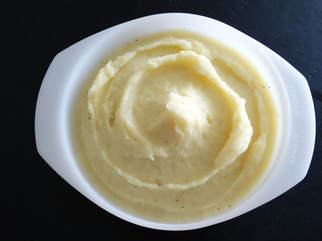
What does a rutabaga taste like?Some folks may find rutabagas slightly bitter, however their sweetness comes out when roasted, particularly when combined with other vegetables, such as in the dish below. The sweetness is not overpowering, but more like a delicious, less-starchy potato. How do you eat rutabaga?Rutabagas are most delicious roasted or puréed, where their sweetness comes out. However, they can also be enjoyed raw, like jicama or celeriac. Ideas for using a rutabaga:
How nutritious are rutabagas?Raw rutabagas are rich in vitamin C (58% DV) and are a good source of fiber (14% DV), manganese (12%), and potassium (13%). One cup of sliced raw rutabagas contain almost two grams of protein. (2) The dish below is a colorful addition to your holiday celebrations. My extended family enjoyed it immensely this past weekend. And if you want to “geek out” over more information about this delicious vegetable, click here. References:
Roasted Mixed Vegetables with Sour Cherries
Directions:
Notes:
~Nancy Miller, MA, MS, RDN
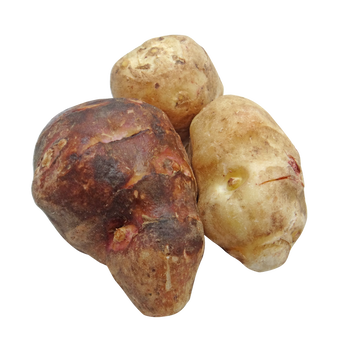
What does a sunchoke taste like?Choose sunchokes that are very firm and smooth. Some say they taste like artichoke hearts. Others say they are rather sweet and nutty. They have a texture like a potato and are creamy when cooked. How do you eat sunchokes?Keep in mind, the flesh of the sunchoke turns brown, like apples or pears, when exposed to air. Mix with chopped raw vegetables and a tiny bit of lemon juice, should you plan on them sitting out for awhile. Like kohlrabi and jicama, you can eat this vegetable either raw or cooked. Ideas for using these include:
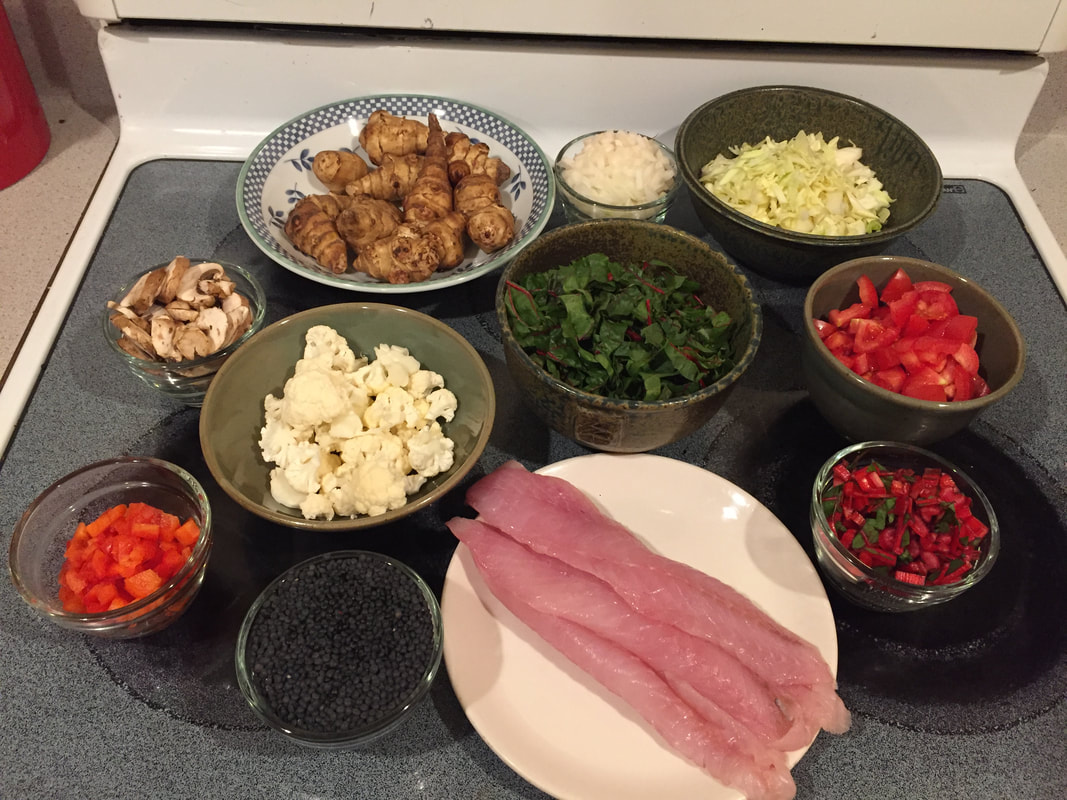
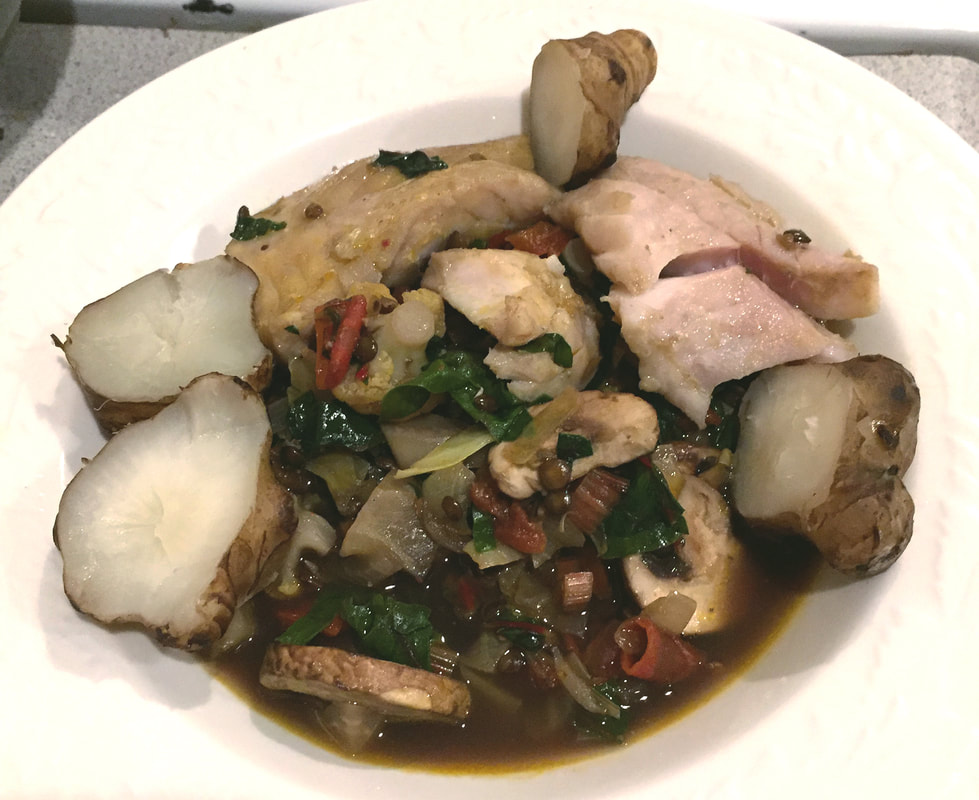
How nutritious are sunchokes?Sunchokes are rich in iron, potassium and thiamine. One cup of sliced sunchokes contains three grams of protein. They are also a good source of copper, niacin and vitamin C. (1) This vegetable is high in inulin, a “prebiotic” soluble fiber, which may help control your blood sugar. (2) This inulin can also cause gas. To avoid this, some say to use sunchokes that have been through a frost and others say to be sure to use lemon juice when you cook them. (3) Try each method and let me know what works for you! Since we have eaten them, in the dish highlighted below, we are now discussing where to plant them in our garden in the spring. The recipe below may seem lengthy, but it’s fairly straightforward and full of flavor. See notes after recipe. References: 1. https://nutritiondata.self.com/facts/vegetables-and-vegetable-products/2456/2 2. https://www.sciencedirect.com/science/article/pii/S0271531799001529 3. https://modernfarmer.com/2018/02/jerusalem-artichoke-sunchoke-recipe-prevents-gas/ Lentil Stew with Steamed Rock Fish and SunchokesServes 6-8 Recipe adapted from Cancer Lifeline Cookbook by Kimberly Mathai, MS, RD Ingredients:
Directions:
Notes:
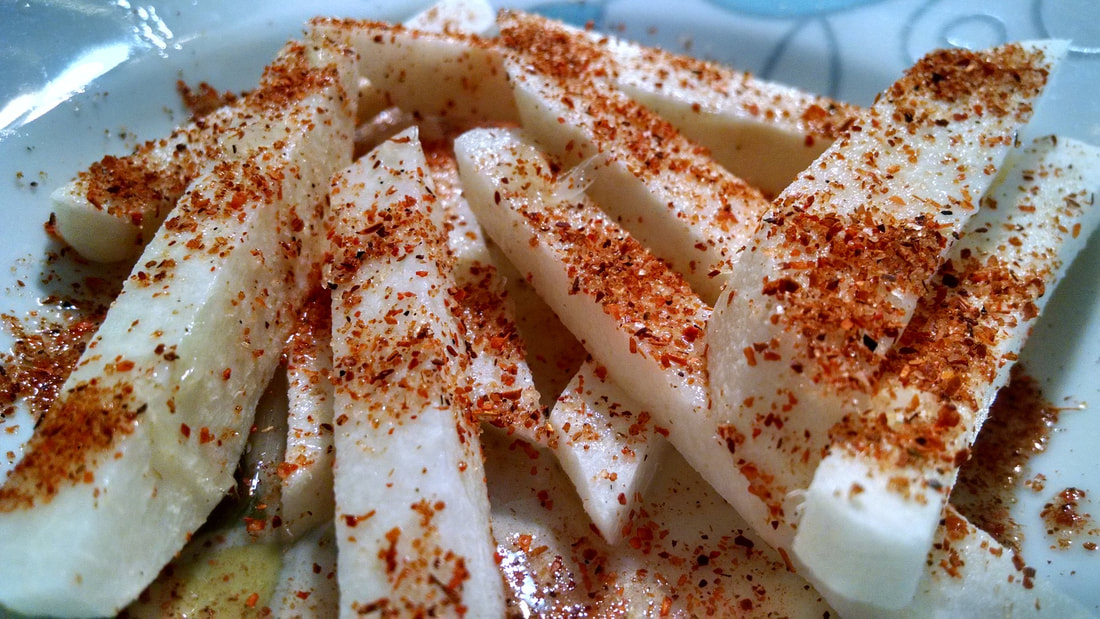
~Nancy Miller, MA, MS, RDN One of the reasons to try new vegetables you may or may not have noticed at the grocery story is to get out of the rut that mealtimes can bring over time. There’s an tan-colored, oval, root vegetable you maybe have seen at the store and not known what it is or how to pronounce its name. It’s called jicama (pronounced “hee-kah-mah”). Some may call it a yam bean or a Mexican water chestnut. It is part of the legume (bean) family. This is a tuber like a potato, but it is less starchy. However, the tough skin on a jicama needs to be peeled with a knife (not a vegetable peeler – the skin is too tough) because it contains a toxin (that is NOT found in the fleshy part of the tuber). What does a jicama taste like? A jicama is sweet like a pear or apple, but it is starchier. When eaten raw, it is quite crunchy, making it ideal for nut butters, hummus and other dips. How do you chose a jicama?Choose smaller jicamas because they are less fibrous. Choose ones with smooth skins because shriveled skin is a sign of an older tuber. They do not need to be refrigerated until they are cut open. If you find a jicama that is too large, ask the produce worker to cut into half or fourths. How do you eat a jicama? You can eat a jicama either raw or cooked, as you would eat an apple, pear, or kohlrabi. Some ideas for using it are:
How nutritious is jicama?Jicama is low in calories (46 calories for one cup of sliced, raw jicama) and high in soluble dietary fiber. Soluble fiber can help lower your blood LDL levels and can normalize blood glucose levels. Jicama is also very high in vitamin C (40% of your daily needs). Vitamin C supports your immune system and provides powerful antioxidants to aid your body’s cells. Mealtimes don’t need to be boring if you add new vegetables into the rotation. Drop us a comment and tell us about your adventures with vegetables you haven’t tried before, such as jicama, celeriac, or kohlrabi. For a quick tutorial in how to prepare a jicama, click here. Roasted Jicama
Notes:
Resources:
~Nancy Miller, MS, RDN |

SD BlogA place for our consultant Registered Dietitian Nutritionists (RDNs) to share nutrition science, yummy and healthy recipes, tips on seasonal ingredients, and other nutritional musings. Enjoy! Categories
All
Archives
May 2024
|


 RSS Feed