SOUND DIETITIANS LLC
  • HOME
  • About
    • Philosophy
    • Our Team
    • Locations
    • Telehealth
  • Work With Us
    • Nutrition Counseling
    • Diabetes Education
    • Clinics & Businesses
    • Dietitians & Interns
    • Contact
  • Blog
  • Giving & Receiving

The Spirit of Giving: Nacho Salad

12/28/2018

0 Comments

 
In the spirit of giving, I thought I would share a new lightened-up version of one of my favorite comfort food dishes, Nacho Salad. This recipe flips the standard nacho dish on its head. Instead of tortilla chips and cheese acting in starring roles, vegetables and beans get their moment in the spotlight. This recipe is colorful and nutrient dense. What makes the recipe even more attractive, is the amount of time it takes to create the dish from start to finish and the cost to prepare it. You can be ready to eat in no more than 10-minutes if you have all the ingredients on hand and the dish is extremely low-cost by utilizing store-brand and canned products. Follow the steps below and you will have a deliciously simple, quick, nutritious, cost-conscious, "go-to" recipe for lunch or dinner!
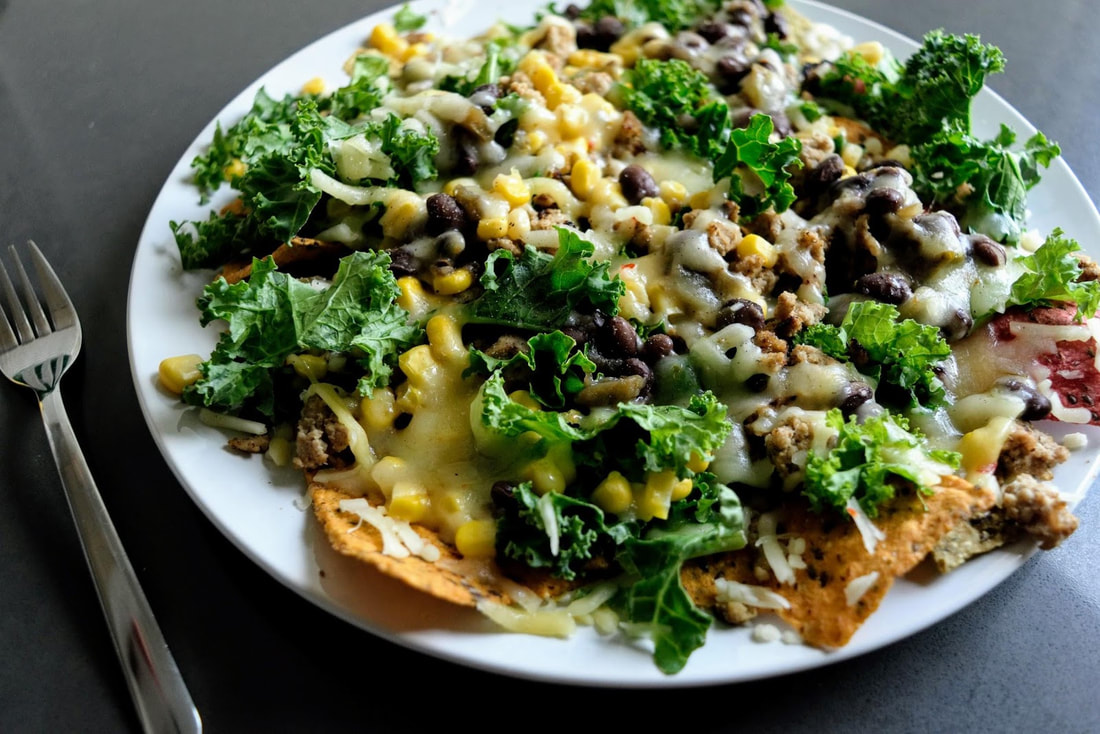
Picture

Nacho Salad

The ingredients in this salad can be purchased at any grocery store. Though, I think it is always nice to provide you with the ingredients I used to make the recipe so you can easily find what you need at the grocery store. I bought all my ingredients at Trader Joe’s. 

Ingredients:​
  • Trader Joe’s Veggie & Flaxseed Tortilla Chips - a good source of fiber and omega-3 fatty acids
  • Trader Joe’s Kale (in a bag) - an excellent source of Vitamins A & C and a good source of calcium & iron
  • Trader Joe’s Sugar Plum Tomatoes (wash before use) - an excellent source of Vitamin C and a good source of Vitamin A
  • Trader Joe’s Whole Kernel Corn (canned)
  • Trader Joe’s Cuban Style Black Beans (canned) - a good source of iron
  • Trader Joe’s Shredded Cheese Blend (Pepper Jack) - an excellent source of calcium
  • Optional ingredients (ground turkey, avocado, enchilada sauce, cilantro...) can all be found at Trader Joe’s as well.​
Directions:
  1. Place one layer of baked tortilla chips to cover a standard size dinner plate (15-20 chips).
  2. Place one large handful of kale leaves (or more) atop chips; enough to completely cover the chips. Note: ​The kale will look overwhelming on the chips, but don’t worry, the kale leaves will wilt substantially once you microwave the dish.
  3. Sprinkle ¼ cup canned corn kernels, ¼ cup canned black beans, and ¼ cup halved cherry tomatoes or canned diced tomatoes over the top.
  4. Sprinkle one handful (~⅓ cup) pepper jack cheese over the veggies.
  5. Microwave nachos for about one minute.
  6. Optional: add cooked ground turkey for extra protein, add sliced avocado for added heart-healthy fat, add a drizzle of enchilada sauce for a flavor boost, or add fresh chopped cilantro for extra color and flavor.
Enjoy!

~Sara Mussa, RDN, CD
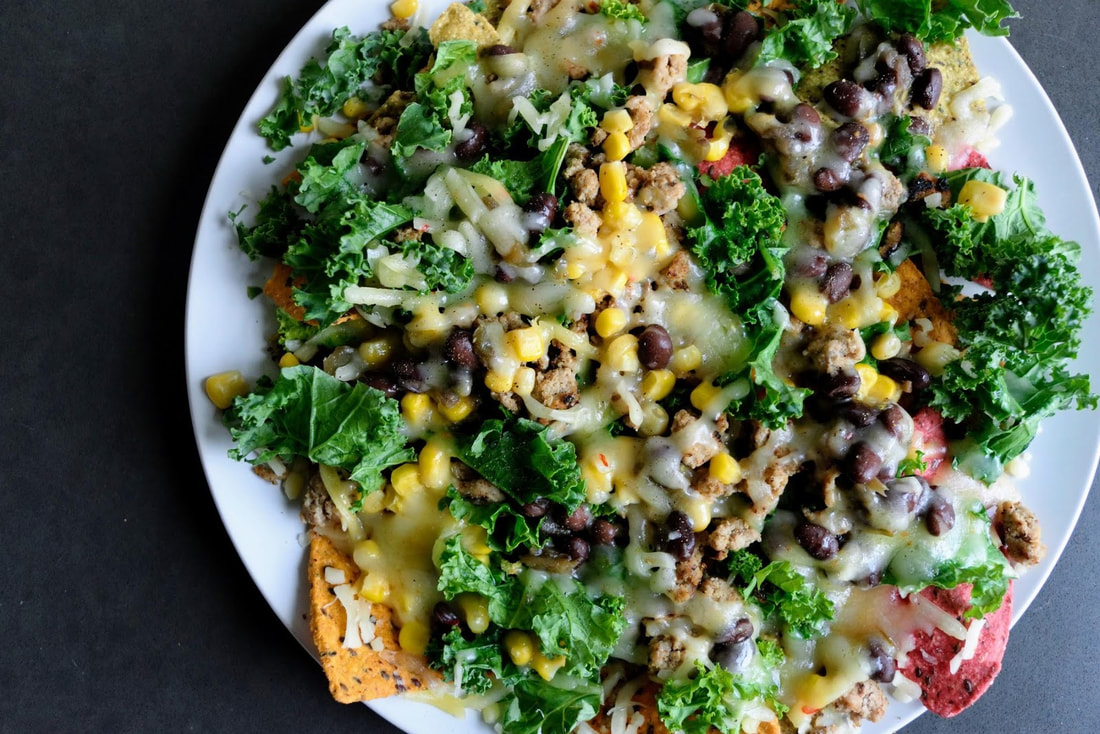
Picture
0 Comments

Meals on the Move

9/25/2018

0 Comments

 
Fall is here and with it we are feeling cooler temperatures and are seeing leaves changing color. School is back in session and with that, an increase in after-school activities. Sometimes multiple sports with multiple kids in multiple places. Making family meals seem challenging. Unfortunately, the ever present feeling of being strapped for time can cause families to make unhealthy choices, typically found at the drive-through window.
​

Providing healthy food for your family is a priority for most, however challenging to find on the road. Whether you are feeding everyone in a fury before dashing off to practice or eating in the car on the way to multiple destinations, here are a few ideas to make meals on the move simple and healthy! ​

Quick meals before hitting the road

A little planning ahead makes feeding the troops before heading out simple. Although having options that everyone agrees on can be a challenge. Keeping the ingredient list short and options limited might make dining before you dash a much better deal.
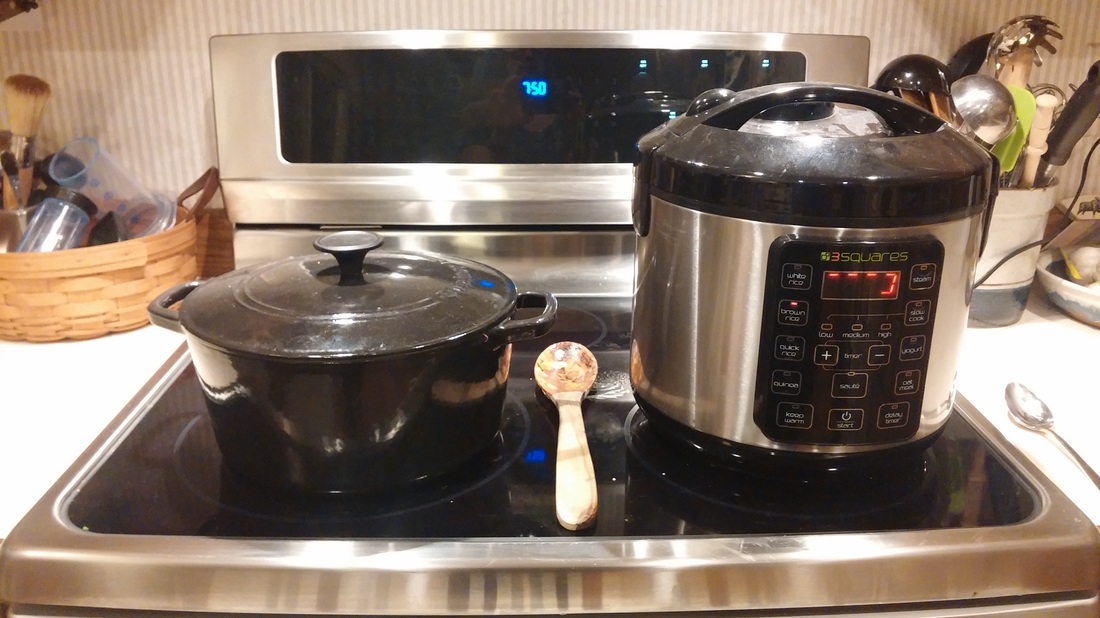
Some of my favorite recipes call for a slow cooker. It’s so easy to prep what you need ahead of time. You can even place all of the ingredients in the slow cooker pot (refrigerated) the evening before! The next morning preparing dinner just requires you to remove the pot from the fridge and place it into the slow cooker base, plug it in and turn it on (two VERY important steps I know we have all missed a time or two).
Picture

Portable meals - let's wrap this up

I am a firm believer that you can put almost anything in a tortilla to make a meal portable - perhaps soup is the exception. This still leaves many other foods you can wrap up and go! For example, chicken caesar salad or any other salad for that matter. Lightly dress the lettuce in a bowl, place in the center of a tortilla, then add chicken or any other vegetable you fancy. Fold up the ends, roll it up, and wrap in a paper towel and perhaps a small piece of foil on the end and off you go!

This wrapping method can be used for breakfast too. Who doesn’t love a breakfast burrito?
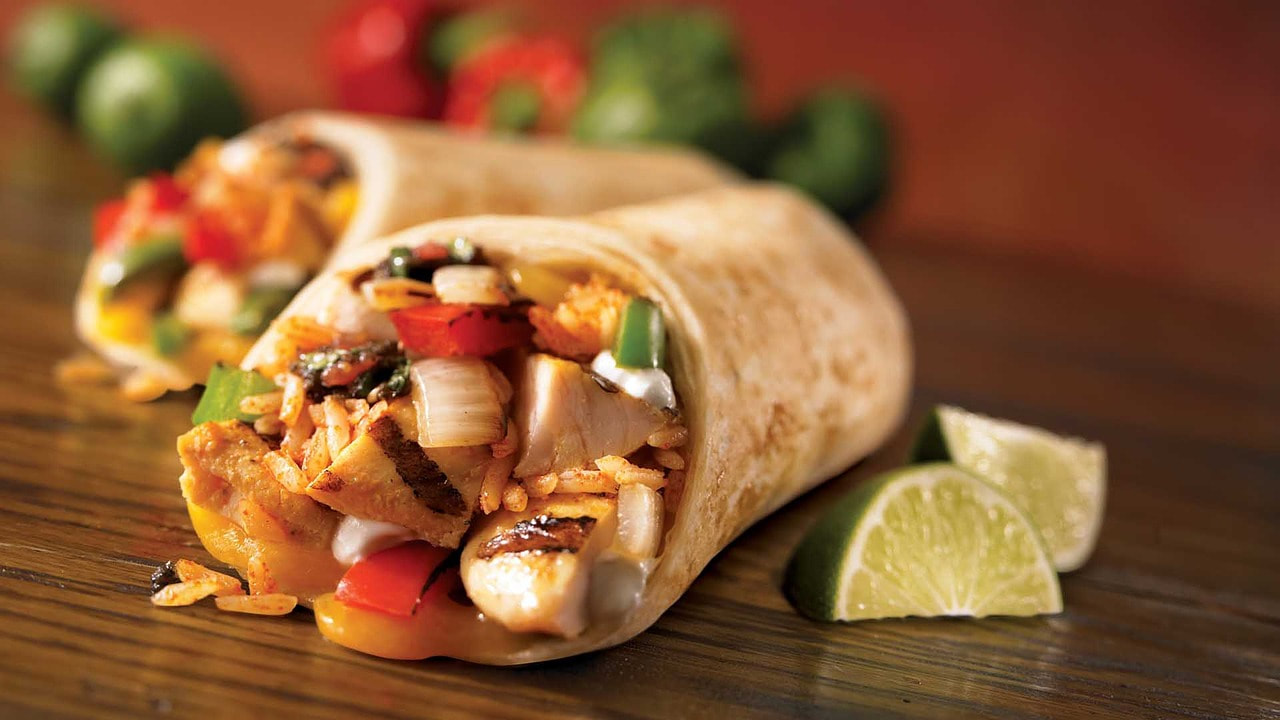
Picture

Slow and low - A perfect cooking tempo

Using a slow cooker is a sure fire way to ensure whatever you are preparing will be tender and juicy. One pot meals are also fantastic! Clean up in minimal and the flavors are married perfectly together.
Here are a few recipes that include a slow cooking and one pot, courtesy of www.skinnytaste.com. They are simple, delicious and every recipe from this site includes nutrition information. Which is super helpful if you are trying to be a mindful eater. ​

One-Pot Spaghetti and Meat Sauce (Stove-Top Recipe)

Makes 5 Servings
Recipe from www.skinnytaste.com 


Ingredients:
  • 1 pound 90% lean ground beef
  • 3/4 teaspoon salt
  • 1/4 cup onion, diced
  • 3 cloves garlic, minced
  • 1 can (28 ounces) crushed tomatoes
  • Ground black pepper, to taste
  • 2 cups water
  • 4 fresh basil leaves, torn, plus more for garnish
  • 8 ounces whole-wheat or gluten-free pasta, broken in half
  • Optional: grated parmesan cheese for serving
Picture
Directions:
  1. Heat a large pot over high heat. Add beef and salt and cook for about 3 minutes, breaking up beef with a spatula.
  2. Add onions and garlic and cook until onions are tender, about 3-4 minutes.
  3. Add tomatoes, black pepper, water, and basil to beef. Stir to combine.
  4. Add spaghetti, making sure there is enough liquid to cover the noodles without stirring.
  5. Turn heat down to medium-low. Cover and cook until the water is absorbed and the pasta is cooked, about 17 minutes. 
  6. Serve with parmesan cheese and extra fresh basil, if desired. 
Nutrition per serving (scant 1 1/2 cups): 377 Calories; 10.5g Fat; 23.5g Protein; 43.5g Carbohydrates; 5g Fiber; 567mg Sodium

Easiest Salsa Verde Chicken (Slow Cooker or Instant Pot)

Makes 6 Servings
Recipe from www.skinnytaste.com 


Ingredients:
  • 1 1/2 pounds raw, skinless chicken tenders
  • 1/4 teaspoon garlic powder
  • 1/8 teaspoon oregano
  • 1/8 teaspoon ground cumin
  • Salt, to taste
  • 16 ounces roasted salsa verde ​
Picture
Directions:
Slow Cooker:
  1. Combine chicken, garlic powder, oregano, cumin, and salt in slow cooker. Stir to combine.
  2. Pour salsa verde over the top. Cover and cook on high for 2 hours. 
  3. Remove chicken and shred with two forks.
  4. Remove 2/3 cup of liquid from the slow cooker and discard. 
  5. Place shredded chicken back in slow cooker with remaining liquid and adjust seasoning to taste.
Instant Pot:
  1. Combine chicken, garlic powder, oregano, cumin, and salt in Instant Pot. Stir to combine.
  2. Pour salsa verde over the top. Cover and cook on high pressure for 20 minutes. Release pressure using the "quick release" method or naturally.
  3.  Remove chicken and shred with two forks. 
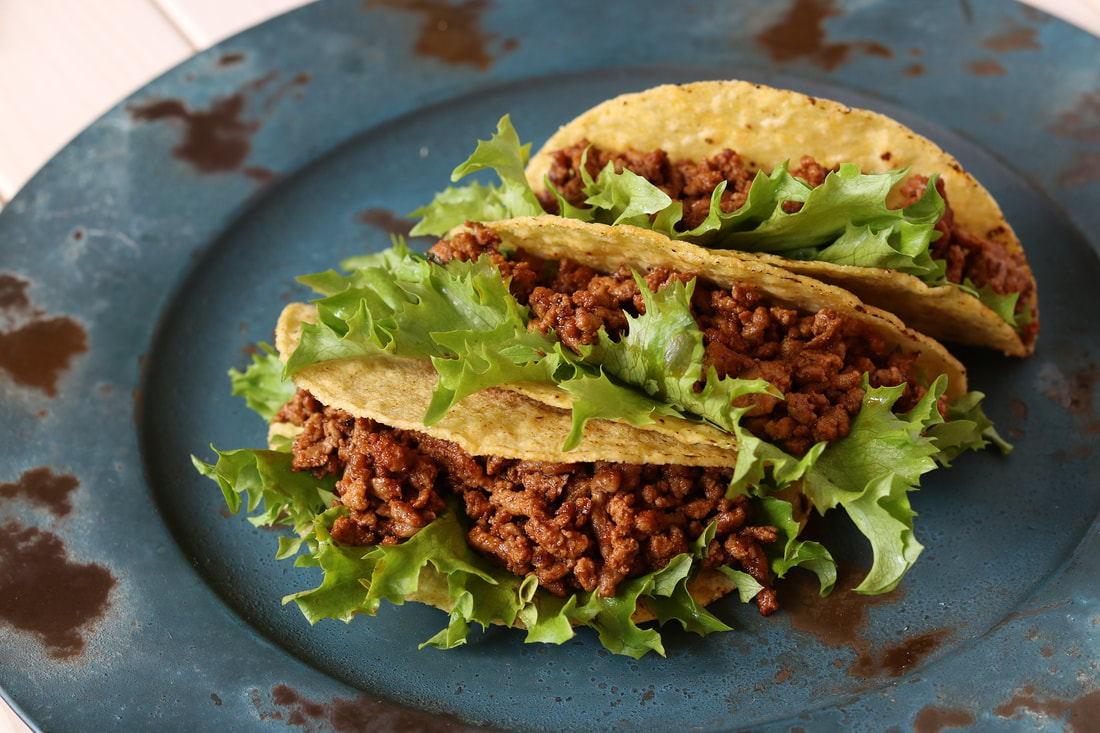
Nutrition per serving (1/2 cup): 145 Calories; 2g Fat; 26g Protein; 5g Carbohydrates; 0g Fiber; 415mg Sodium

Beef Tacos (Slow Cooker or Instant Pot)

Makes 8 Servings
Recipe from www.skinnytaste.com 


Ingredients:
  • 2 pounds 93% lean ground beef​
  • 2 teaspoons + 1 teaspoon cumin, divided
  • 2 teaspoons salt
  • 2 teaspoons chili powder
  • 2 teaspoons paprika
  • 1 teaspoon dried oregano
  • 1 small onion, minced
  • 2 cloves garlic, crushed
  • 1/4 cup red bell pepper, minced
  • 1/2 cup water
  • 1 cup tomato sauce
  • 1 bay leaf
  • 16 corn taco shells
Toppings:
  • 2 cups romaine lettuce, shredded
  • 1 cup cheddar cheese, shredded
  • 2 plum tomatoes, sliced
Picture
Directions:
Slow Cooker:
  1. Heat large skillet over high heat. Add beef to brown, breaking it into smaller pieces. When beef is brown throughout, add 2 teaspoons cumin, salt, chili powder, paprika, oregano, onion, garlic, and bell pepper. Cook until veggies are soft, about 2-3 minutes. 
  2. Transfer beef mixture to slow cooker and add 1/2 cup water, bay leaf, and tomato sauce. 
  3. Cover and cook on high for 3 hours or low for 6-8 hours. Discard the bay leaf and add the remaining 1 teaspoon cumin.
  4. Heat taco shells according to package and then place 1/4 cup beef in each shell. Top with romaine lettuce, cheddar cheese, and tomato. 
Instant Pot:
  1. Press saute button on Instant Pot. Add beef to brown, breaking it into smaller pieces. When beef is brown throughout, add 2 teaspoons cumin, salt, chili powder, paprika, oregano, onion, garlic, and bell pepper. Cook until veggies are soft, about 2-3 minutes. 
  2. Add 1/2 cup water, bay leaf, and tomato sauce. 
  3. Cover and cook on high pressure for 20 minutes. Natural release. Discard the bay leaf and add the remaining 1 teaspoon cumin.
  4. Heat taco shells according to package and then place 1/4 cup beef in each shell. Top with romaine lettuce, cheddar cheese, and tomato. 
Nutrition per serving (2 tacos): 382 Calories; 20g Fat; 31g Protein; 24g Carbohydrates; 8g Fiber; 744mg Sodium
​

~Olivia Mathisen-Holloman, RDN, CD
0 Comments

Tempeh Tacos with Pineapple Cabbage Slaw (GF, Vegan)

3/14/2017

1 Comment

 
Picture
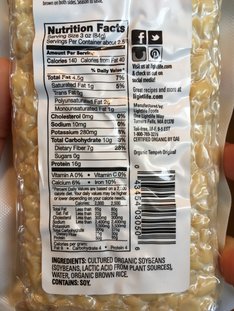
Tempeh is one of those foods that may not be on everyone's weekly grocery list. Often confused with tofu, tempeh is made from fermented soybeans and offers a whole host of health benefits. Let's see why you should incorporate more tempeh into your into your healthy diet. 
  • Tempeh is a prebiotic: Tempeh feeds the good bacteria in your gut, so that you can continue to have better gut health. 
  • Better bioavailability: The fermentation process that tempeh undergoes makes the soy proteins and calcium molecules easier for our bodies to digest and absorb. 
  • High in protein: One 3 ounce serving of tempeh has 16 grams of protein! 
  • Versatility: Tempeh can be used in a variety of dishes. It can be baked with a simple marinade, crumbled as a ground meat alternative, or cut into strips to be used in sandwiches. 

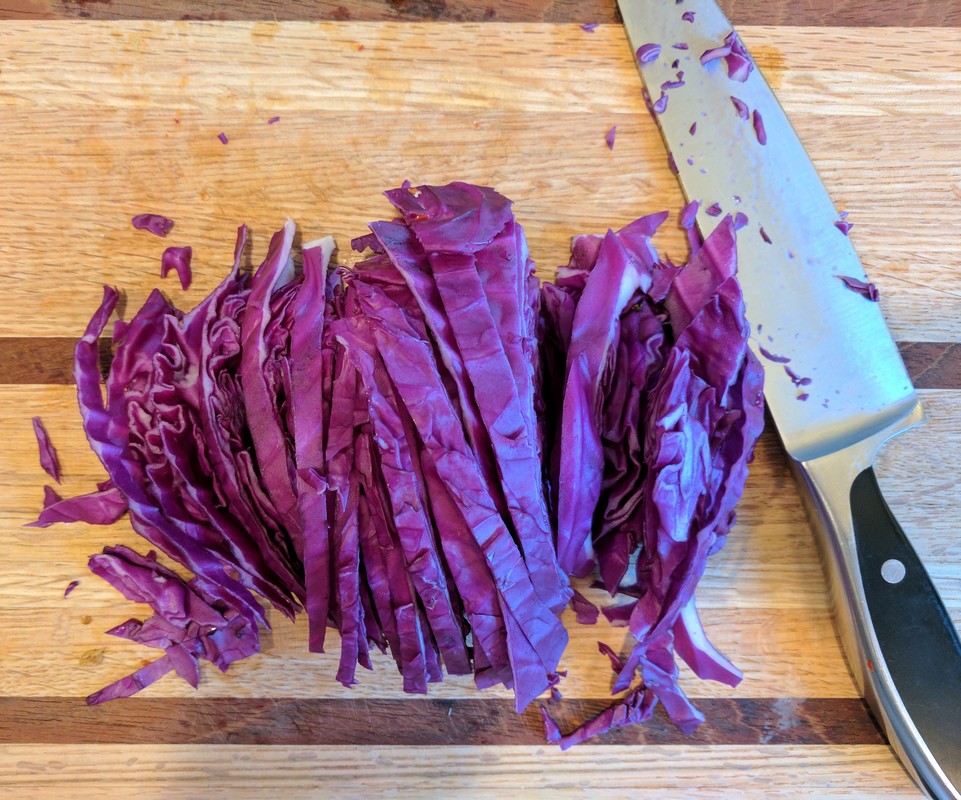
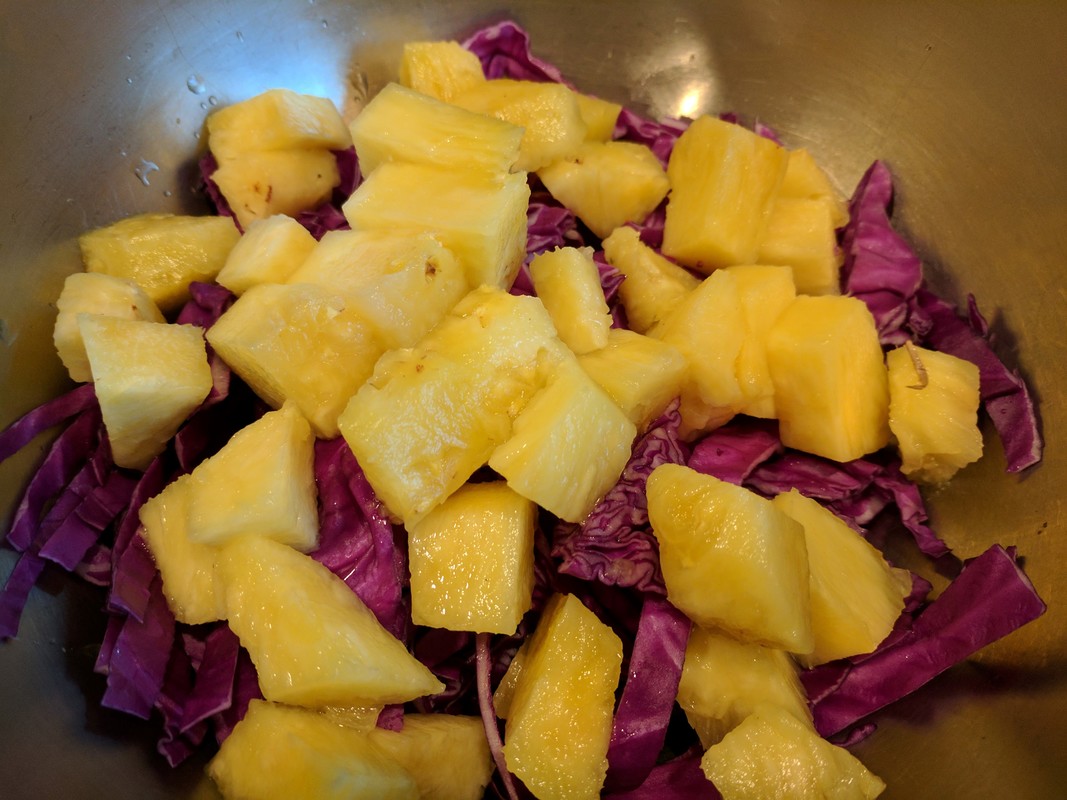
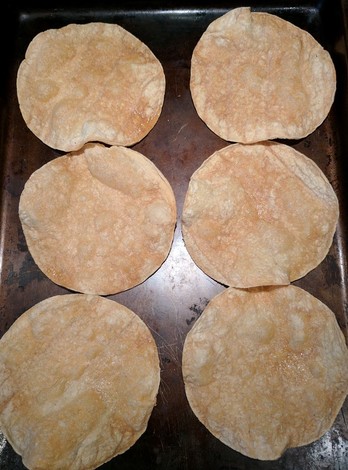
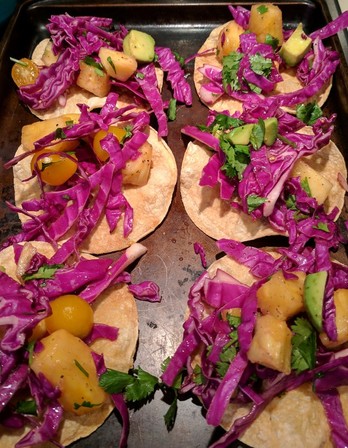
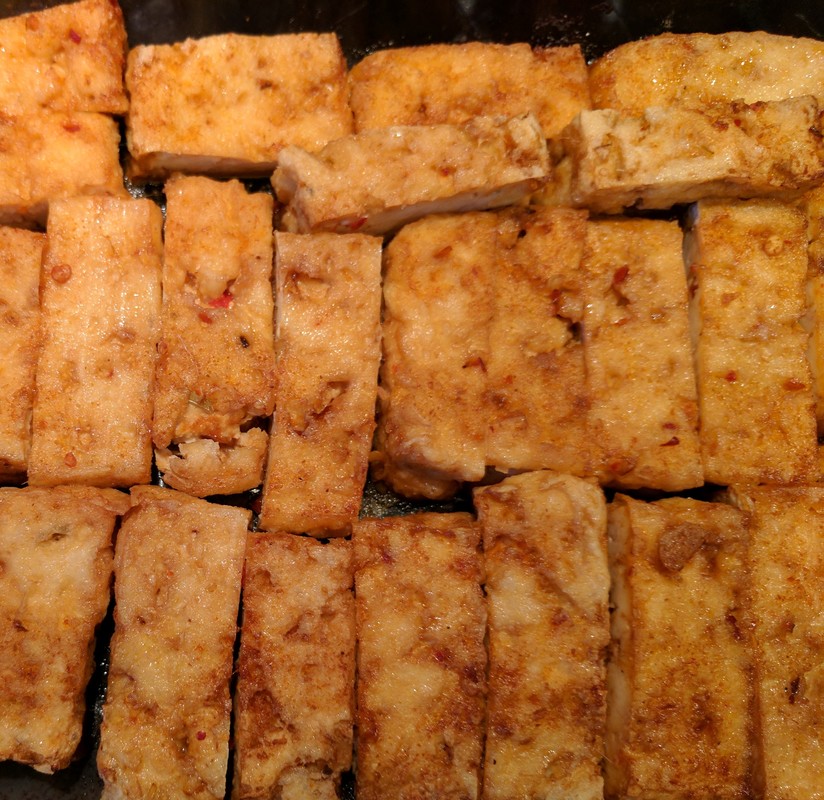
These tasty tacos are quick to prepare and will be sure to impress! The combination of spices and seasoning pack a punch of flavor that won't leave you missing the meat. You can use whole-wheat flour tortillas or pre-made tostadas in place of the corn tortillas. Enjoy! 

~ Lauren, Dietetic Intern

Recipe adapted by Lauren Hoffman & Megan Ellison from Emilie Eats 
Makes 3 Servings 
​
Ingredients:
  • 1 (8-ounce) package tempeh, cut into bite-size chunks
  • 2 Tablespoons reduced-sodium tamari + 2 Tablespoons water
  • 1 teaspoon chili powder
  • 1/2 - 1 teaspoon red chili flakes (depending on how spicy you want it)
  • 1/2 teaspoon ground cumin
  • 1/2 teaspoon liquid smoke or paprika
  • 1/2 teaspoon garlic power (or 4 minced fresh garlic cloves) 
  • 1/2 teaspoon onion powder
  • 1/4 teaspoon ground black pepper
  • 6 corn tortillas (6" size) 
  • Oil for cooking
  • 1 1/2 cups red cabbage, shredded
  • 3/4 cup pineapple, diced (you could deliciously substitute mango) 
  • 1/2 cup cilantro, finely minced, plus more for garnish
  • 2 Tablespoons fresh lime juice (~1 lime)
  • 1 teaspoon apple cider vinegar (or rice vinegar) 
  • 1 teaspoon honey (or agave) 
  • 1/4 teaspoon each salt and pepper 
  • Additional toppings: cilantro, avocado, salsa, green onions, lettuce
Directions:
  1. Preheat oven to 350°F. 
  2. Place the tempeh in a medium bowl.
  3. In a small bowl, whisk tamari, chili powder, hot sauce, cumin, liquid smoke, garlic powder, onion powder, and pepper. Add mixture to tempeh and stir to coat. Let sit for 5-10 minutes. 
  4. ​Place corn tortillas on a baking sheet and brush with a small amount of oil. Bake for 10 minutes, or until crisp and golden brown.
  5. Heat a skillet over medium heat. Add tempeh and cook for 4-5 minutes, or until browned. Flip the tempeh and cook for another 3-4 minutes. 
  6. Meanwhile, combine red cabbage, pineapple, cilantro, lime juice, vinegar, honey, and salt in a medium bowl. Top the tortillas with the prepared tempeh, slaw, and other desired toppings. 
Nutrition per Serving (2 corn tortillas with tempeh and slaw): 319 Calories, 12g Fat, 19g Protein, 41g Carbohydrates, 9g Fiber, 655mg Sodium

Preparation time: 10 minutes
Cook time: 15 minutes
Total time: 25 minutes
Picture
Picture
Picture
Picture
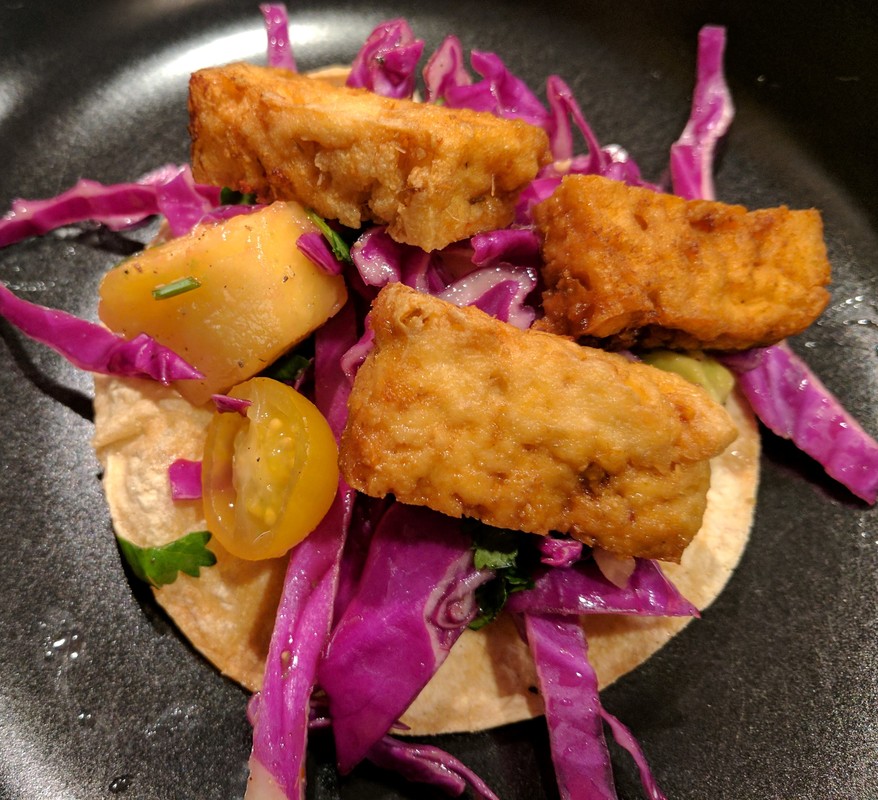
Lauren shared this recipe with me a while back and I finally got around to trying it tonight for our first dinner after returning from a Hawaii vacation. It definitely helped with the post-vacation blues and took me back to the Island at least in flavor. I also love the various textures and colors in this easy and quick dinner option.  Give it a try and let us know what you think.  With Aloha - Megan
1 Comment

Warm Up to Curry

9/26/2016

0 Comments

 
Picture
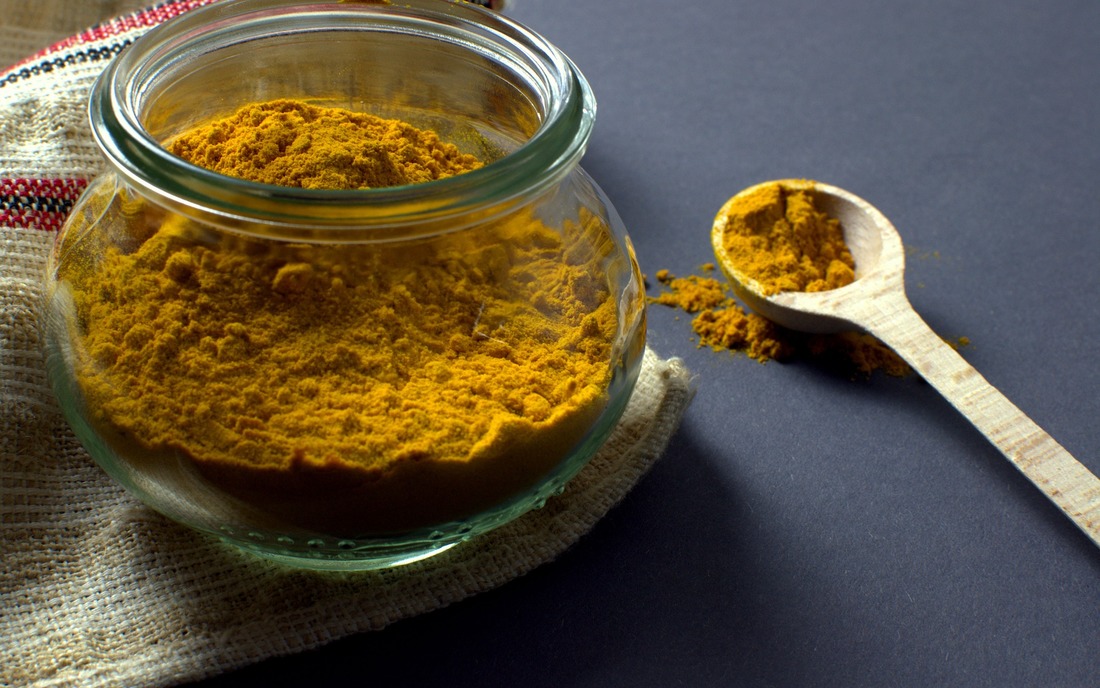
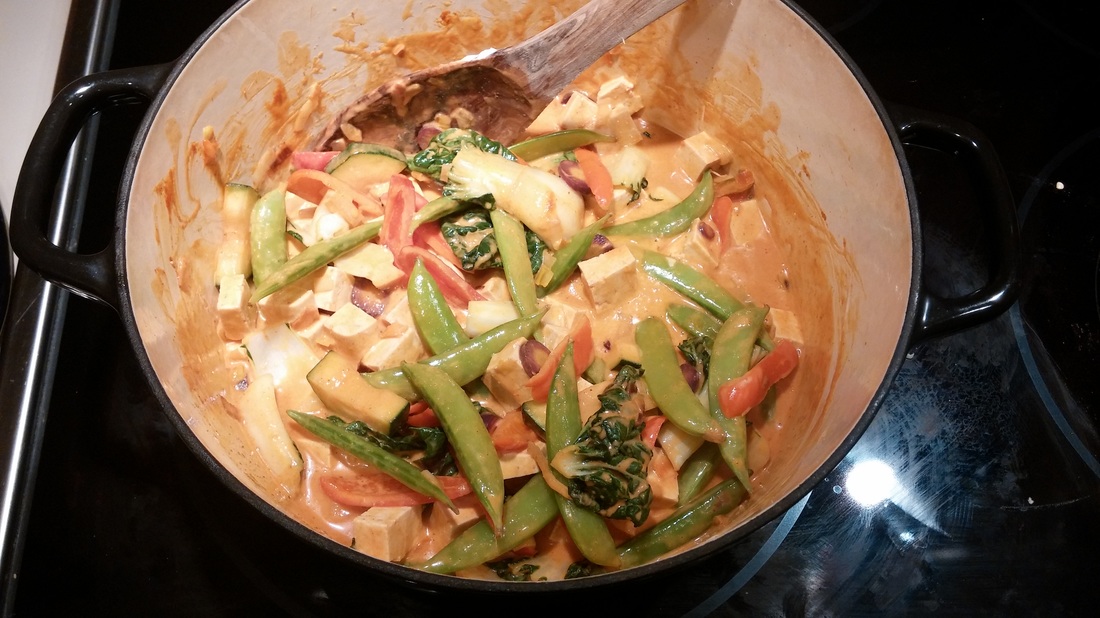
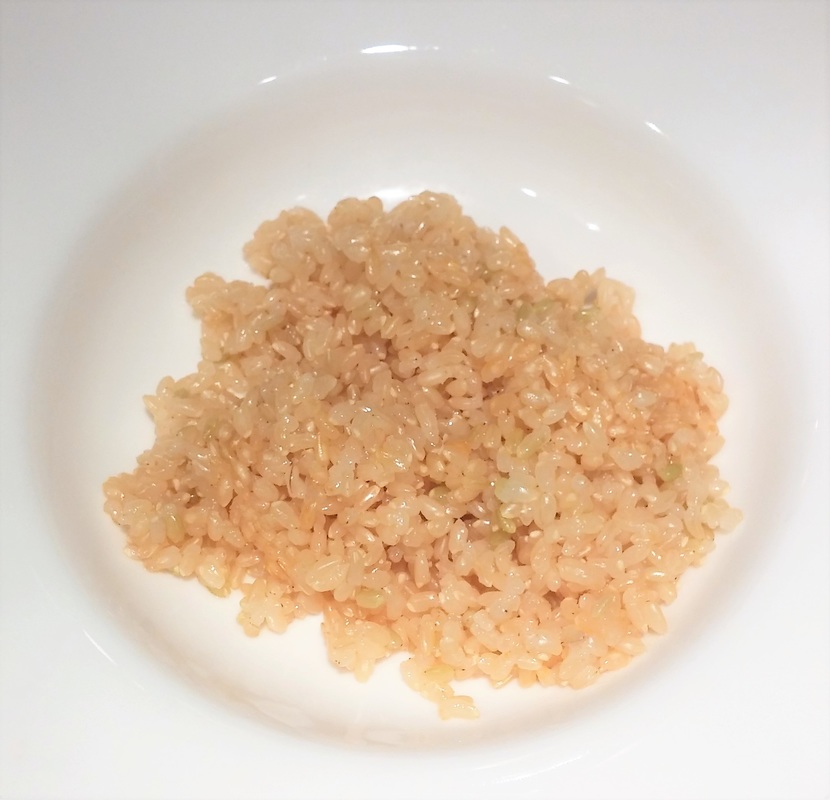
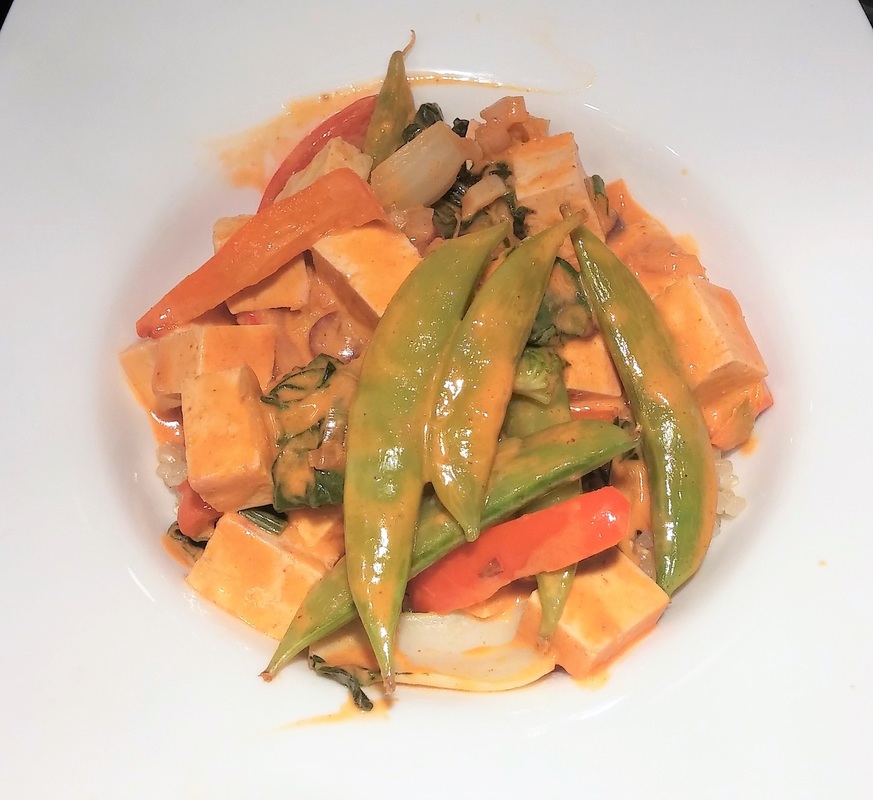
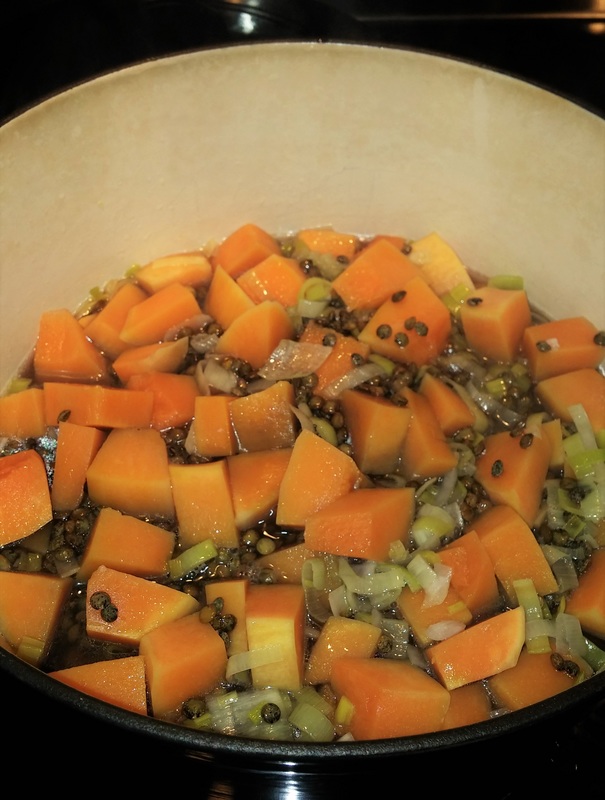
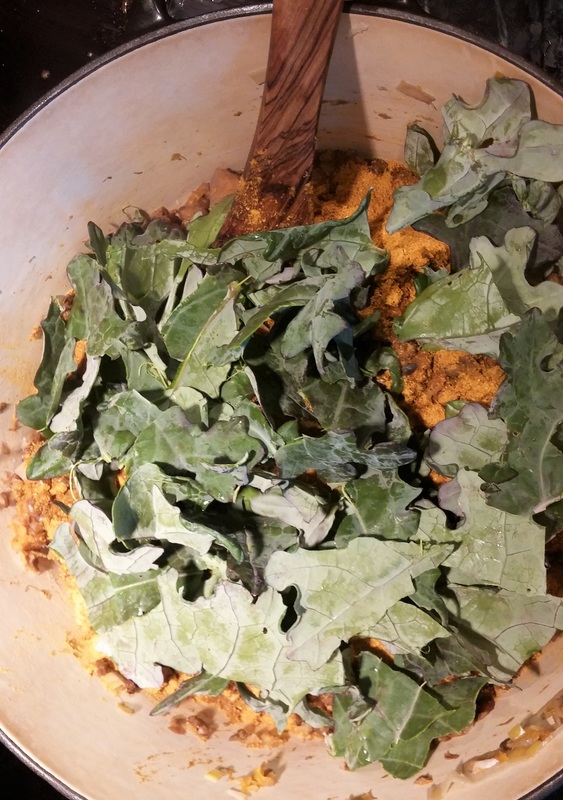
With the temperatures cooling down, its human nature to start craving hearty, cooked meals that warm you from the inside out. Soups and stews are a popular choice, but by mid-November it’s easy to get bored of the regular recipes. When I start getting chilly, I reach for my curry powder.
 
The word curry actually means “sauce” in Indian and Asian cultures. It is typically made with a cream base, cooked with meats and vegetables of choice and served over rice. There are many different kinds of curries from the dairy-based Indian curries to the coconut milk-based Thai curries.
 
The fun part about making your own curry is that it is pretty much impossible to mess up! They can be a one-pan meal or even done in a slow-cooker. You can use any vegetables that you like, your favorite protein source, and can use cow’s milk, coconut milk, or a vegetable stock as your liquid base. Additions like curry powder, red curry paste, lemongrass, garlic, and onion will bring ethnic flare to your dishes and can be found in most grocery stores.


Thai Red Curry with Chicken and Veggies

  • 2 Tbsp canola oil
  • 2 cloves garlic, minced
  • 1 yellow onion, chopped
  • 1 Tbsp Red Curry Paste (more or less depending on spice tolerance, this will be mild to medium)
  • 1 pound chicken breast, cubed  (Veggie option: 1lb super firm tofu, cubed)
  • 4 cups of frozen or fresh mixed veggies (broccoli, red pepper, and sugar snap peas are my favorite)
  • 1 can reduced fat canned coconut milk
  • 1 cup reduced sodium chicken broth
  • 4 cups of cooked brown rice
  • 3 Tbsp smooth, natural peanut butter (optional)
Picture
Picture
Picture
  1. Heat oil in a large skillet over medium.
  2. Sauté onion in oil for about 2 minutes. Add garlic and sauté 1 min more, stirring constantly. Stir in curry paste and simmer until the onions are soft (1-2 minutes more).
  3. Add chicken and cook until done, 8-10 minutes if already thawed.
  4. Once chicken is almost done, add in all vegetables and pour in coconut milk. Let this simmer until the veggies are soft, but still vibrant.
  5. If you choose to use the peanut butter, add it in here and allow it to melt into the sauce. I highly recommended if you can  - add the peanuts!
  6. Serve over brown rice.  Makes 6 Servings.

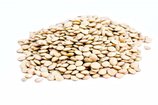
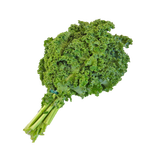
Nutrition facts per 1/6 of recipe: 483 calories; 18g fat; 54g carbohydrates; 5g fiber; 27g protein; 231g sodium.

This next recipe uses seasonal vegetables, is vegetarian, and is easy on the wallet! The lentils pack a ton of iron, fiber and protein to help satiate you until your next meal. Butternut squash lends a slight sweetness, and bright green kale adds a great dose of vitamin K. Curry powder is made of a blend of healthy spices, but doesn’t make the dish spicy-hot. This may be better for children and folks with sensitive palates. Since this dish is so hearty, it doesn’t need to be paired with rice and can be eaten more as a stew. Feel free to add in whole grain brown rice if you miss it.

Autumn Butternut Squash and Lentil Curry
Original recipe by Lauren Hoffman, Dietetic Intern

  • 11/2 cups dry green lentils, rinsed well 
  • 4 cups water
  • 1 medium butternut squash, washed, peeled and cubed
  • 1 yellow onion, chopped
  • 2 cloves garlic, minced or chopped
  • 5 kale leaves, destemmed and torn into pieces
  • 2 Tbsp canola or grapeseed oil
  • 2 Tbsp curry powder
  • 1/2 tsp ground pepper, or to taste
  • Salt to taste

Serves 4-5
Picture
Picture
Picture
  1. In a large pan over medium heat, add oil and sauté onion and garlic until tender, about 2-3 minutes.
  2. In the same pan, place the lentils along with the butternut squash and 4 cups of water. Cook until the lentils and squash are soft. Add more water as need to keep the dish from drying out, about 20-30 minutes.
  3. When the lentils are soft, stir in kale, curry and pepper powders. Allow the kale to wilt into the curry for 3-5 minutes.
  4. Season with salt and serve!
Nutrition facts per 1/5 of recipe: 320 calories; 6g fat; 53g carbohydrate; 11g fiber; 15g protein; 21g sodium
Curries are a wonderful way to satisfy your comfort food cravings and still pack in a ton of nutrients. These two recipes are very versatile, so feel free to add and take out any vegetable or other ingredient that you like. Try out your own variations and leave us a comment about what you did!
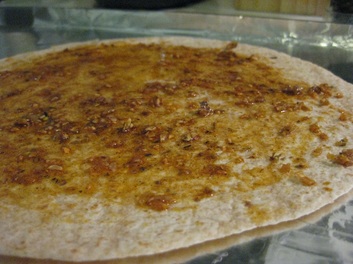
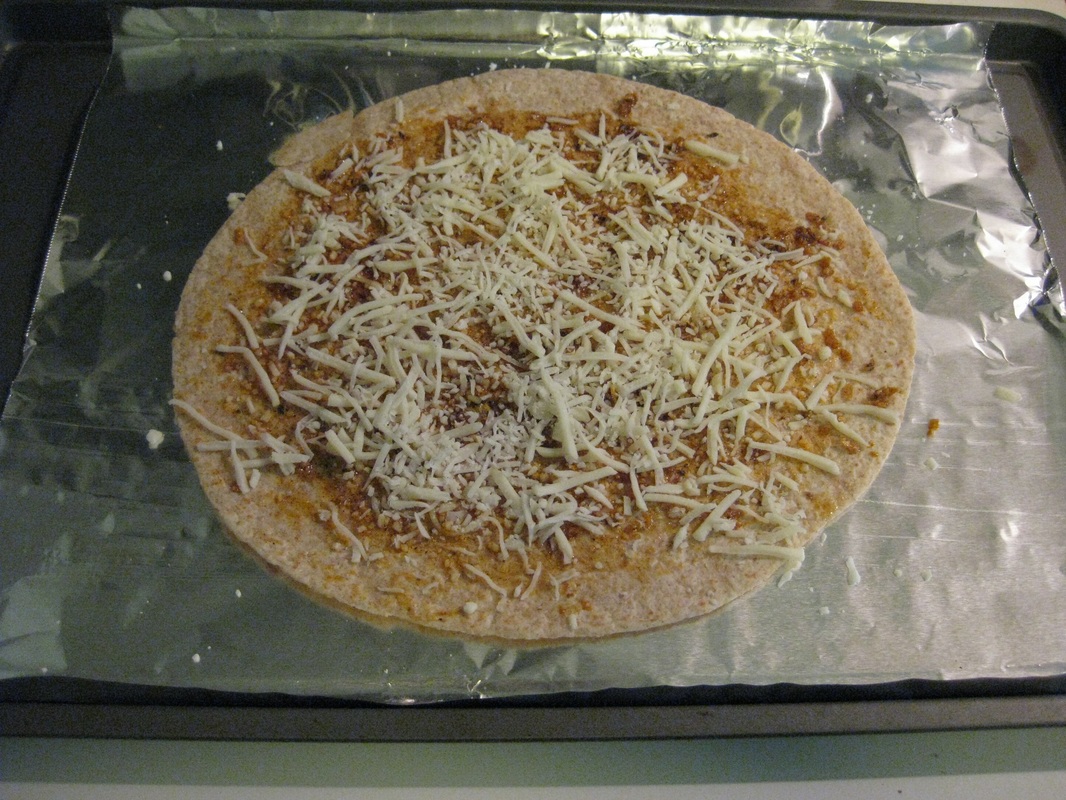
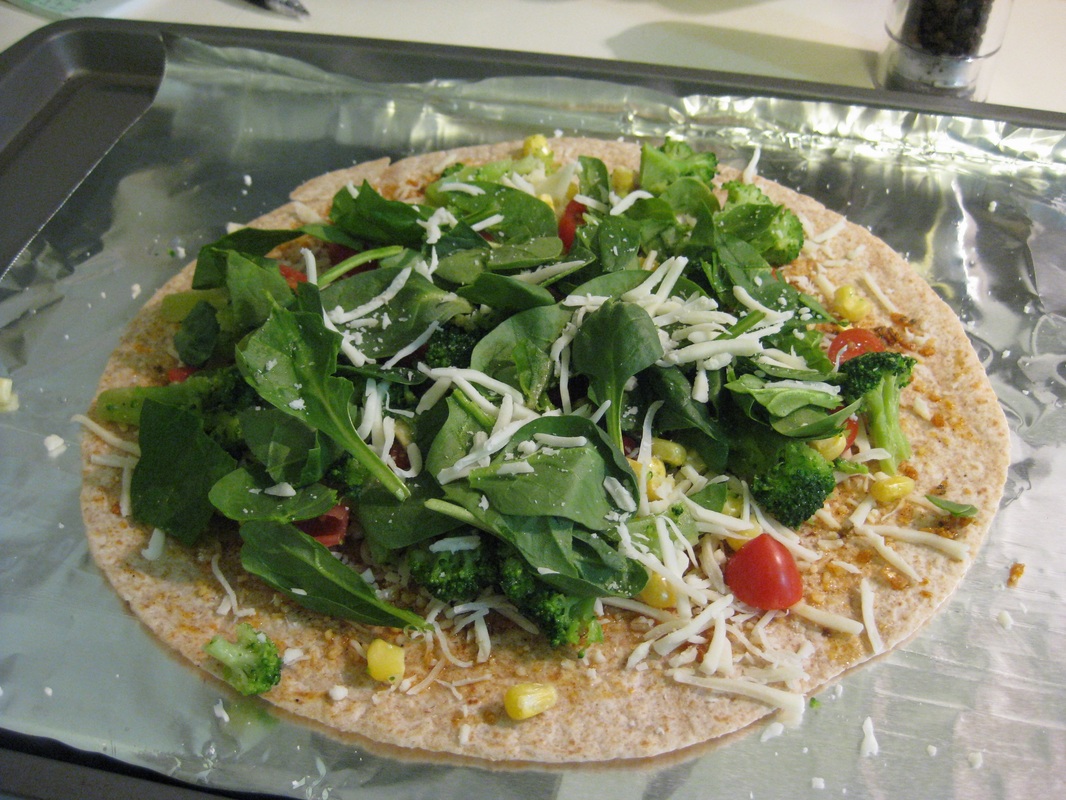
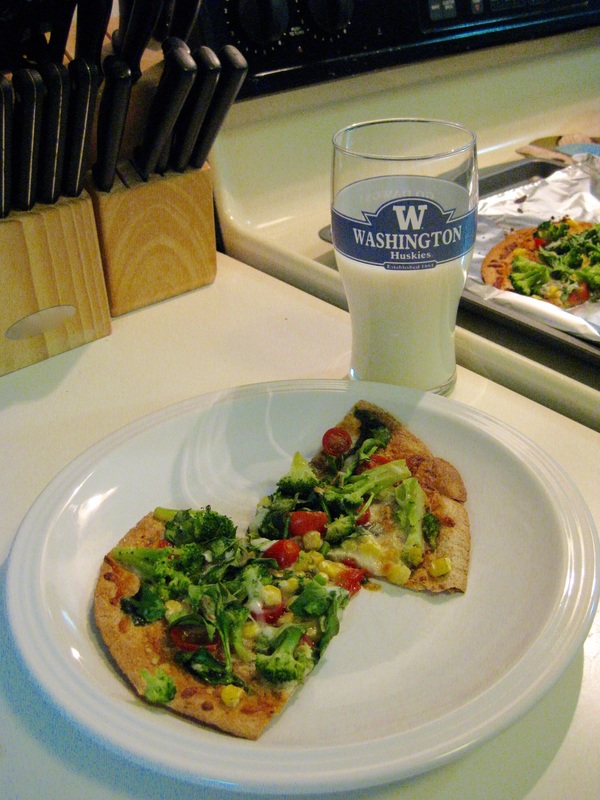
 
Enjoy!

​Lauren - Dietetic Intern 
0 Comments

Pizza in a Pinch

1/15/2016

1 Comment

 
Picture
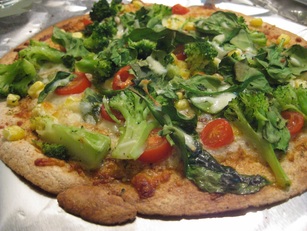
Happy New Year! With the bustle of the holidays behind us, we can all settle into our daily routines again and get pumped up for an exciting year ahead. One new venture that Sound Dietitians will be pursuing in 2016 is teaching hands-on family cooking classes at Verdant Community Wellness Center in Lynnwood, Washington. Our first class in January will be all about pizza, from homemade dough to freshly blended marinara sauce to simple tips for quick prep. And the best part is, we’ll get to directly involve kids in the cooking process. Actively including kids in meal planning and food preparation helps develop important life skills and is one of the best ways to promote appreciation for healthy eating early on.
 
One recipe we will be teaching in our pizza class is a personal favorite: tortilla pizza! This is a quick recipe for those days when you’re craving a crispy, tasty pizza but want to get dinner on the table in 20 minutes or less. There is no need to fuss with dough because a whole wheat tortilla or flatbread makes the perfect base. Just add sauce, top it, and bake for 10 minutes at 400°F – quick, easy, and delicious!

Here is my go-to recipe to get you started:
 
Garlic Olive Oil Drizzle
  • 1-2 cloves garlic, minced
  • 1 Tablespoon Extra Virgin Olive Oil
  • ¼ teaspoon paprika
  • ¼ teaspoon dried oregano
  • Pinch of salt and pepper to taste

Instructions: In a small skillet over medium heat, warm the olive oil. Add the minced garlic and spices and sauté for about a minute. The garlic should be aromatic. Do not overcook and burn.

Picture
Building Your Pizza
  • Prepared olive oil drizzle, or about 1 Tablespoon of your favorite sauce
  • 8-inch whole wheat soft shell tortilla (or your favorite flatbread)
  • 1 Tablespoon freshly grated Parmesan cheese (optional)
  • ¼ cup + 1 Tablespoon mozzarella cheese, divided
Favorite toppings:
  • Thinly sliced sweet potato, sliced cherry tomatoes, bell pepper, broccoli, fresh spinach, frozen corn (thawed), black olives, Canadian bacon, sliced grilled chicken

  1. Preheat oven to 400° F. Prepare a sheet pan lined with aluminum foil to minimize your mess.
  2. Place tortilla or flatbread on prepared baking sheet. Using a spoon or pastry brush, spread a thin layer of your olive oil or sauce mixture over the tortilla, leaving 1-inch around the perimeter without oil.
  3. Sprinkle the freshly grated Parmesan and ¼ cup mozzarella on your tortilla.
  4. Top with your favorite ingredients. Try to incorporate at least 2 or 3 bright colorful vegetables into your pizza!
  5. Sprinkle remaining 1 Tablespoon mozzarella on your toppings.
  6. Bake on the center rack of your oven for 10 minutes, until cheese is melted and crust around the edge is golden brown.
 
Servings: 1-2 for adults, 2-3 for children. Once topped with veggies and protein, one-half tortilla pizza can be quite filling. You may also choose to reduce the amount of oil or cheese you use if you are using a smaller tortilla or flatbread.
 
Nutrition Facts (for whole pizza)!!:
Calories: 447, Protein: 17 grams, Total fat: 26 grams (Saturated: 8 grams, Monounsaturated: 11 grams, Polyunsaturated: 4 grams), Total carbohydrate: 34 grams (Dietary fiber: 5 grams), Sodium: 695 mg
(based on recipe using: Mission 8-inch whole wheat tortilla, garlic olive oil drizzle, and cheeses. Nutrition will vary with different tortillas, sauces, and toppings chosen)
Picture
Picture
Picture

Stay tuned for more posts about all things food and nutrition throughout 2016. Check out the Verdant Community Wellness Center events calendar if you are interested in learning about other health and wellness classes, seminars, and activities available to the public. Cheers to a healthy and delicious year!
 
~ Holly, RDN
1 Comment
    Picture

    SD Blog 

    A place for our consultant Registered Dietitian Nutritionists (RDNs) to share nutrition science, yummy and healthy recipes, tips on seasonal ingredients, and other nutritional musings. Enjoy!  

    ​Megan Ellison,
    ​MS, RDN, CSOWM, CDE Founder

    Categories

    All
    Diabetes
    Dinners
    Farmers' Market
    Food Preparation
    Food Preservation
    Grocery Shopping TIps
    Gut Health
    Hydration
    Lunches
    Proteins
    Seasonal
    Snacks
    Sweets
    Veggie Sides
    Wellness
    Whole Grains

    Archives

    December 2022
    October 2022
    June 2022
    May 2022
    April 2022
    March 2022
    February 2022
    January 2022
    December 2021
    November 2021
    September 2021
    May 2021
    March 2021
    February 2021
    January 2021
    November 2020
    October 2020
    June 2020
    April 2020
    March 2020
    February 2020
    January 2020
    November 2019
    October 2019
    August 2019
    July 2019
    June 2019
    May 2019
    April 2019
    March 2019
    February 2019
    January 2019
    December 2018
    November 2018
    October 2018
    September 2018
    August 2018
    July 2018
    May 2018
    March 2018
    February 2018
    January 2018
    November 2017
    September 2017
    August 2017
    July 2017
    June 2017
    May 2017
    April 2017
    March 2017
    January 2017
    December 2016
    November 2016
    October 2016
    September 2016
    August 2016
    July 2016
    June 2016
    May 2016
    April 2016
    February 2016
    January 2016
    November 2015
    October 2015

    RSS Feed

Providing Expert Nutrition Services to the Greater Puget Sound Region. 
Newsletter
  • HOME
  • About
    • Philosophy
    • Our Team
    • Locations
    • Telehealth
  • Work With Us
    • Nutrition Counseling
    • Diabetes Education
    • Clinics & Businesses
    • Dietitians & Interns
    • Contact
  • Blog
  • Giving & Receiving