SOUND DIETITIANS LLC
  • HOME
  • About
    • Philosophy
    • Our Team
    • Locations
    • Telehealth
  • Work With Us
    • Nutrition Counseling
    • Clinics & Businesses
    • Contact
  • Blog
  • Giving & Receiving

Cooking for One or Two & Cooking on a Budget

10/1/2018

0 Comments

 
Check out Amanda's segment on King 5's New Day Northwest and find the recipes below! 
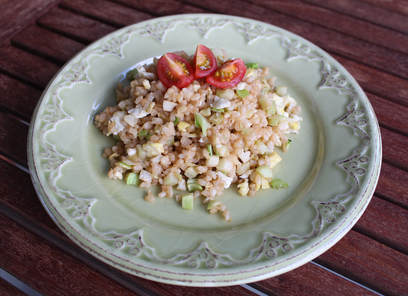
Quick Fried Rice

Makes 2 Servings

Ingredients:
  • 2 eggs
  • 1 Tablespoon olive oil
  • 1 cup riced broccoli
  • 1 cup riced cauliflower
  • 10 ounces cooked brown rice or frozen/pre-cooked 
  • 1 tsp garlic powder
  • 2 Tablespoons low-sodium soy sauce
Picture
Directions:
  1. Microwave brown rice for 3 minutes (skip this step if your rice is already hot).
  2. Meanwhile, heat a skillet over medium heat. Add olive oil when pan is hot and crack two eggs into the pan. Gently scramble eggs until eggs are completely cooked. Set eggs aside. 
  3. Using the same pan, add broccoli, cauliflower, rice, garlic powder, and soy sauce. Stir fry rice mixture on medium heat for 1-2 minutes. Add eggs to rice mixture. Enjoy! 
  4. Optional: garnish with chopped or sliced tomatoes. 
Nutrition per serving: 410 Calories; 12.5g Fat; 14g Protein; 45g Carbohydrates; 5g Fiber; 460mg Sodium

Eggs To-Go

Ingredients:
  • 1 egg
  • 1/4 cup spinach
  • 1 Tablespoon feta cheese
  • Ground black pepper, to taste
​Directions:
  1. Place spinach at the bottom of a mug. Add feta cheese and crack an egg on top. 
  2. Cover and microwave for 1 minute. Optional: season with black pepper. Enjoy! 
  3. Make this a balanced meal by pairing with fruit or whole grain toast. 
Picture
Nutrition per mug: 90 Calories; 6g Fat; 7g Protein; 0g Carbohydrates; 0g Fiber; 184mg Sodium
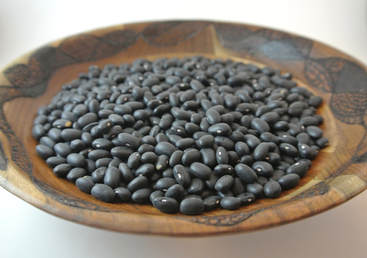
Black Bean Tacos

Makes 2 Servings

Ingredients:
  • 1 (15 ounce) can no salt added or low-sodium black beans, rinsed and drained
  • 1 1/2 teaspoons olive oil
  • 1/4 teaspoon garlic powder
  • 1/4 teaspoon ground cumin
  • 1/4 teaspoon chili powder
  • 1/4 large lime, juiced
  • 2 Tablespoons cheese of choice, shredded
  • 2 (6 inch) corn tortillas
  • 2 Tablespoons fresh cilantro, chopped
  • Optional toppings: plain nonfat Greek yogurt, lettuce, chopped tomatoes
Picture
Directions:
  1. Heat olive oil in a saucepan over medium heat. Add beans, garlic powder, cumin, and chili powder. Stir gently and cook for 5 minutes. 
  2. Remove from heat and add lime juice and cilantro. Stir mixture.
  3. Place tortillas in a microwave and cover with a damp paper towel. Heat for 30-45 seconds, or in 30 second increments until tortillas are soft. 
  4. To build tacos: Place tortillas on a plate and fill each tortilla with 1 tablespoon cheese and 1/4 cup bean mixture. Top with your favorite toppings! 
  5. Tip: Use leftover beans for salads, soups, omelets, or quesadillas. 
Nutrition per 2 tacos: 295 Calories; 7g Fat; 13g Protein; 45g Carbohydrates; 11g Fiber; 259mg Sodium
0 Comments

Meals on the Move

9/25/2018

0 Comments

 
Fall is here and with it we are feeling cooler temperatures and are seeing leaves changing color. School is back in session and with that, an increase in after-school activities. Sometimes multiple sports with multiple kids in multiple places. Making family meals seem challenging. Unfortunately, the ever present feeling of being strapped for time can cause families to make unhealthy choices, typically found at the drive-through window.
​

Providing healthy food for your family is a priority for most, however challenging to find on the road. Whether you are feeding everyone in a fury before dashing off to practice or eating in the car on the way to multiple destinations, here are a few ideas to make meals on the move simple and healthy! ​

Quick meals before hitting the road

A little planning ahead makes feeding the troops before heading out simple. Although having options that everyone agrees on can be a challenge. Keeping the ingredient list short and options limited might make dining before you dash a much better deal.
Some of my favorite recipes call for a slow cooker. It’s so easy to prep what you need ahead of time. You can even place all of the ingredients in the slow cooker pot (refrigerated) the evening before! The next morning preparing dinner just requires you to remove the pot from the fridge and place it into the slow cooker base, plug it in and turn it on (two VERY important steps I know we have all missed a time or two).
Picture

Portable meals - let's wrap this up

I am a firm believer that you can put almost anything in a tortilla to make a meal portable - perhaps soup is the exception. This still leaves many other foods you can wrap up and go! For example, chicken caesar salad or any other salad for that matter. Lightly dress the lettuce in a bowl, place in the center of a tortilla, then add chicken or any other vegetable you fancy. Fold up the ends, roll it up, and wrap in a paper towel and perhaps a small piece of foil on the end and off you go!

This wrapping method can be used for breakfast too. Who doesn’t love a breakfast burrito?
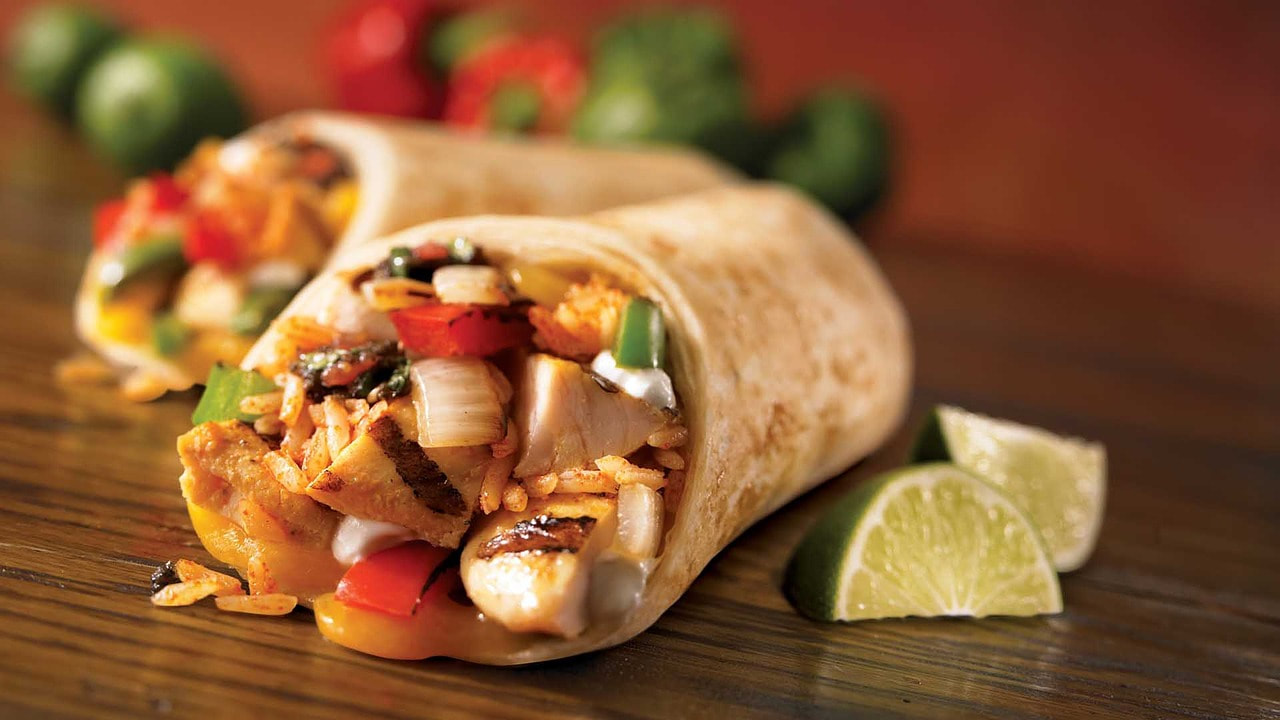
Picture

Slow and low - A perfect cooking tempo

Using a slow cooker is a sure fire way to ensure whatever you are preparing will be tender and juicy. One pot meals are also fantastic! Clean up in minimal and the flavors are married perfectly together.
Here are a few recipes that include a slow cooking and one pot, courtesy of www.skinnytaste.com. They are simple, delicious and every recipe from this site includes nutrition information. Which is super helpful if you are trying to be a mindful eater. ​

One-Pot Spaghetti and Meat Sauce (Stove-Top Recipe)

Makes 5 Servings
Recipe from www.skinnytaste.com 


Ingredients:
  • 1 pound 90% lean ground beef
  • 3/4 teaspoon salt
  • 1/4 cup onion, diced
  • 3 cloves garlic, minced
  • 1 can (28 ounces) crushed tomatoes
  • Ground black pepper, to taste
  • 2 cups water
  • 4 fresh basil leaves, torn, plus more for garnish
  • 8 ounces whole-wheat or gluten-free pasta, broken in half
  • Optional: grated parmesan cheese for serving
Picture
Directions:
  1. Heat a large pot over high heat. Add beef and salt and cook for about 3 minutes, breaking up beef with a spatula.
  2. Add onions and garlic and cook until onions are tender, about 3-4 minutes.
  3. Add tomatoes, black pepper, water, and basil to beef. Stir to combine.
  4. Add spaghetti, making sure there is enough liquid to cover the noodles without stirring.
  5. Turn heat down to medium-low. Cover and cook until the water is absorbed and the pasta is cooked, about 17 minutes. 
  6. Serve with parmesan cheese and extra fresh basil, if desired. 
Nutrition per serving (scant 1 1/2 cups): 377 Calories; 10.5g Fat; 23.5g Protein; 43.5g Carbohydrates; 5g Fiber; 567mg Sodium

Easiest Salsa Verde Chicken (Slow Cooker or Instant Pot)

Makes 6 Servings
Recipe from www.skinnytaste.com 


Ingredients:
  • 1 1/2 pounds raw, skinless chicken tenders
  • 1/4 teaspoon garlic powder
  • 1/8 teaspoon oregano
  • 1/8 teaspoon ground cumin
  • Salt, to taste
  • 16 ounces roasted salsa verde ​
Picture
Directions:
Slow Cooker:
  1. Combine chicken, garlic powder, oregano, cumin, and salt in slow cooker. Stir to combine.
  2. Pour salsa verde over the top. Cover and cook on high for 2 hours. 
  3. Remove chicken and shred with two forks.
  4. Remove 2/3 cup of liquid from the slow cooker and discard. 
  5. Place shredded chicken back in slow cooker with remaining liquid and adjust seasoning to taste.
Instant Pot:
  1. Combine chicken, garlic powder, oregano, cumin, and salt in Instant Pot. Stir to combine.
  2. Pour salsa verde over the top. Cover and cook on high pressure for 20 minutes. Release pressure using the "quick release" method or naturally.
  3.  Remove chicken and shred with two forks. 
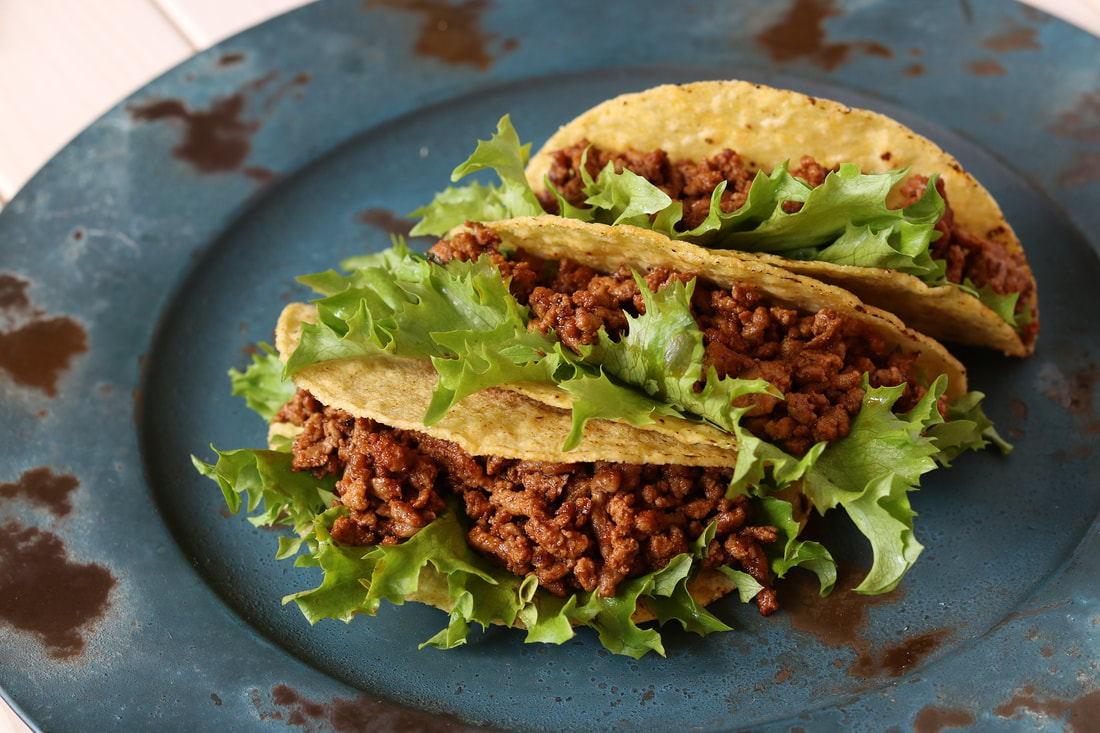
Nutrition per serving (1/2 cup): 145 Calories; 2g Fat; 26g Protein; 5g Carbohydrates; 0g Fiber; 415mg Sodium

Beef Tacos (Slow Cooker or Instant Pot)

Makes 8 Servings
Recipe from www.skinnytaste.com 


Ingredients:
  • 2 pounds 93% lean ground beef​
  • 2 teaspoons + 1 teaspoon cumin, divided
  • 2 teaspoons salt
  • 2 teaspoons chili powder
  • 2 teaspoons paprika
  • 1 teaspoon dried oregano
  • 1 small onion, minced
  • 2 cloves garlic, crushed
  • 1/4 cup red bell pepper, minced
  • 1/2 cup water
  • 1 cup tomato sauce
  • 1 bay leaf
  • 16 corn taco shells
Toppings:
  • 2 cups romaine lettuce, shredded
  • 1 cup cheddar cheese, shredded
  • 2 plum tomatoes, sliced
Picture
Directions:
Slow Cooker:
  1. Heat large skillet over high heat. Add beef to brown, breaking it into smaller pieces. When beef is brown throughout, add 2 teaspoons cumin, salt, chili powder, paprika, oregano, onion, garlic, and bell pepper. Cook until veggies are soft, about 2-3 minutes. 
  2. Transfer beef mixture to slow cooker and add 1/2 cup water, bay leaf, and tomato sauce. 
  3. Cover and cook on high for 3 hours or low for 6-8 hours. Discard the bay leaf and add the remaining 1 teaspoon cumin.
  4. Heat taco shells according to package and then place 1/4 cup beef in each shell. Top with romaine lettuce, cheddar cheese, and tomato. 
Instant Pot:
  1. Press saute button on Instant Pot. Add beef to brown, breaking it into smaller pieces. When beef is brown throughout, add 2 teaspoons cumin, salt, chili powder, paprika, oregano, onion, garlic, and bell pepper. Cook until veggies are soft, about 2-3 minutes. 
  2. Add 1/2 cup water, bay leaf, and tomato sauce. 
  3. Cover and cook on high pressure for 20 minutes. Natural release. Discard the bay leaf and add the remaining 1 teaspoon cumin.
  4. Heat taco shells according to package and then place 1/4 cup beef in each shell. Top with romaine lettuce, cheddar cheese, and tomato. 
Nutrition per serving (2 tacos): 382 Calories; 20g Fat; 31g Protein; 24g Carbohydrates; 8g Fiber; 744mg Sodium
​

~Olivia Mathisen-Holloman, RDN, CD
0 Comments

Let's Get Grilling!

8/10/2018

0 Comments

 
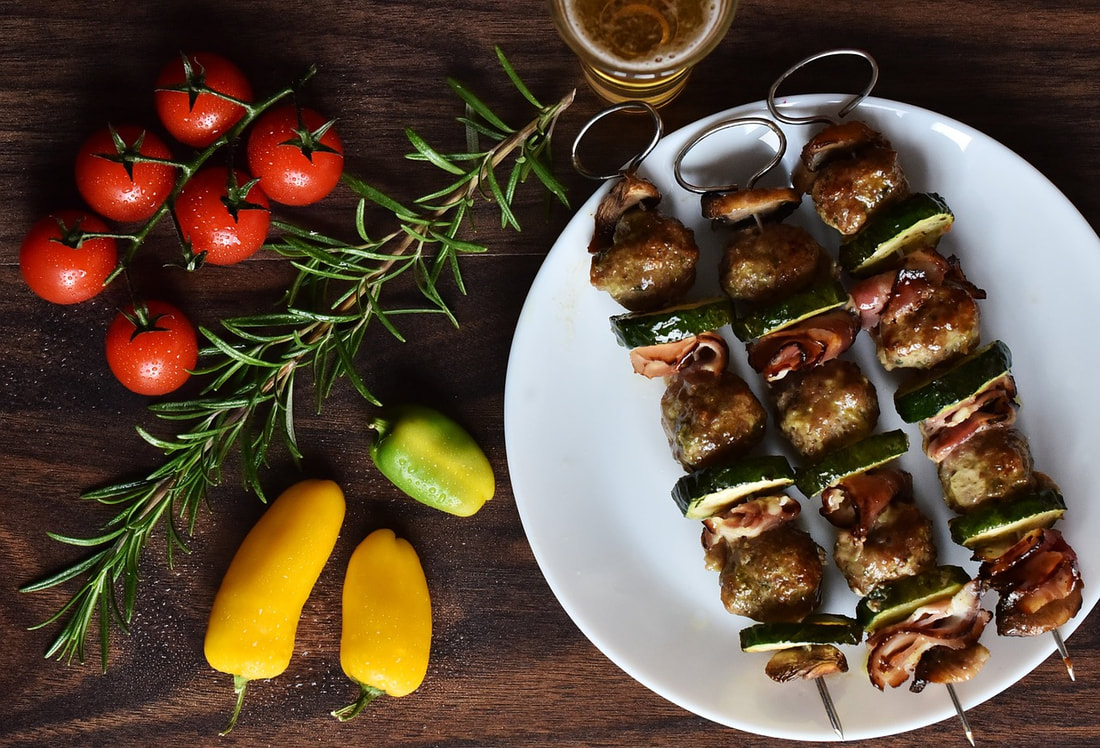
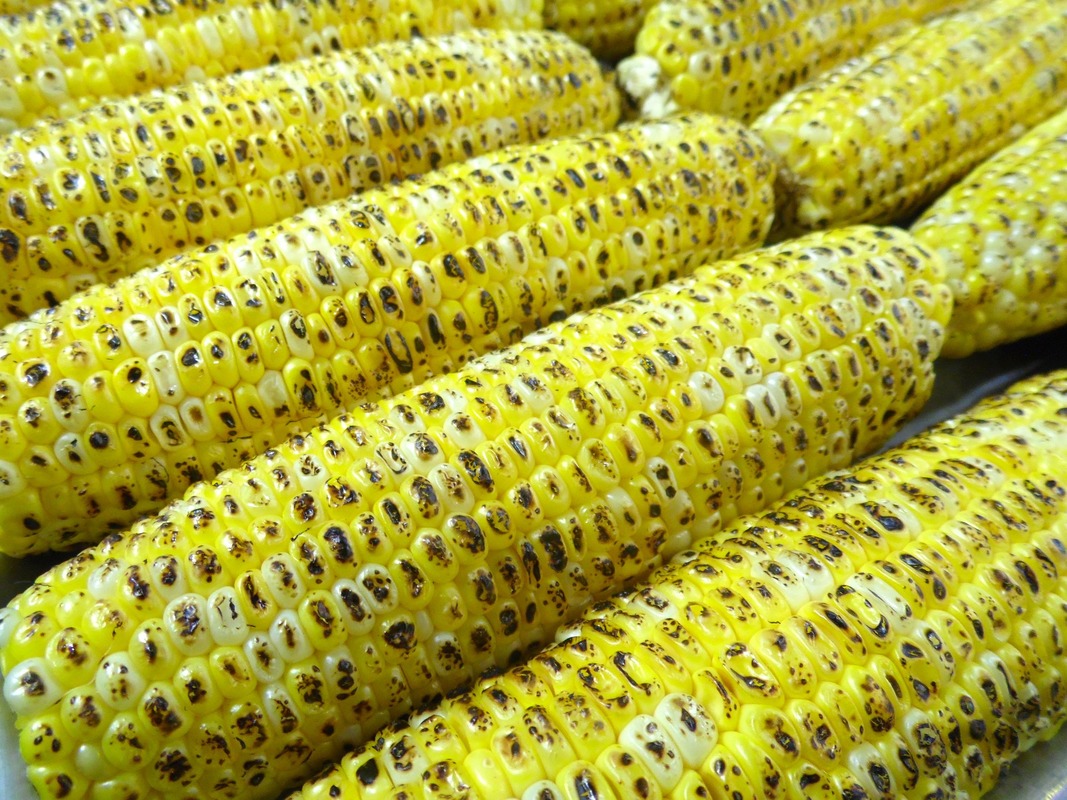
August has arrived in the PNW, and with it warm evenings and golden orange sunsets. Now’s the time of year to be outside as much as possible. That means spending time in the kitchen cooking (and sweating, because who has AC here?) is not high on the priority list. Not to worry. We’ve got all the tips you’ll need to create a delicious feast on your favorite outdoor grill—without sacrificing your health.
There are often concerns regarding food safety and health risks related to grilled foods. However, there are many ways to make grilling a healthy, safe, and delicious way to eat. It’s all about the foods you choose, preparation, and cooking methods.

Does grilling food increase cancer risk?

Studies of have shown that there is an increased risk of developing cancer with consumption of charred grilled foods. This is due to the formation of two main substances: Heterocyclic Amines (HCA) and Polycyclic Aromatic Hydrocarbons (PAH). When the fats and proteins of a meat or poultry product are heated at high temperatures to the point of being browned or blackened, carcinogens form. This can happen with all forms of cooking, not just grilling.

HOWEVER, this risk can be greatly reduced with a few simple steps. First, cook at lower temperatures by using charcoal briquettes or hardwood chips from hickory and maple. Second, the use of marinades that contain olive oil and citrus juices (such as lemon or lime) can minimize the formation of these cancer-causing substances by as much as 99%. Marinate foods for at least one hour before cooking. Marinades also add a lot of flavor and juiciness to any grilled item—whether it’s eggplant or chicken. Thirdly, reduce the formation of HCAs by cooking with herbs from the lamiaceae family. These herbs include basil, mint, rosemary, thyme, oregano, and sage. Fresh herbs can easily be chopped and added to any marinade.

Grill Prep & Cooking Tips!

  • Look for lean pieces of meat with less fat, and trim off extra fat
  • Flip the food before it’s charred
  • Remove the skin from chicken or salmon
  • Remove charred portions of meat before eating 
  • Keep the grill rack clean and away from the coals
  • Grill your veggies and fruit! Vegetables and fruit do not form cancer-causing chemicals when cooked on high heat. They also make great main dishes!

General Safety Guidelines for Choosing, Storing, and Cooking

When shopping, pick your meat products right before checkout. Make sure the packages feel cold to the touch and are not torn. To protect against contamination, put raw goods into individual plastic bags and store in the cart away from produce.

When transferring, use an insulated cooler to keep meat below 40F. Use ground meats and poultry within 1-2 days, and other products within 5 days. Store on the bottom shelf of your fridge. If storing for a longer period of time, wrap in freezer paper or plastic and store at 0F. Raw meat, poultry, or any other perishable food should not be left out at room temperature for longer than two hours.

It is important to use a thermometer to check temperatures of meat and poultry. Cooking to the proper temperature destroys harmful bacteria that may be present. Once the food has reached temperature keep it hot until serving at 140F or warmer. If storing for later consumption, put in refrigerator right after cooking for up to 3-4 days, or freezer up to four months.
Picture

Internal Cooking Temperatures

  • 145°F – whole cuts of beef, pork, lamb, and veal (stand-time of 3 minutes at this temperature)
  • 145°F – fish
  • 160°F – hamburgers and other ground beef
  • 165°F – all poultry and pre-cooked meats, like hot dogs
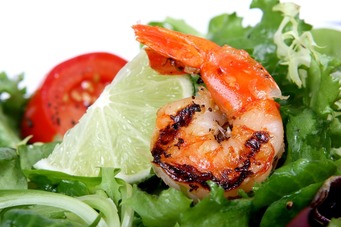
Finally, remember to cook meats separate from produce and always wash hands before and after handling raw foods. Now go and enjoy the outdoors with some grilled foods!

Prawns with Garlic & Smoked Paprika

Makes 8 Servings
Recipe from www.thisisyourcookbook.com
​

Ingredients:
  • 2 pounds prawns
  • 1/2 teaspoon sea salt
  • 3 cloves garlic, finely chopped
  • 1 teaspoon smoked paprika
  • 2 Tablespoons olive oil
  • Zest and juice of 1 lemon
Picture
Directions:
  1. ​Place prawns in a bowl and add salt, garlic, paprika, olive oil, and lemon zest. Mix and let sit 15 minutes.
  2. Heat griddle or barbecue grill on high. Place prawns on pan or grill and cook about 2-3 minutes on each side or until charred on the outside, but opaque in the middle. 
  3. Sprinkle lemon juice over prawns during the last minute of cooking. 
  4. Transfer to a serving dish and enjoy! 
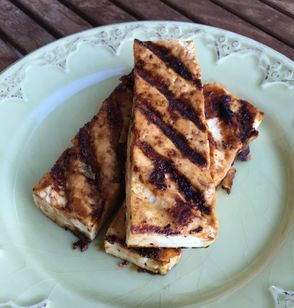
Nutrition per 4 ounces: 117 Calories; 2g Fat; 20g Protein; 3.5g Carbohydrates; 0g Fiber; 426mg Sodium

Grilled Soy-Ginger Glazed Tofu

Makes 7 Servings
Recipe from America's Test Kitchen
​

Ingredients:
  • 3 Tablespoons low-sodium soy sauce
  • 3 Tablespoons water
  • 3 Tablespoons mirin
  • 1 1/2 teaspoons grated fresh ginger
  • 1 garlic clove, minced
  • 1 teaspoon corn starch
  • 1/2 teaspoon Asian chili-garlic sauce
  • 28 ounces extra firm tofu, sliced lengthwise into 1-inch thick planks
  • 2 Tablespoons vegetable oil
  • Pepper
  • 1/4 cup minced fresh cilantro
Picture
Directions:
  1. Glaze: Combine soy sauce, water, mirin, ginger, garlic, corn starch, and chili-garlic sauce in small saucepan. Simmer over medium-high heat until thickened, about 5-7 minutes. Transfer to a bowl. 
  2. Tofu: Spread tofu on a paper towel-lined baking sheet and drain for 20 minutes. Brush tofu with oil and pepper. 
  3. Grill: Heat griddle or barbecue on high. Oil cooking grate and place tofu on grill. Cook until light brown on each side, about 6-10 minutes, flipping tofu halfway through. Brush tofu with 1/4 cup glaze and cook until well browned, about 1-2 minutes. Repeat on the other side of the tofu. Transfer tofu to platter and brush with remaining 1/4 cup glaze. Garnish with fresh cilantro.
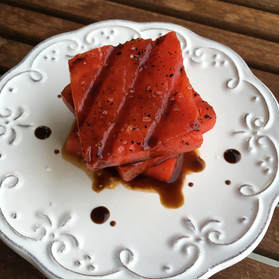
Nutrition per 4 ounces tofu: 172 Calories; 10g Fat; 12g Protein; 11g Carbohydrates; 0.5g Fiber; 288mg Sodium

Grilled Watermelon Salad

Makes 4 Servings
Recipe from Food Network
​

Ingredients:
  • 1/2 (5 pound) seedless watermelon
  • 1/4 cup balsamic vinegar
  • Olive oil
  • Kosher salt
  • 2 cups baby arugula
  • 1/4 cup feta cheese
  • Finely cracked fresh pepper
Picture
Directions:
  1. Place the watermelon half cut-side down on a cutting board and cut off the rind. Slice the block into 8-inch squares, about 3 x 3 inches and 1-inch thick. 
  2. Pour the vinegar into a saucepan and simmer over medium-high heat until vinegar reduces to a thick consistency. Set aside. 
  3. Heat grill or nonstick griddle. Brush a small amount of olive oil onto both sides of watermelon slices. Place watermelon on hot grill for about 2 minutes on each side, or until grill marks appear. Transfer to a plate and season with salt. 
  4. To assemble salad, place arugula on a plate, place watermelon on top of arugula, and garnish with a drizzle of balsamic glaze and  sprinkle of feta cheese. 
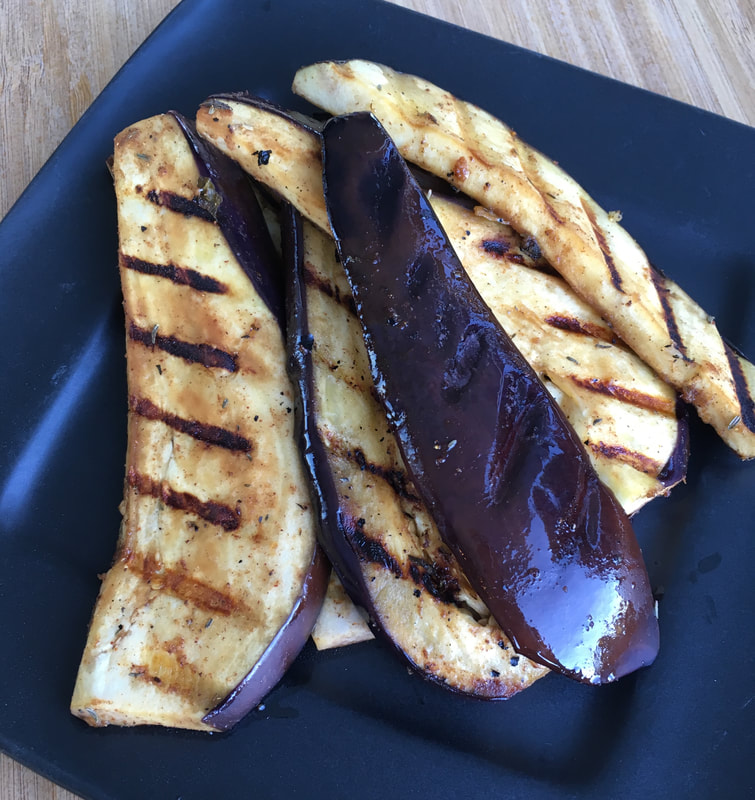
Nutrition per serving: 156 Calories; 6g Fat; 3.5g Protein; 25g Carbohydrates; 1g Fiber; 405mg Sodium

Jamaican Jerk Grilled Eggplant

Makes 8 Servings
Recipe from Minimalist Baker
​

Ingredients:
  • 1 teaspoon ground cinnamon
  • 1 Tablespoon ground coriander
  • 1/4 teaspoon allspice
  • 1/4 teaspoon cayenne pepper
  • 1/2 teaspoon pepper
  • 2 Tablespoons fresh thyme
  • 4 garlic cloves, minced
  • 1 Tablespoon fresh ginger, grated
  • 3 Tablespoons lime juice
  • 1/4 cup low-sodium soy sauce
  • 2 Tablespoons maple syrup
  • 2 Tablespoons olive oil
  • 3 stalks green onions, sliced
  • 1 medium serrano pepper, seeds removed, thinly sliced
  • 1 large or 2 small eggplant
Picture
Directions:
  1. Combine cinnamon, coriander, allspice, cayenne pepper, pepper, thyme, garlic, ginger, lime juice, soy sauce, maple syrup, olive oil, green onions, and serrano pepper in a small bowl. 
  2. Slice eggplant lengthwise into 1/2-inch thick "steaks." Brush both sides of the steaks with marinade. 
  3. Heat grill or grill pan and lightly oil. Place eggplant on hot grill or about 3-5 minutes on each side, or until both sides are golden brown and grill marks are present. 
Nutrition per serving: 74 Calories; 3.5g Fat; 2g Protein; 10g Carbohydrates; 3g Fiber; 270mg Sodium
​

~Kelsy, Dietetic intern
0 Comments

Lettuce Tell You - Tips for Salad Preparation and Preservation

7/20/2016

0 Comments

 
Let’s face the facts: as much as we may love our kale, good things do not last forever. We have all faced the disheartening moment when your once-crisp spinach turns into a pile of bruised, unappetizing mush. Never fear, there are a few tips that you can use along the way to prolong the quality your leafy greens! Our last visit to the farmer’s market included sharing such tips, in addition to classifying different greens, and ideas for preparation. Families gathered ‘round to spin the “head of knowledge” and put themselves to the test. Have you used produce wash on your greens? Apparently such an act, despite us believing it’ll benefit us, is a big “no-no”. Are you on top of your salad game? Look below to find out!
Picture
We love our spinner - can you tell? This week it is a "salad spinner"!

Top Tips for Washing Leafy Greens from Eatright.org
  • Always start with clean hands. Wash your hands for 20 seconds or more with soap and warm water.
  • Cut away any damaged areas on leaves or stems before preparing or eating the greens. If something seems rotten, discard it.
  • If leafy greens are not labeled as "pre-washed" or "ready-to-eat," thoroughly wash them under running water just before chopping, cooking or eating. This will help reduce the presence of microorganisms. If you wash leafy greens before storing, you can potentially promote bacterial growth and enhance spoilage.
  • If lettuce has a core, such as iceberg lettuce, remove it before washing. When you have loose leaves that can't easily be held under cold running water, immerse the leaves in a large clean bowl or a salad spinner filled with cold water. Toss them around in the water for 30 seconds or more. Drain and repeat twice.
  • Never wash leafy greens with soap, detergent or bleach, since these can leave residues that are not meant to be consumed. The U.S. Food and Drug Administration doesn't recommend using commercial produce washes because these may also leave residues.
  • If leafy greens are labeled as "pre-washed" or "ready-to-eat," use them without additional washing, since it is unlikely to enhance their safety.
  • After washing fresh greens, pat them dry with paper towels or a freshly clean kitchen towel — or use a salad spinner — to help remove excess liquid.
Bruised greens? No problem.

​Both of the recipes below have enough flavor and texture to disguise most lettuce that crosses into the “not ideal for salads” zone. The kale chip recipe is not only packed with B vitamins, it provides a crave-worthy salty and crunchy alternative to the average bag of chips! 
And the green smoothie is so good, spinach is the last ingredient you- or your family members- will think of when you sip on it.
Kale Chips
YIELD: 4-6 servings

1 bunch of Kale
1-2 Tbs. Safflower oil or Canola oil
Seasoning of choice: garlic powder, onion powder, salt, pepper, nutritional yeast
Picture
Preheat oven to 250 F. Wash, spin or pat kale dry. Remove the stem and cut or tear kale into bite site pieces. Toss kale in oil. Cover baking sheets with parchment paper. Spread kale leaves over the sheet and sprinkle seasoning of choice. Bake for 30 minutes. Kale chips should be crunchy and green. They burn easily, so be sure to check on them and adjust the time as needed. 
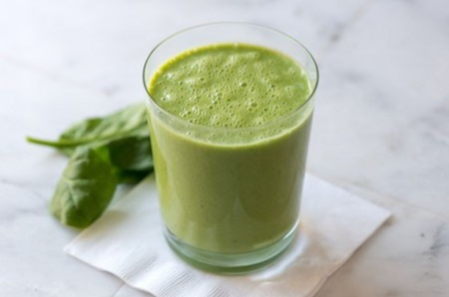
Picture
Green Smoothie
YIELD: 2 servings
​
2 cups Spinach, 4 Strawberries, 1 cup orange juice, 1/2 cup plain Greek yogurt. Blend until smooth and enjoy!


Blueberry Spinach Summer Salad
YIELD: Makes 6 servings
 
3 tablespoons red wine vinegar
1/2 cup olive oil
1 teaspoon Dijon mustard
1 teaspoon white sugar
1 pound fresh spinach
1 pint fresh blueberries
4 ounces goat cheese
4 ounces hazelnuts
Picture
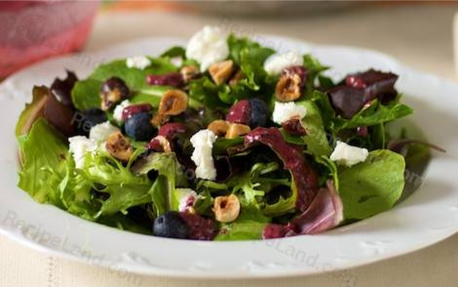
Combine vinegar, oil, mustard, and sugar in a jar with a tight-fitting lid; shake well.
Toss spinach, blueberries, goat cheese, and hazelnuts in a large salad bowl.
​Drizzle with dressing and toss gently; serve immediately.
 ​

​If you’re lucky enough to frequent the Everett Farmer’s Market, take this recipe along with you! Almost all of the above ingredients can be found at the market right now. If your shopping loyalties lie elsewhere, not to worry. This salad is composed of in-season produce that can be found almost everywhere in the PNW. No hazelnuts? Almonds slices or pumpkin seeds will do the trick! Adding a hardboiled egg, chicken breast or salmon fillet would also revamp this salad from a snack to an evening meal.
 
I hope salading down in the kitchen with your newly acquired lettuce facts will help you find your inner peas. :) 
 
Feel free to visit us for another beautiful day at the Everett Farmer’s Market, this Sunday, July 24th!
 
​~ Olivia
0 Comments
    Picture

    SD Blog 

    A place for our consultant Registered Dietitian Nutritionists (RDNs) to share nutrition science, yummy and healthy recipes, tips on seasonal ingredients, and other nutritional musings. Enjoy!  

    ​Megan Ellison,
    ​MS, RDN, CSOWM, CDE Founder

    Categories

    All
    Diabetes
    Dinners
    Farmers' Market
    Food Preparation
    Food Preservation
    Grocery Shopping TIps
    Gut Health
    Hydration
    Lunches
    Proteins
    Seasonal
    Snacks
    Sweets
    Veggie Sides
    Wellness
    Whole Grains

    Archives

    October 2024
    May 2024
    February 2024
    November 2023
    October 2023
    June 2023
    April 2023
    March 2023
    February 2023
    December 2022
    October 2022
    June 2022
    May 2022
    April 2022
    March 2022
    February 2022
    January 2022
    December 2021
    November 2021
    September 2021
    May 2021
    March 2021
    February 2021
    January 2021
    November 2020
    October 2020
    June 2020
    April 2020
    March 2020
    February 2020
    January 2020
    November 2019
    October 2019
    August 2019
    July 2019
    June 2019
    May 2019
    April 2019
    March 2019
    February 2019
    January 2019
    December 2018
    November 2018
    October 2018
    September 2018
    August 2018
    July 2018
    May 2018
    March 2018
    February 2018
    January 2018
    November 2017
    September 2017
    August 2017
    July 2017
    June 2017
    May 2017
    April 2017
    March 2017
    January 2017
    December 2016
    November 2016
    October 2016
    September 2016
    August 2016
    July 2016
    June 2016
    May 2016
    April 2016
    February 2016
    January 2016
    November 2015
    October 2015

    RSS Feed

Providing Expert Nutrition Services to the Greater Puget Sound Region. 
Newsletter
Photo from jeffreyw
  • HOME
  • About
    • Philosophy
    • Our Team
    • Locations
    • Telehealth
  • Work With Us
    • Nutrition Counseling
    • Clinics & Businesses
    • Contact
  • Blog
  • Giving & Receiving