SOUND DIETITIANS LLC
  • HOME
  • About
    • Philosophy
    • Our Team
    • Locations
    • Telehealth
  • Work With Us
    • Nutrition Counseling
    • Diabetes Education
    • Clinics & Businesses
    • Dietitians & Interns
    • Contact
  • Blog
  • Giving & Receiving

Mediterranean Bean Salad

1/30/2020

0 Comments

 
Picture
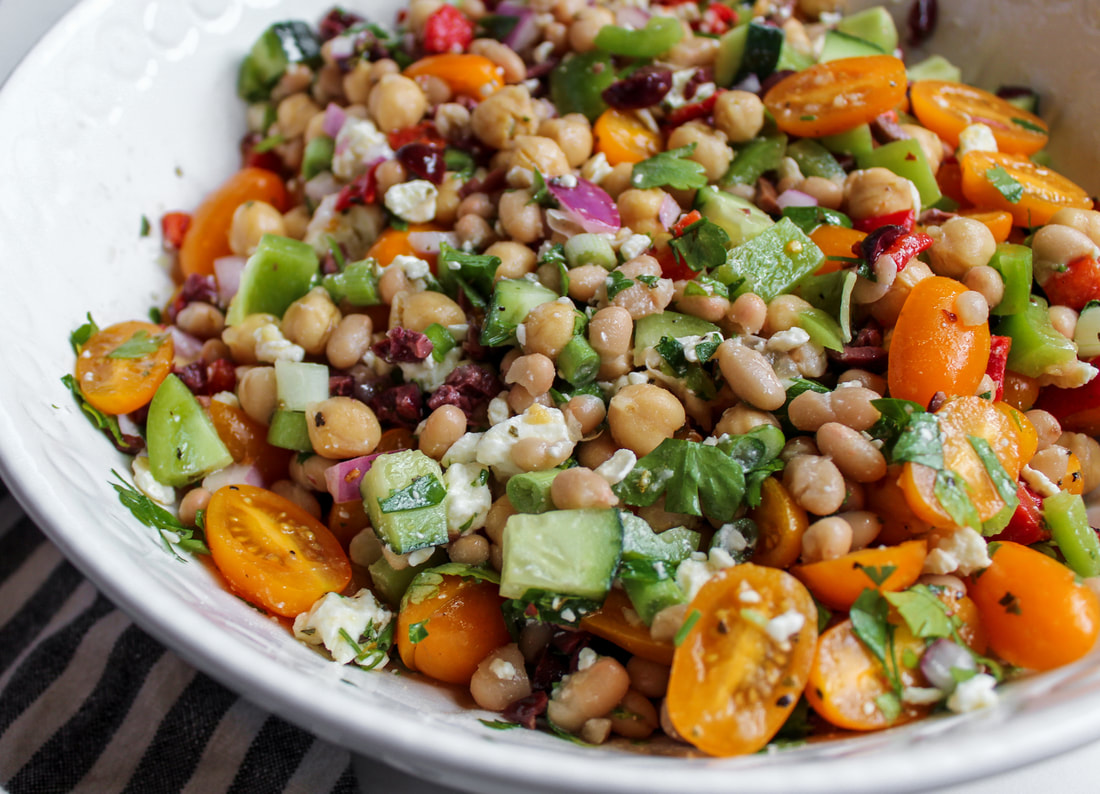
Mediterranean foods are typically high in vegetables, fruits, whole grains, beans, nuts, seeds, lean proteins like fish, healthy fats like olive oil, fresh herbs, and the occasional glass of red wine. It has also been the most widely researched style of eating and has shown to have heart health benefits.

There are so many reasons why beans are truly one of the best foods we can eat. They are a great source of plant based protein and complex carbohydrates. This means the carbohydrates are rich in fiber which is amazing for your gut health. Did you know that most Americans don’t meet their recommended 30g of daily fiber? Fiber is so important because it’s a prebiotic which helps to feed all the good bacteria in your gut! On top of all that goodness, legumes also contain iron, calcium, phosphorus, zinc, magnesium, and folate. Not to mention they are easy on your budget!

If you happen to be looking for a healthy work lunch, look no further! This lunch is super easy to whip up for the whole week ahead and is packed with nutrition to keep you satisfied.

Since this salad doesn’t contain any leafy greens like a typical salad, it doesn’t get soggy or wilted so you can dress the salad while you are preparing it and you won’t have to worry about it sitting in the fridge during the week. If anything, the veggies will marinate in the dressing making it tastier each day!

I recommend pairing this salad with some homemade hummus and pita for a complete and delicious mediterranean style lunch.
Picture
Serves 10

Ingredients for the Salad:
  • 1 - 15 ounce can of chickpeas, drained and rinsed
  • 15 ounce can of white beans, drained and rinsed
  • 1/4 cup kalamata olives, halved and pitted
  • 1/3 cup roasted red peppers, drained, chopped
  • 1/2 of a small red onion, chopped
  • 1 cup cherry tomatoes, halved
  • 1 green bell pepper, seeds removed, diced
  • 1/2 of an english cucumber, diced
  • 1/2 cup crumbled feta cheese {optional}
  • Handful of fresh parsley, chopped
  • 4 green onions, chopped
Ingredients for the Dressing:
  • 1/4 cup extra virgin olive oil
  • 2 Tablespoons red wine vinegar
  • 1 lemon, juiced
  • 2 garlic cloves, minced
  • Salt and pepper to taste
  • 1 teaspoon of oregano
  • Crushed red pepper for extra spice
Directions:
  1. Combine all ingredients in a large bowl.
  2. Mix up the dressing ingredients in a liquid measuring cup or shake together in a mason jar.
  3. Pour dressing over salad.
  4. Mix well.
  5. Enjoy immediately or store in the refrigerator for up to 4 days.

Nutrition Facts per Serving: 165 calories, 21g carbs, 4.5g fiber, 8g fat, 6g protein, 255mg sodium
0 Comments

Back to School Lunches

9/16/2018

1 Comment

 
Picture
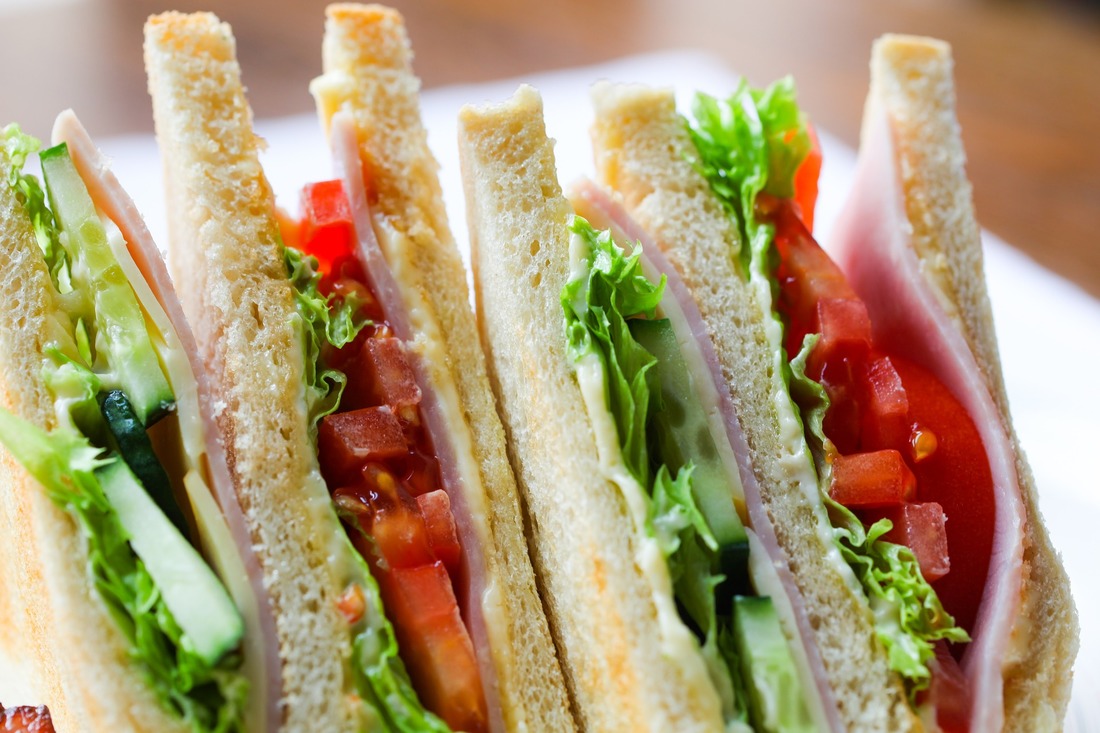
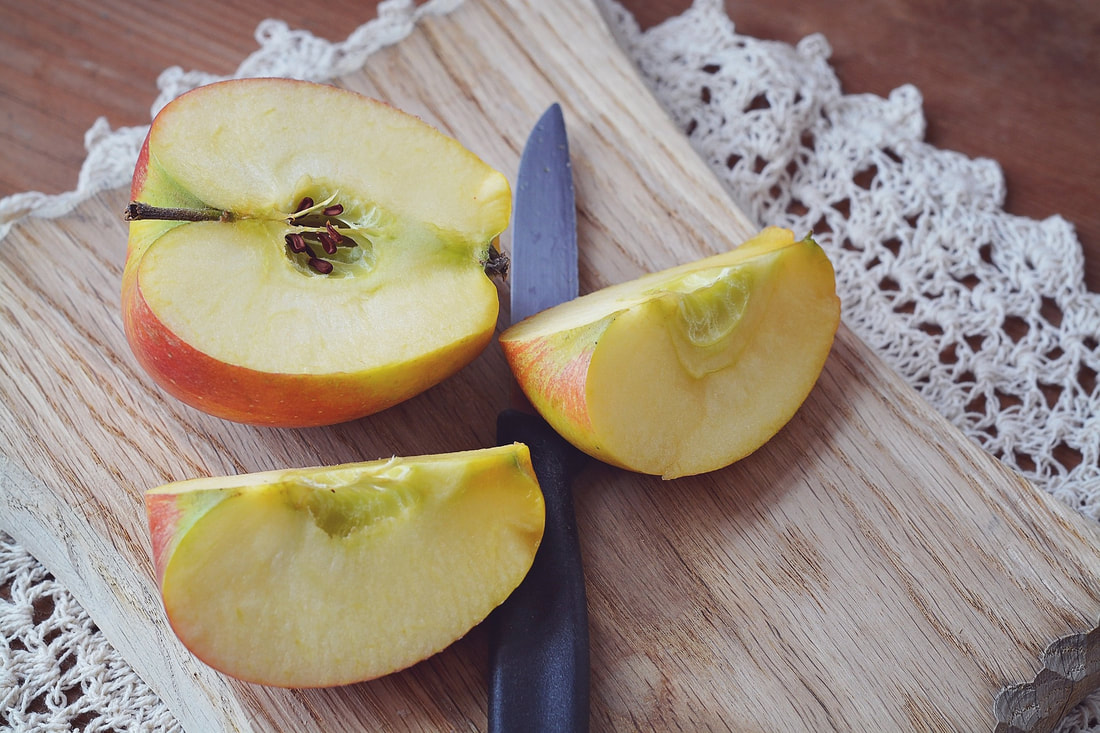
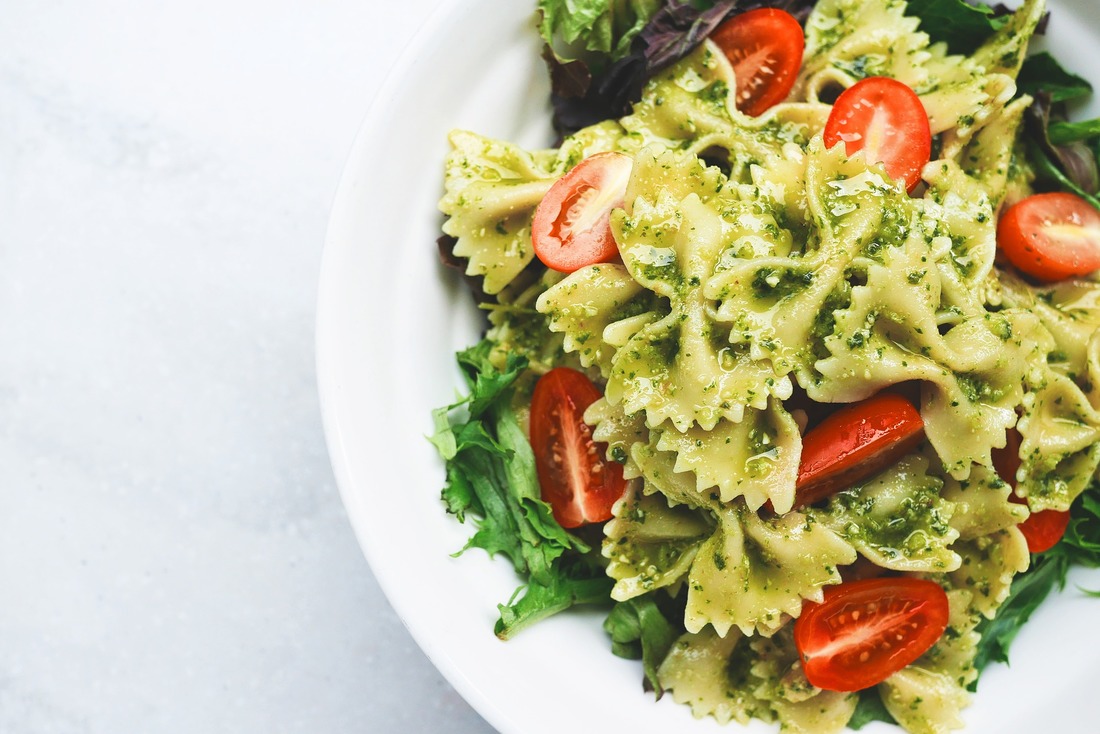
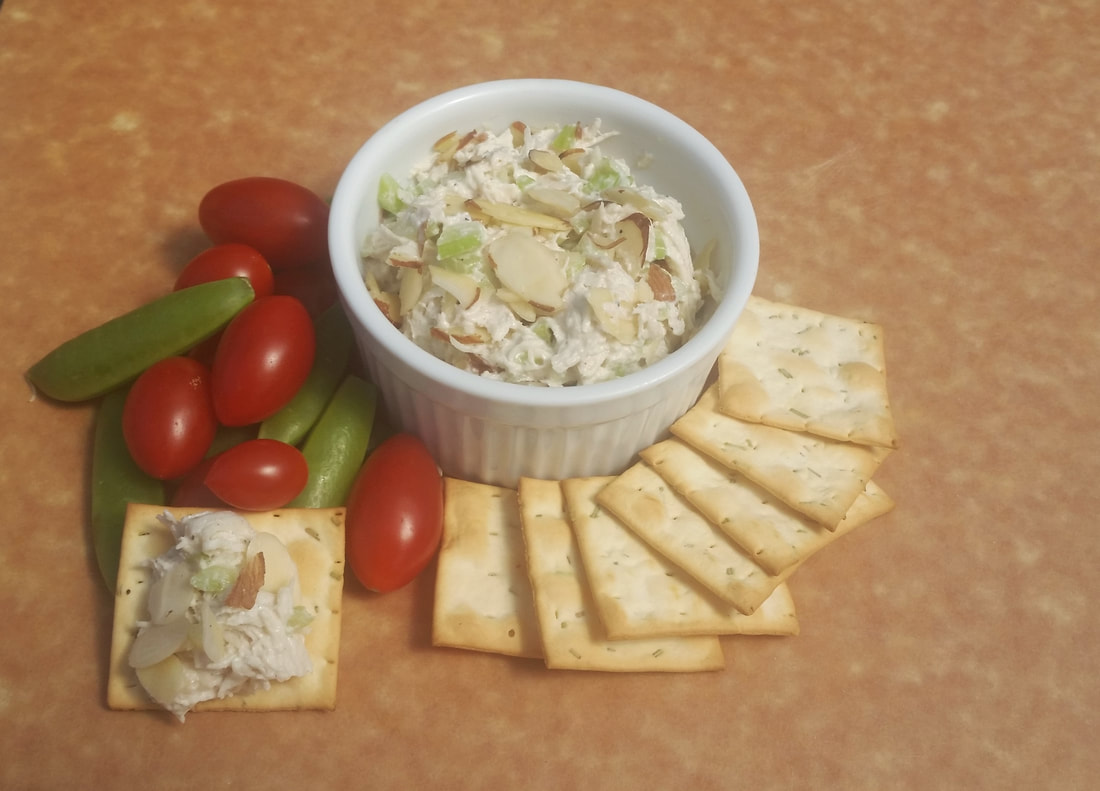
It's that time of the year - school is here! If you’re a parent or caregiver, you may already feel overwhelmed just thinking about packing school lunches for your kiddos. Lunch planning and packing are actually great activities to involve your kids in. As the parent, your roles are to ensure nourishing food options are available to pack and to provide guidance/assistance to your child. Your child’s jobs are to communicate their food preferences, give feedback on how much food is satisfying for meals and snacks, and to assist or independently pack their own lunch, depending on their comfort or maturity level. This may be a work in progress, but with time, your child will learn how to pack healthful food to fuel them for a day of school. ​
​

As you ease into passing along lunch packing duty, assess your child’s readiness level. Children in grades 1 to 3 may not be ready to pack independently, but they can certainly help with making decisions about what they’d like you to pack. This would also be a good time to brainstorm and plan together with this handy chart! Have discussions with your child about what should be included in a healthful lunch. Aim to always have “growing food” (protein and whole grains), fruit, and veggies on hand.
By grade 4 to 6, your child may be ready to pack all or part of their lunch independently. Maybe they could assemble a wrap, sandwich, pasta salad, or leftovers, but they may need more assistance with slicing fresh fruits and veggies and packing food up properly to ensure food safety. And don’t forget to involve your child in grocery shopping so they can take pride in their selections for the week.
Last month, the Sound Dietitians team had a blast talking about planning healthy lunches and doing some hands-on prep with kids and families at Verdant Community Wellness Center.  This was an excellent way to conclude Kids Eat Right Month and prepare for the start of school. Here are some tasty recipes from our class! ​

Chicken Salad

Leftover chicken breast or rotisserie chicken can easily be chopped or shredded to be used in lunches and additional dinner meals. Toss shredded chicken on salad or pasta, season for tacos or quesadillas, or make a batch of this delicious chicken salad. It is perfect for school lunches or snacks and can be enjoyed as a sandwich, wrap, or with whole grain crackers. Just remember to pack it with some cold packs so it stays chilled until lunch time.
​

Makes 2 Cups (4 Servings)
​​
Ingredients:​
  • ¾ cup celery, diced (2 stalks)
  • ½ cup seedless grapes, halved (optional)
  • 2 cups chicken breast, shredded or chopped
  • 1/3 cup Greek yogurt, plain, 2% fat
  • 2 Tablespoons mayonnaise
  • 1 teaspoon Dijon mustard
  • ½ teaspoon red wine vinegar
  • ¼ teaspoon black pepper
  • ½ teaspoon garlic powder
  • ¼ teaspoon salt
  • 1/3 cup sliced almonds or sunflower seeds (optional)
Picture
Directions:
  1. Wash and chop celery (and grapes, if desired). If kids want to practice dicing, parents can help make the job easier by first cutting the celery stalks into 3-4 inch pieces and then slicing lengthwise into thin sticks. Once this size, kids can practice chopping with supervision. Slicing grapes may be a better task for older children or adults since the grapes might slip/roll away more easily.
  2. Combine wet ingredients and spices. Mix with shredded chicken until moistened.
  3. Fold in celery, grapes, and nuts or seeds.
  4. Enjoy with whole grain bread, an English muffin, crackers, on a tortilla, or in lettuce wraps.
  5. Store in the refrigerator for up to 3-4 days.
Nutrition per 1/2 cup serving (with almonds and grapes): 240 Calories; 12g Fat; 27g Protein; 7g Carbohydrates; 1.5g Fiber; 300mg Sodium

Rainbow Power Bowl with Easy Red Wine Vinaigrette

This bowl was a HUGE hit with our class! The kids loved shaking up their own dressing and choosing a variety of colorful veggies for their bowls. One kiddo commented “the cucumbers are so crunchy and refreshing!” After assembling, these grain bowls are too pretty to pass up.
​
Makes 2 Cups
Recipe adapted from: https://www.superhealthykids.com/rainbow-buddha-bowls-kids/​​​
​

Ingredients:​​​
  • ½ cup cooked grains: quinoa, farro, pasta, or other whole grains
  • ½ to 1 cup mixed veggies
    • sliced cucumber
    • shelled edamame
    • chopped bell pepper
    • halved cherry tomatoes
    • chopped snap peas
    • diced avocado
    • leftover roasted veggies: sweet potato cubes, broccoli
  • 2 Tablespoons nuts, seeds, or beans
    • sunflower seeds, pepitas, slivered almonds, crushed walnuts, seasoned roasted chickpeas
  • 1-2 Tablespoons dressing/sauce of choice
    • Vinaigrette dressing, Avocado sauce, Hummus
  • Sprinkle of feta or parmesan cheese (optional)
Picture
Red Wine Vinaigrette:
  • ½ cup olive oil
  • ¼ cup red wine vinegar
  • ¼ teaspoon garlic powder
  • ¼ teaspoon salt
  • ¼ teaspoon black pepper
  • 1 teaspoon Dijon mustard
  • 1 ½ teaspoons dried chives
Directions:
(Dressing)
  1. Shake up all ingredients in glass bottle or jar and store in the refrigerator. Serving size: 1-2 tablespoons.
(Power Bowl)
  1. Use an airtight container or mason jar to package up your creation.
  2. No need to measure precisely. Build your bowl with a heaping scoop of cooked grains, at least 2-3 colorful veggies, and adjust the amount of dressing based on the size of your salad.
  3. Dressing can be packaged separately to add on just before lunch, or it can be added to the bottom of your container first (just shake it up to mix it all together!)
  4. Mix together grains and veggies, or assemble in layers.​
Notes:
  • Add extra protein to your bowl with shredded chicken or turkey breast, baked tofu, or diced hard-boiled egg.
  • For roasted sweet potato cubes: chop a large sweet potato into ½ inch cubes, toss with 1 teaspoon olive oil, transfer to foil lined pan, sprinkle with salt and pepper, and roast at 425 degrees Fahrenheit for 25 minutes (stir halfway through roasting).
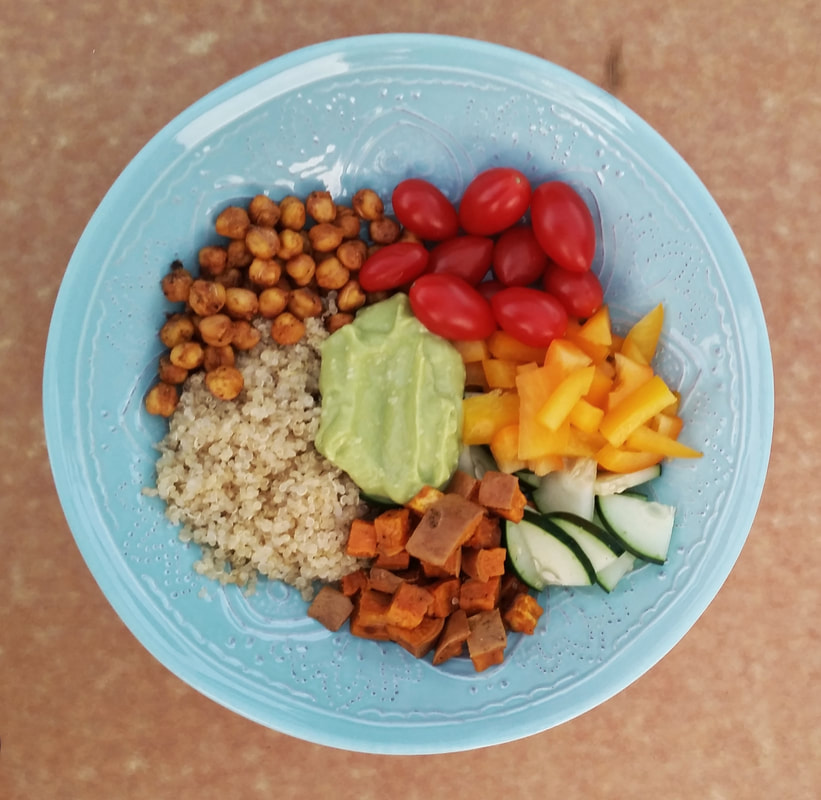
Nutrition per one example bowl (½ cup quinoa; 1/3 cup each cucumber/peppers/tomatoes, ¼ cup roasted sweet potato, 2 Tablespoons roasted chickpeas; 2 Tablespoons vinaigrette dressing): 355 Calories; 19.5g Fat; 7g Protein; 38g Carbohydrates; 6.7g Fiber; 210mg Sodium

​Chocolate Cherry Energy Balls

These energy balls are a great alternative to packaged, processed snacks because they are only lightly sweetened and also provide protein, fiber, vitamins and minerals. You can have fun mixing them up on the weekend and enjoy throughout the week.
​

Makes 24 Energy Balls
Recipe adapted from: https://www.smartnutrition.ca/recipes/mix-n-match-energy-ball-recipe/
Ingredients:
  • 1 cup old fashioned oats (whole or ground)
  • 1/3 cup sunflower seed butter
  • 1/4 cup date paste (8 pitted dates)
  • 1/4 teaspoon vanilla extract
  • 3 Tablespoons dried cherries, chopped
  • 1 Tablespoon dark chocolate (about 10 chocolate chips), chopped
  • 2 Tablespoons chia seeds
Picture
Directions:
  1. Prepare date paste. Soak dates in hot water for at least 10 minutes until softened. If you are in a rush, you can 
microwave the mixture for 1 minute (be careful – water and dates will be hot!). Remove dates and combine with 3 
Tablespoons water. Mash with a fork, or blend mixture in a food processor, Magic Bullet, or similar device.
  2. Combine liquid ingredients: nut/seed butter, date paste, and vanilla extract. Stir until smooth.
  3. Gather dry ingredients: oats, dried fruit, chocolate, seeds. Using a sturdy spatula or wooden spoon, mix all ingredients together in a medium sized bowl. If mixture is too 
difficult to stir, you can knead the mixture with clean hands until well combined.
  4. Scoop balls with a tablespoon or small cookie scoop. Gently roll into balls with your hands. If mixture is too crumbly, add in 1 teaspoon water at a time until mixture sticks together better. Place balls on a parchment lined sheet pan or storage container. Refrigerate until firm. 
​
  5. Store energy balls in an air-tight container in the refrigerator for up to one week
Notes:
  • Oats can be mixed in whole for a chewier energy ball
  • For a smoother texture energy ball, process oats in a food processor and pulse until a flour-like consistency
  • Recommended serving size: 2-3 energy balls
Nutrition per energy ball: 55 Calories; 2.5g Fat; 1.5g Protein; 7g Carbohydrates; 1.2g Fiber

Fun extra: Check out America's Test Kitchen's "Kid Friendly Recipe & Activity Testing" to encourage food, cooking, and STEAM (Science, Technology, Engineering, the Arts, and Mathematics)!

Happy planning, prep, and packing ~ Wishing you all an excellent start to a new school year!


~Holly, RDN
1 Comment

Planning and Packing Healthful Lunches

8/31/2016

0 Comments

 
Picture
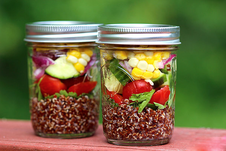
This past Saturday, the Sound Dietitians team had a blast talking about planning healthy lunches and doing some hands-on prep with kids and families at Verdant Community Wellness Center.  This was an excellent way to conclude Kids Eat Right Month and prepare for the start of school. Some of our participants will be starting classes again in just a week or two! Here are a few highlights and a favorite recipe from our class.


Three Steps to Healthy Lunches

1.  Planning: Get kids involved in the planning process
  • Brainstorm weekly lunch ideas on the weekends
  • Discuss guidelines for what should make it into their lunchbox – remember all 5 food groups
  • Always plan to have “growing food” (protein & whole grains), fruit, and veggies on hand
  • Make lists and go grocery shopping together so kids can take pride in their selections

2.  Preparation: Practice food prep skills and food safety with your children
  • Add fun shapes by cutting sandwiches or sliced fruit with cookie cutters
  • Slice or peel fruit and veggies so they are easy to grab and eat without fuss
  • Rinse fruit and vegetables with cool water before cutting or packing them
  • Hand washing before food prep (and eating) is a must. Keep those germs away!

3.  Packing
: Put it all together for a nutritious and safe lunch
  • Use an insulated lunch box with cold packs – keep meat, dairy, or leftovers cold and safe
  • Include lots of colors so your children can “eat the rainbow” to get important nutrients
  • Throw in a fun surprise once in awhile, like a note or small treat
Packing lunches is a great time to encourage your kids to be creative and find satisfying foods and flavors. The following recipe got rave reviews from our cooking class families. It is completely customizable and is a yummy lunch option for both parents and kids.

Colorful Quinoa Confetti Bowls

This lunch option can use up quinoa from dinner leftovers and double as a side dish for other meals during the week. Quinoa is a quick-cooking whole grain as well as a complete protein source. Add more protein to keep your kiddos full longer with nuts or seeds and soy sources, such as tofu or edamame.  Vary the veggies to make this whole grain salad bowl pop with color and nutrients!
Picture
Ingredients
  • 2 teaspoons flavoring (Basil pesto, Balsamic vinaigrette, Italian dressing)
  • ½ cup cooked quinoa
  • ½ cup mixed veggies (diced cucumber, shelled edamame, chopped bell pepper, halved cherry tomatoes, chopped sugar snap peas, diced avocado, sliced scallions)
  • 1 Tablespoon nuts or seeds (sunflower seeds, slivered almonds, crushed walnuts)
  • Optional: chopped pears or green apple, pomegranate arils, or chopped dried cherries
 
Directions
  1. Add choice of flavoring to the bottom of an airtight container. Parents may also choose to pack in a mason jar.
  2. Add quinoa and vegetables in alternating layers, or mix all together.
  3. Right before eating, shake up the container to mix the dressing throughout (dressing can also be saved in an extra container to add on right before eating)
 
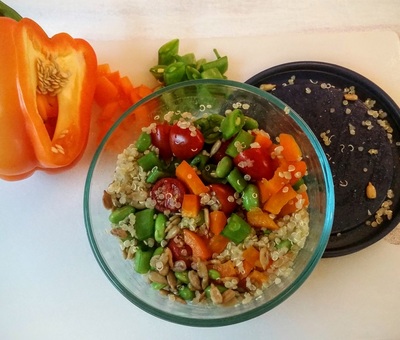
Nutrition: (for example combination – ½ C quinoa; ½ C mixed edamame/cherry tomatoes/orange bell pepper; sugar snap peas; 1 Tablespoon sunflower seeds, 2 teaspoons Balsamic vinaigrette dressing)
  • Calories: 230
  • Protein: 9 grams
  • Total fat: 10 grams (0.75 g saturated, 2 g monounsaturated, 5 g polyunsaturated)
  • Total carbohydrate: 28 grams (Dietary fiber: 6 grams)
  • Sodium: 130 mg
Happy planning, prepping, and packing ~ Wishing you all an excellent start to a new school year!
 
Holly, RDN
0 Comments

Lettuce Tell You - Tips for Salad Preparation and Preservation

7/20/2016

0 Comments

 
Let’s face the facts: as much as we may love our kale, good things do not last forever. We have all faced the disheartening moment when your once-crisp spinach turns into a pile of bruised, unappetizing mush. Never fear, there are a few tips that you can use along the way to prolong the quality your leafy greens! Our last visit to the farmer’s market included sharing such tips, in addition to classifying different greens, and ideas for preparation. Families gathered ‘round to spin the “head of knowledge” and put themselves to the test. Have you used produce wash on your greens? Apparently such an act, despite us believing it’ll benefit us, is a big “no-no”. Are you on top of your salad game? Look below to find out!
Picture
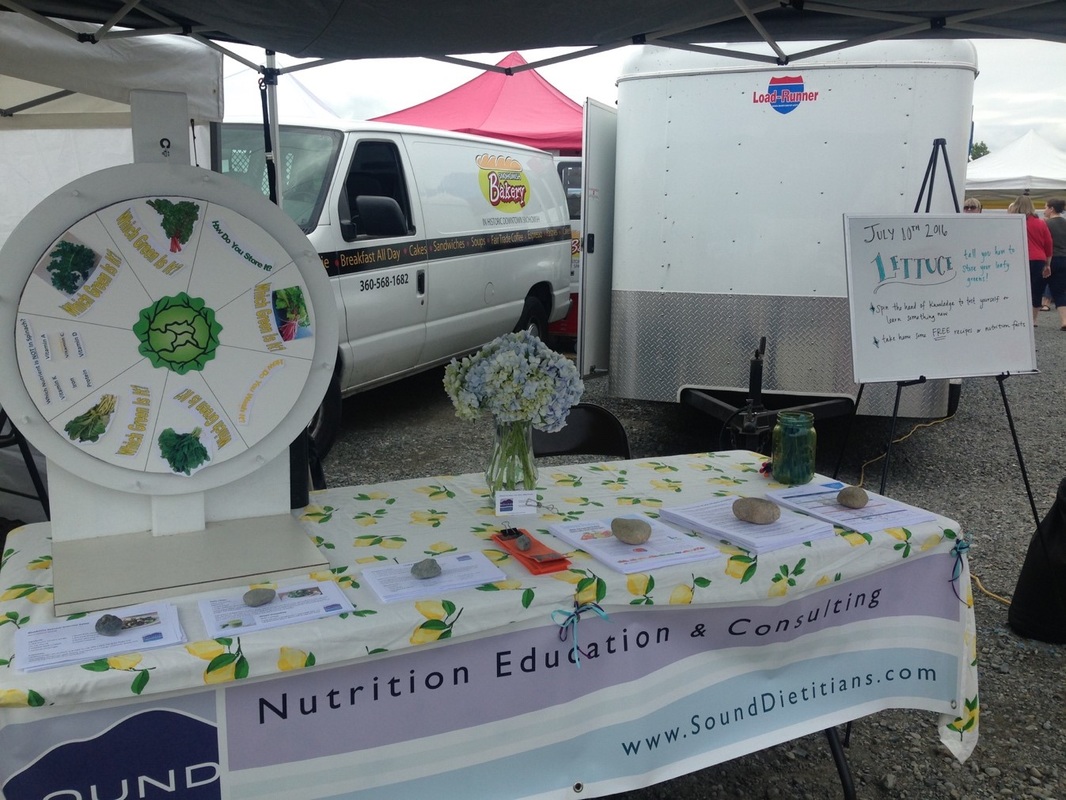
We love our spinner - can you tell? This week it is a "salad spinner"!

Top Tips for Washing Leafy Greens from Eatright.org
  • Always start with clean hands. Wash your hands for 20 seconds or more with soap and warm water.
  • Cut away any damaged areas on leaves or stems before preparing or eating the greens. If something seems rotten, discard it.
  • If leafy greens are not labeled as "pre-washed" or "ready-to-eat," thoroughly wash them under running water just before chopping, cooking or eating. This will help reduce the presence of microorganisms. If you wash leafy greens before storing, you can potentially promote bacterial growth and enhance spoilage.
  • If lettuce has a core, such as iceberg lettuce, remove it before washing. When you have loose leaves that can't easily be held under cold running water, immerse the leaves in a large clean bowl or a salad spinner filled with cold water. Toss them around in the water for 30 seconds or more. Drain and repeat twice.
  • Never wash leafy greens with soap, detergent or bleach, since these can leave residues that are not meant to be consumed. The U.S. Food and Drug Administration doesn't recommend using commercial produce washes because these may also leave residues.
  • If leafy greens are labeled as "pre-washed" or "ready-to-eat," use them without additional washing, since it is unlikely to enhance their safety.
  • After washing fresh greens, pat them dry with paper towels or a freshly clean kitchen towel — or use a salad spinner — to help remove excess liquid.
Bruised greens? No problem.

​Both of the recipes below have enough flavor and texture to disguise most lettuce that crosses into the “not ideal for salads” zone. The kale chip recipe is not only packed with B vitamins, it provides a crave-worthy salty and crunchy alternative to the average bag of chips! 
And the green smoothie is so good, spinach is the last ingredient you- or your family members- will think of when you sip on it.
Kale Chips
YIELD: 4-6 servings

1 bunch of Kale
1-2 Tbs. Safflower oil or Canola oil
Seasoning of choice: garlic powder, onion powder, salt, pepper, nutritional yeast
Picture
Preheat oven to 250 F. Wash, spin or pat kale dry. Remove the stem and cut or tear kale into bite site pieces. Toss kale in oil. Cover baking sheets with parchment paper. Spread kale leaves over the sheet and sprinkle seasoning of choice. Bake for 30 minutes. Kale chips should be crunchy and green. They burn easily, so be sure to check on them and adjust the time as needed. 
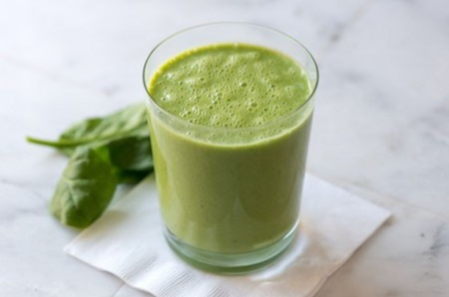
Picture
Green Smoothie
YIELD: 2 servings
​
2 cups Spinach, 4 Strawberries, 1 cup orange juice, 1/2 cup plain Greek yogurt. Blend until smooth and enjoy!


Blueberry Spinach Summer Salad
YIELD: Makes 6 servings
 
3 tablespoons red wine vinegar
1/2 cup olive oil
1 teaspoon Dijon mustard
1 teaspoon white sugar
1 pound fresh spinach
1 pint fresh blueberries
4 ounces goat cheese
4 ounces hazelnuts
Picture
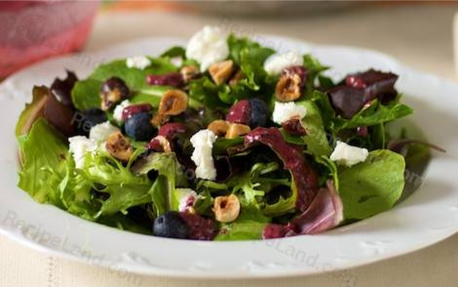
Combine vinegar, oil, mustard, and sugar in a jar with a tight-fitting lid; shake well.
Toss spinach, blueberries, goat cheese, and hazelnuts in a large salad bowl.
​Drizzle with dressing and toss gently; serve immediately.
 ​

​If you’re lucky enough to frequent the Everett Farmer’s Market, take this recipe along with you! Almost all of the above ingredients can be found at the market right now. If your shopping loyalties lie elsewhere, not to worry. This salad is composed of in-season produce that can be found almost everywhere in the PNW. No hazelnuts? Almonds slices or pumpkin seeds will do the trick! Adding a hardboiled egg, chicken breast or salmon fillet would also revamp this salad from a snack to an evening meal.
 
I hope salading down in the kitchen with your newly acquired lettuce facts will help you find your inner peas. :) 
 
Feel free to visit us for another beautiful day at the Everett Farmer’s Market, this Sunday, July 24th!
 
​~ Olivia
0 Comments
    Picture

    SD Blog 

    A place for our consultant Registered Dietitian Nutritionists (RDNs) to share nutrition science, yummy and healthy recipes, tips on seasonal ingredients, and other nutritional musings. Enjoy!  

    ​Megan Ellison,
    ​MS, RDN, CSOWM, CDE Founder

    Categories

    All
    Diabetes
    Dinners
    Farmers' Market
    Food Preparation
    Food Preservation
    Grocery Shopping TIps
    Gut Health
    Hydration
    Lunches
    Proteins
    Seasonal
    Snacks
    Sweets
    Veggie Sides
    Wellness
    Whole Grains

    Archives

    December 2022
    October 2022
    June 2022
    May 2022
    April 2022
    March 2022
    February 2022
    January 2022
    December 2021
    November 2021
    September 2021
    May 2021
    March 2021
    February 2021
    January 2021
    November 2020
    October 2020
    June 2020
    April 2020
    March 2020
    February 2020
    January 2020
    November 2019
    October 2019
    August 2019
    July 2019
    June 2019
    May 2019
    April 2019
    March 2019
    February 2019
    January 2019
    December 2018
    November 2018
    October 2018
    September 2018
    August 2018
    July 2018
    May 2018
    March 2018
    February 2018
    January 2018
    November 2017
    September 2017
    August 2017
    July 2017
    June 2017
    May 2017
    April 2017
    March 2017
    January 2017
    December 2016
    November 2016
    October 2016
    September 2016
    August 2016
    July 2016
    June 2016
    May 2016
    April 2016
    February 2016
    January 2016
    November 2015
    October 2015

    RSS Feed

Providing Expert Nutrition Services to the Greater Puget Sound Region. 
Newsletter
  • HOME
  • About
    • Philosophy
    • Our Team
    • Locations
    • Telehealth
  • Work With Us
    • Nutrition Counseling
    • Diabetes Education
    • Clinics & Businesses
    • Dietitians & Interns
    • Contact
  • Blog
  • Giving & Receiving