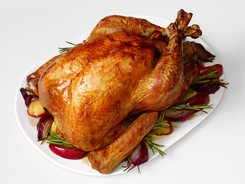
 Thanksgiving is a holiday when practicing food safety is very important. Pulling off a big meal for a crowd is quite an accomplishment and certainly takes some planning and teamwork. Here are some tips to ensure you and your guests have a safe and enjoyable meal. When it comes to cooking turkey, your meat thermometer should be your best friend. With your oven set at 325 °F, your cooking time may range from 2 ¾ to 5 hours, depending on the size of your turkey. What is important is that your turkey reaches a minimum internal temperature of 165 °F throughout. Since turkey is a type of poultry, it is important that it is thoroughly cooked to reduce the risk of Salmonella poisoning. Even if you have an automatic button thermometer that pops to indicate "doneness" in one spot, still check your turkey’s temperature in various places. Good places to check the temperature of your turkey are areas where heat may need to penetrate the most: the innermost thigh/wing and the thickest part of the breast. Once your turkey is done and removed from the oven, let it sit for about 20 minutes before carving. This next part is very important! If you are a fan of stuffing, make sure it is thoroughly cooked:
An interesting tidbit that I just recently learned is that fully cooked pink turkey meat is safe to eat. If you properly cook your turkey to at least 165 °F but your turkey meat appears a little pink after you carve it, no need to worry. This pink color may be due to gases from the air that react with your turkey meat in the oven. It could also be due to the natural presence of nitrites that may have been in the turkey’s food or water supply or the age of the turkey (younger birds generally have thinner skin, which allows the oven gases to reach the meat more easily). If you are ever in doubt about the safeness of your turkey, you can also call the USDA Meat & Poultry Hotline: 1-888-MPHotline (1-888-674-6854) – available on Thanksgiving Day from 8am–2pm Eastern time. Your enjoyment of turkey doesn’t need to end after the holiday is over. Use your leftovers!
For more resources, visit the University of Nebraska-Lincoln Extension. Wishing you lots to be thankful for this holiday! ~ Holly, RDN
0 Comments
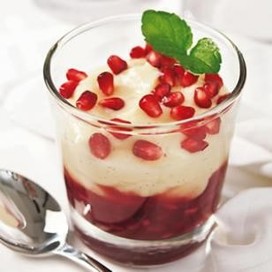
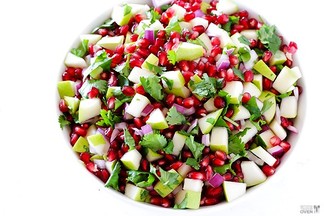
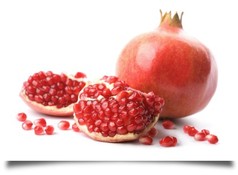 Pomegranates are one of my favorite treats this time of year. I say “treat” because they are a tad pricey at $2 each, but they are definitely worth it! With just a bit of effort to break apart and seed a pomegranate, you can enjoy an abundance of the bright, tangy flesh-covered seeds called arils. For convenience, it may be tempting to buy the pre-packaged containers of arils, but a small 4 oz container that costs more than $2.50 may not get you very far. I just seeded a pomegranate today (for the sake of “research” and deliciousness) and got nearly 2 full cups (16 ounces) of arils. Sounds like a screamin’ deal to me!
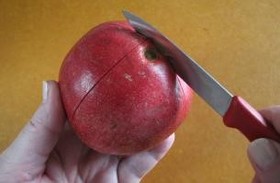
There are quite a few methods for seeding a pomegranate. There is no wrong way, so just choose whatever you are comfortable with. I prefer to make a shallow cut around the perimeter of the pomegranate with a paring knife and pry the two halves apart with my fingers. From there, you can gently pull on the rind and use your fingers to remove the arils into a bowl. Another more inventive method is to hold one half in the palm of your hand (seeds down, and over a bowl) and firmly hit the rind with a wooden spoon. Sometimes the seeds come tumbling out, and other times you might just end up with a juicy palm. Don’t worry about separating the little white rind pieces from the arils as you seed. Once you are done, you can add some water to your bowl and all of the white pieces will float to the top and be easier to remove.
Enjoy a little “pom therapy” and add some zip to your day! ~ Holly, RDN Helpful links:
|

SD BlogA place for our consultant Registered Dietitian Nutritionists (RDNs) to share nutrition science, yummy and healthy recipes, tips on seasonal ingredients, and other nutritional musings. Enjoy! Categories
All
Archives
May 2024
|


 RSS Feed