SOUND DIETITIANS LLC
  • HOME
  • About
    • Philosophy
    • Our Team
    • Locations
    • Telehealth
  • Work With Us
    • Nutrition Counseling
    • Clinics & Businesses
    • Contact
  • Blog
  • Giving & Receiving

Food Preservation – Canning, Dehydrating, & Freezing

10/21/2018

0 Comments

 
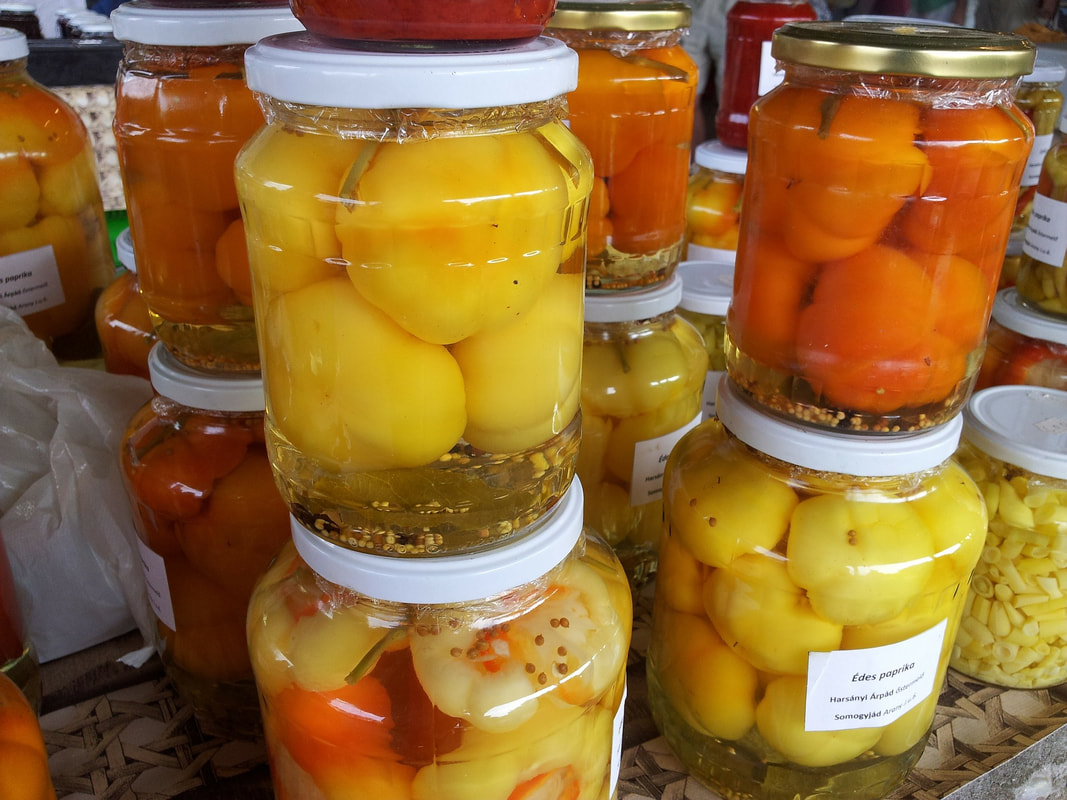
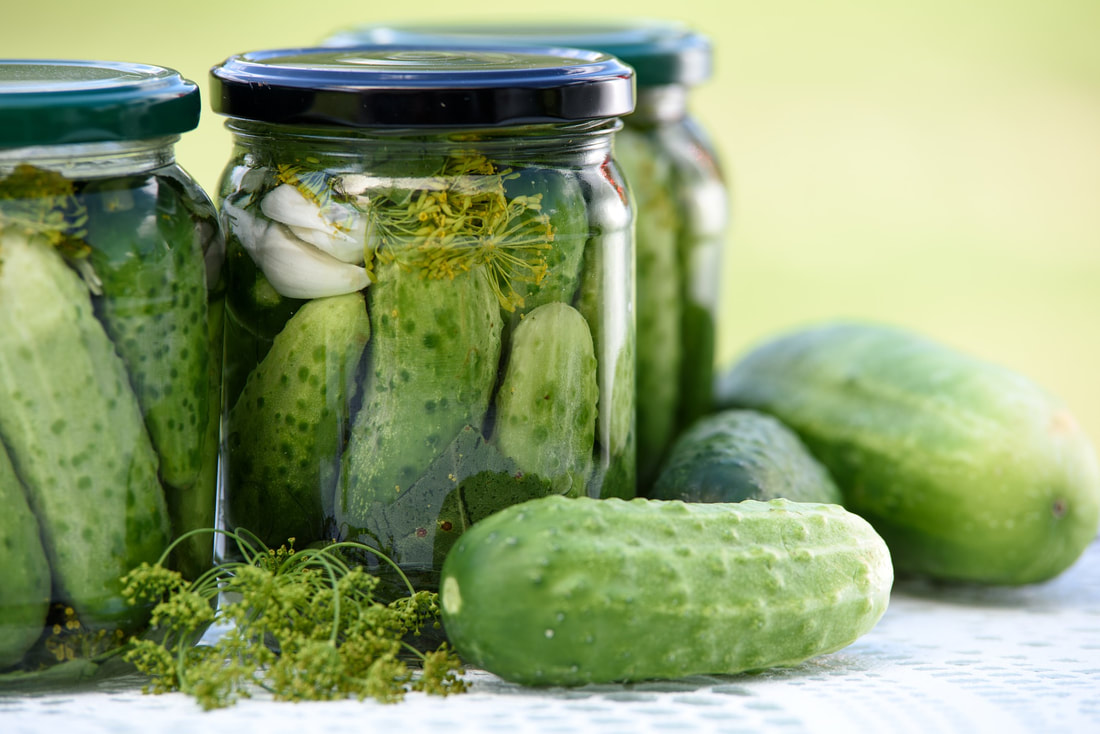
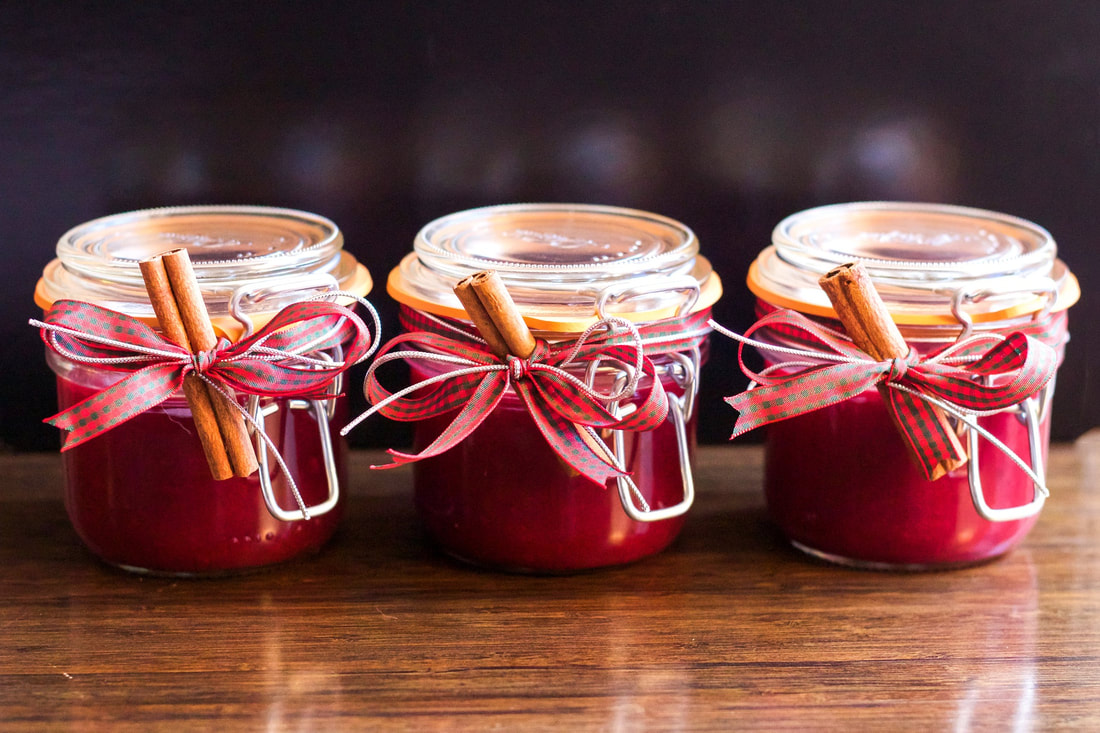
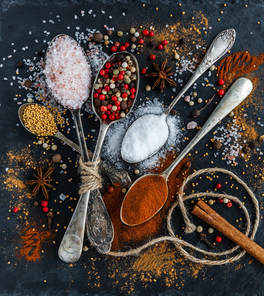
Fall is here! What comes to mind with the turn of the season? What about big pots of soup, large batches of slow cooker recipes, seasonal produce, or even homemade jam and apple butter?

Wouldn’t it be great if some of our fall favorites could last year-round? With the usage of proper food preservation techniques, they totally can!
​
Canning is a commonly used preservation technique, especially in Autumn and during the holiday season. Done correctly using the water bath technique, canning seals the food away from microorganisms that cause it to spoil. This greatly prolongs the shelf life. In fact, canned goods can be stored at room temperature for a minimum of 12-18 months. As long as the seal is still intact, canned goods may survive on your shelves for years! Canning is not limited to just jams and jellies – homemade pickles, compotes, seasonal fruit in syrup, salsa, sauces, and more are also easily canned. Not to mention, canned goods make great homemade gifts for the holidays!

At our food preservation class at Verdant on Monday, October 15th, we went with a common canned good – homemade jam. Our jam was very seasonal, containing fresh pears, figs, orange juice and zest, and cinnamon. Smells and tastes like the holidays!

Autumn Jam

Makes six 8-ounce jars
Recipe from www.SeriousEats.com 


Ingredients:
  • 1 1/2 pounds pears, peeled, cored, cut into 1⁄2” chunks
  • 1 1/2 pounds fresh figs, quartered
  • 3 1/2 cups sugar
  • 1 teaspoon cinnamon
  • 3 Tablespoons orange juice
  • 1 1/2 teaspoons orange zest
  • 1⁄2 teaspoon butter
Picture
Directions:
  1. Mix pears, figs, and sugar together in a large bowl. Cover and let sit at room temperature for 1 hour.
  2. Pour fruit and sugar mixture into a large, deep pot. Add cinnamon, orange juice, zest, and butter. Stir to combine.
  3. Cook over medium heat until the mix begins to bubble, stirring frequently. Once bubbling, cook for an additional 20 minutes, or until desired thickness is achieved. Stir frequently to prevent sticking to the pot.
  4. Remove pot from heat. Use a spoon to remove any foam from the surface of the jam.
  5. Ladle jam into sterilized jars. Process in a hot water bath for 10 minutes.
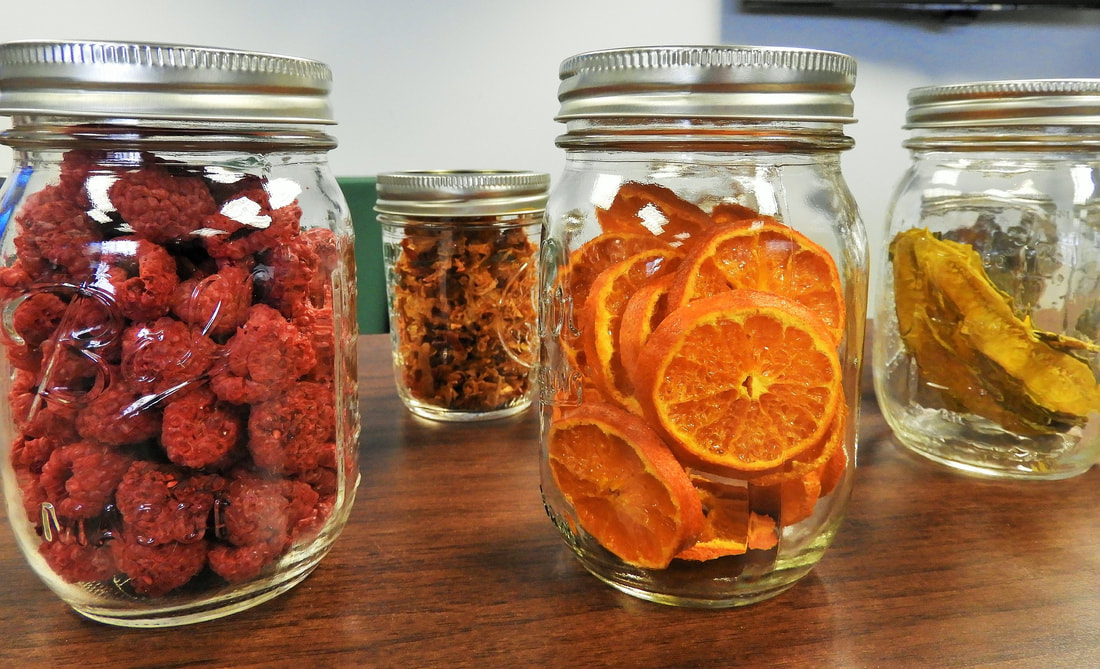
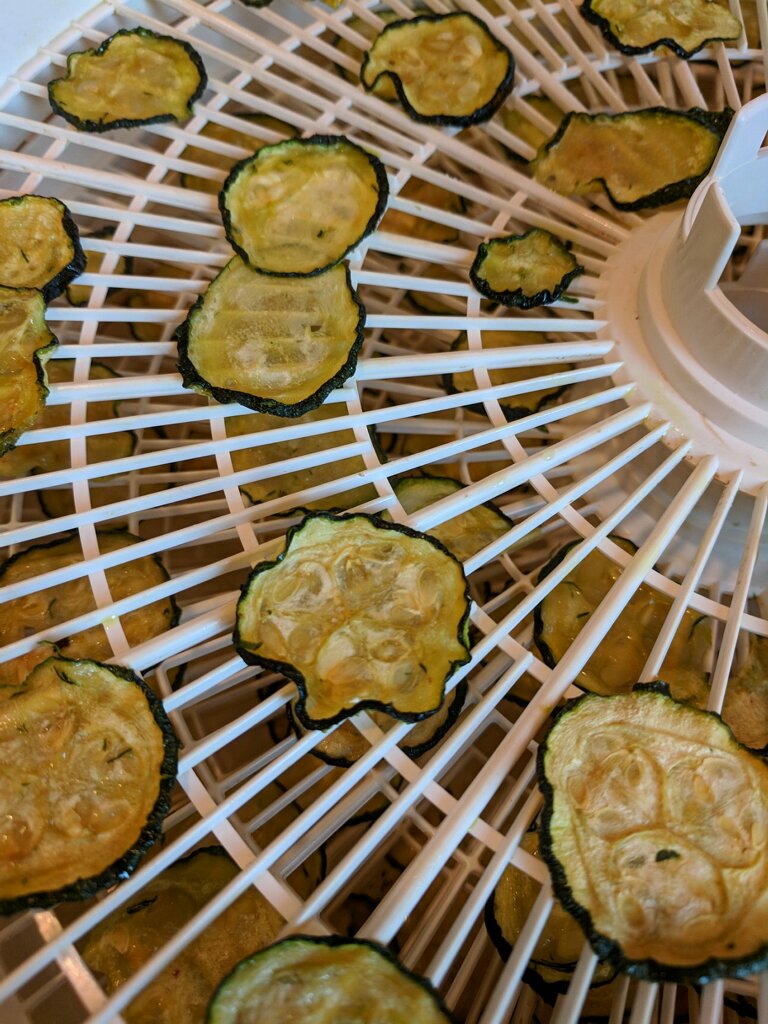
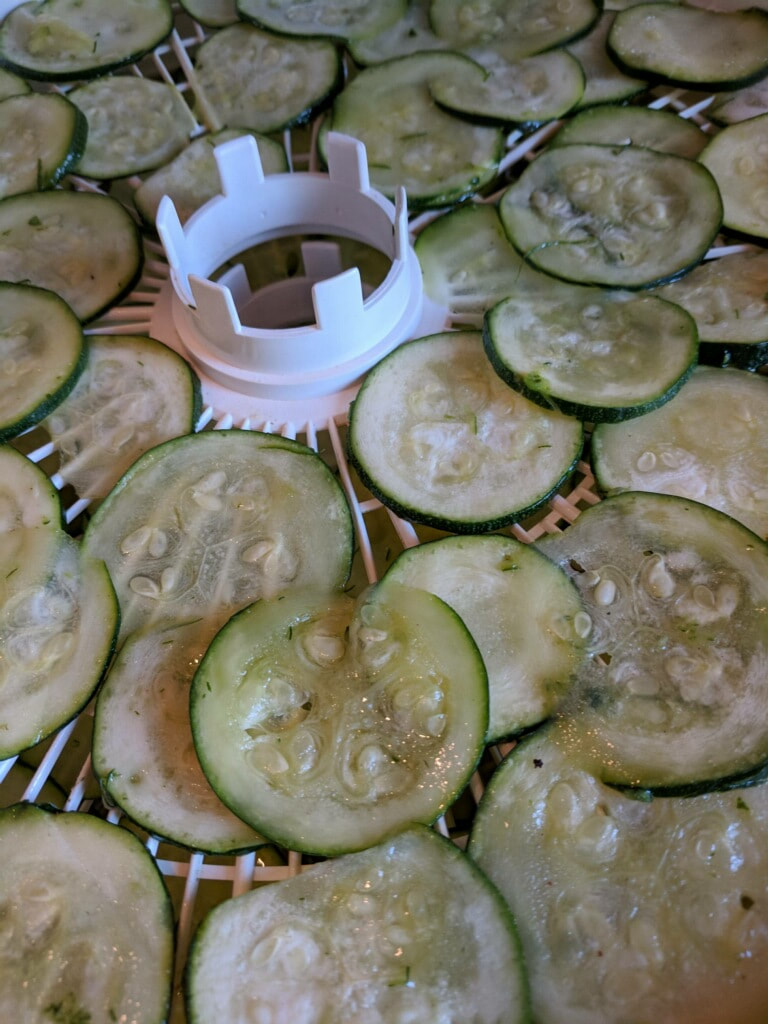
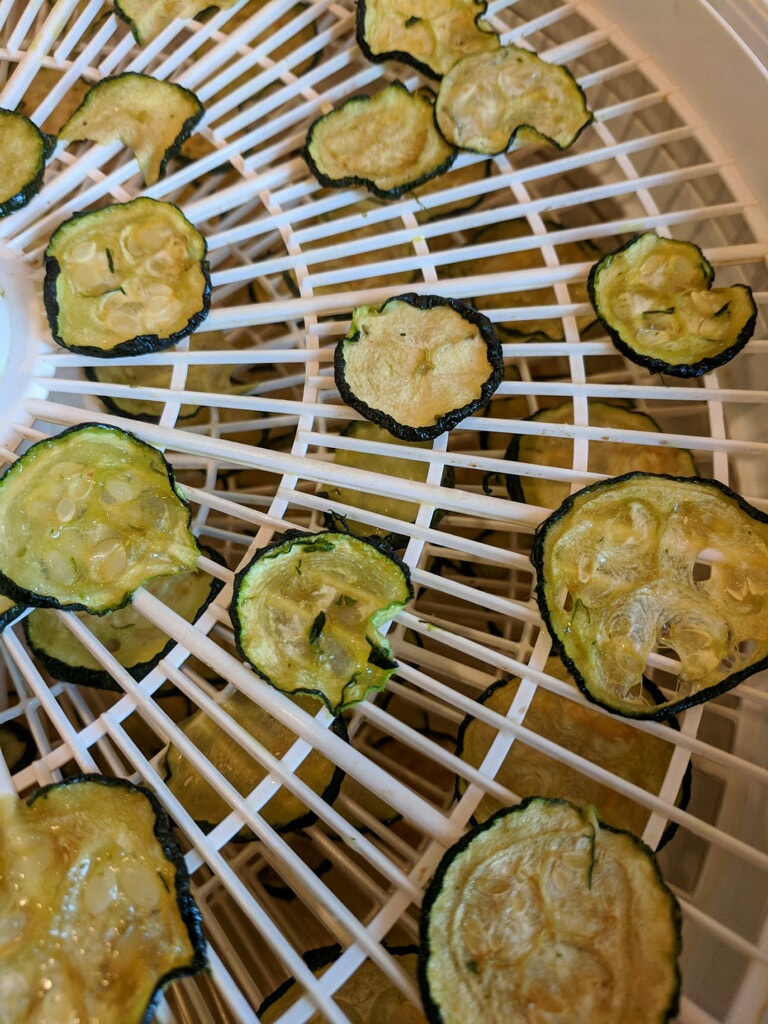
Nutrition per 2 Tablespoons (1 ounce): 72 Calories; <1g Fat; <1g Protein; 19g Carbohydrates; 1g Fiber; <1mg Sodium

Dehydrating is a less common food preservation technique, although it is a useful one. Did you know that dehydrated foods are shelf-stable for up to 5 years?! For best results, using a food dehydrator is ideal. However, using a normal oven at 200 degrees for a few hours will also get the job done. Dehydrators can be used to make dried pasta, dried herbs, snack foods out of fruits and veggies, beef jerky, you name it! The time it takes to dehydrate will vary depending on the food and thickness of pieces. Typically, foods with a higher water content will take longer than those with a lower water content.

For the food preservation class, we chose to make dehydrated pears. We also chose a unique recipe to demonstrate – zucchini chips! Fall season also means football season, and what’s football season without salty snack food? Zucchini chips are a great swap for potato chips at your next tailgating event or viewing party. You can even make them salt and vinegar style!

Zucchini Chips

Makes 8 servings 
Recipe adapted from www.SugarFreeMom.com


Ingredients:
  • 3 medium zucchini, very thinly sliced
  • 2 Tablespoons oil
  • 2 teaspoons salt
  • Optional: 2 Tablespoons white balsamic vinegar (for salt & vinegar chips)
Dehydrator Directions:
  1. Program dehydrator to 135 degrees F.
  2. Place thinly-sliced zucchini in a large bowl. Toss with oil (and vinegar, if desired).
  3. Evenly layer zucchini slices in the dehydrator trays. Sprinkle with salt. Dry for 8-14 hours. Time will depend on thickness of slices – check periodically.
Oven Directions:
  1. Preheat oven to 200 degrees F.
  2. Place thinly-sliced zucchini in a large bowl. Toss with oil (and vinegar, if desired).
  3. Line a cookie sheet with parchment paper. Evenly layer zucchini slices on the tray. Sprinkle with salt. Bake for 2-3 hours, rotating halfway during baking. Time will depend on thickness of slices – check periodically.
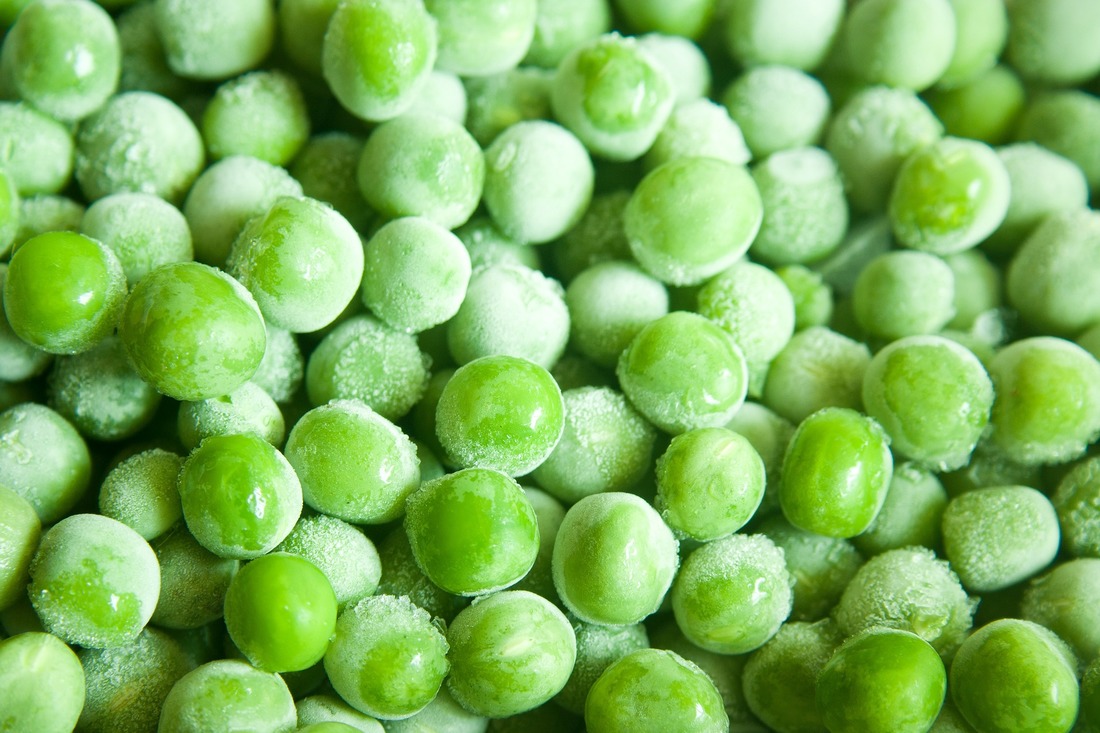
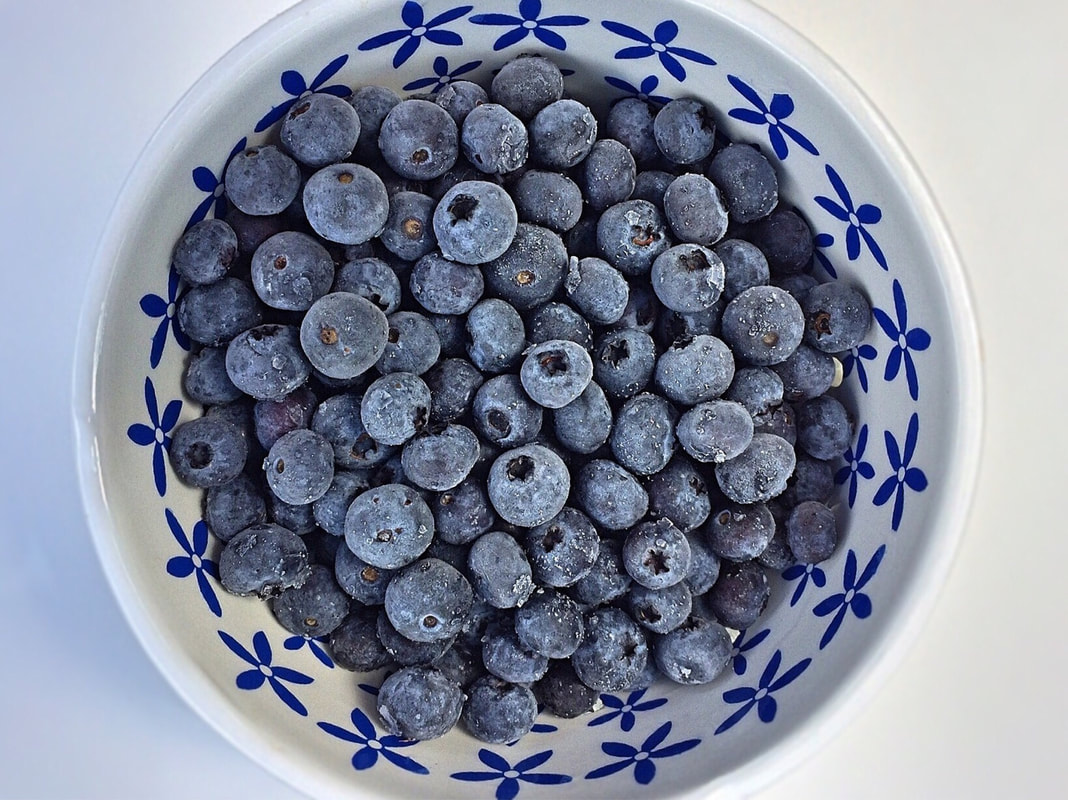
Nutrition per serving: 45 Calories; 4g Fat; 1g Protein; 3g Carbohydrates; 1g Fiber; 42mg Sodium

Last but not least, freezing is another great (and perhaps, the simplest) strategy to prolong the storage of foods. When you prepare a dish and freeze it, that dish will last 2-3 months in the freezer. This is a great way to meal prep for the week, or even the month. It’s also a useful strategy to pre-portion foods and aid in managing your overall intake. You can freeze almost anything you’d like – pasta dishes, soups, meats, stir fry, and more! Try wrapping portions of whatever dish you made in foil and then place that in a ziplock freezer bag. Remember to label your bag with the date! Please note: there is a difference between a regular ziplock bag and a freezer bag. Freezer bags are thicker, sometimes have texture, and will prevent food from freezer burn. Whenever you’re ready to enjoy your dish again, just unwrap the foil, put the food on a plate, and microwave as if it were a frozen TV dinner (minus the preservatives and high sodium content).

Already prepared dishes are not the only things that freeze beautifully. Fresh produce is another freezable option. In fact, freezing produce when ripe will prolong the life of the nutrients within the fruit or vegetable. Freezing produce is a great practice because it will last 8-12 months in the freezer, while produce only lasts 1-2 weeks in the fridge! Plus, what’s a better snack than frozen berries? Throw your frozen berries into a blender for your morning smoothie or toss some frozen veggies into a soup or stew. Talk about zero-effort cooking!

Blanching produce before freezing is an great way to preserve the color and texture. To prevent pieces from sticking together, such as broccoli florets or diced fruits and veggies, try freezing them on a baking sheet first. Make sure the pieces are evenly dispersed and not stacked on each other. Once those are frozen, you can then place them into your foil packets, Tupperware, or ziplock freezer bags. The only produce items that may not freeze the best are your leafy greens and lettuce. Other than that, get creative with what items from the produce section you can freeze. Don’t forget to consider your favorite seasonal produce!

​~Waverly, Dietetic Intern
0 Comments

Kohlrabi: Not a UFO

10/8/2018

2 Comments

 
Picture
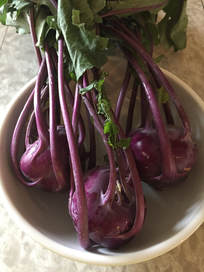
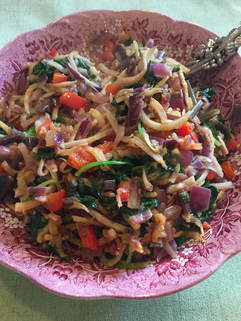
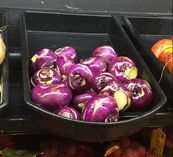
I’d like to introduce you to one of my family’s favorite vegetables. It’s called kohlrabi (“coal-rah-bee”). You may have seen this vegetable at your local grocery store, looking like a misshapen UFO. You have likely overlooked it, not knowing what it was or what to do with it. ​

Kohlrabi is a cruciferous vegetable, just like broccoli, cabbage, kale and Brussels sprouts. Like these other vegetables, it grows above ground where part of the stem of the plant swells into a ball close to the soil. Leaves sprout from this ball. Kohlrabi comes in three different colors: white, light green, and purple. The inner flesh is white in all varieties. ​

What does a kohlrabi taste like? ​

Smaller kohlrabi globes are sweet and juicy like apples. The larger ones are more fibrous and must be peeled before you can enjoy them. While a kohlrabi globe can be stored in the refrigerator for 2-3 weeks (in a container), you need to use the greens and stems (yes, they are edible) as soon as possible. Note: not all kohlrabi is sold with their greens. ​

How do you eat kohlrabi? ​

You can eat this mild-tasting vegetable either raw or cooked. Some ideas for using it are:
  1. Grate into a salad or add to coleslaw.
  2. Eat sliced like an apple and enjoy with a dip of nut butter or hummus.
  3. Include in soups or in a mixed-vegetable stir-fry.
  4. Use the chopped greens as you would other greens.
  5. Chop the stems to include with your greens. ​
Picture

How nutritious is kohlrabi?

Kohlrabi is a nutrient-packed vegetable that has only 48 calories in one cup (sliced and cooked). It is low in sodium and is a good source of dietary fiber, vitamin B6, potassium, copper, manganese, and is an excellent source of vitamin C (1). Studies show that cruciferous vegetables play a key role in cancer-fighting (2), among other health claims. ​
Even though kohlrabi can usually be found year-round, you might not find it in your local grocery store. Request it in the produce section of your grocery store to see if they will order it for you. You can often find it in a natural food market or at an Asian grocery store. It is also more likely to be found in the winter and spring. It is very easy to grow and can be grown even during the winter months in the Pacific NW. ​
I encourage you to try this delicious vegetable - it may become a new family favorite!

Shredded Kohlrabi with Greens and Peppers

Makes 4-6  Servings

Ingredients:
  • 1 kohlrabi (about three-fourths of a pound)
  • 1 medium red onion, chopped (about 1 cup)
  • 2 Tablespoons olive oil
  • 1 medium red pepper, chopped
  • 5 ounces of greens, finely chopped (see note below)
  • Salt, to taste, or your favorite spice mix (one of mine is below)​​
Picture
Directions:
  1. If the kohlrabi still has its greens, cut them off at the bulb and finely chop them, stems included (use only if the leaves look fresh, otherwise, buy fresh greens. See Note).
  2. If the kohlrabi is larger than 3 inches around, peel it with a knife before using.
  3. Cut the globe to a size that will to fit into the hopper of a food processor that has the shredder attachment installed. Shred kohlrabi. If you do not have a food processor, use the larger holes of a cheese grater.
  4. Heat a 6-quart pot over medium heat. Add the oil to the hot pot.
  5. Add onion to the oil. Cook for 3-5 minutes, stirring occasionally.
  6. Add the kohlrabi and red pepper and stir to combine.
  7. Continue stirring until the kohlrabi turns from firm to soft and slightly browned. Add more oil as needed to prevent the kohlrabi from burning.
  8. Add the greens, stirring until they are wilted, about 5 minutes.
  9. Add either salt to taste or your favorite spice mix (start with about 2 teaspoons mix and add more to taste). Stir well to distribute.​

Note: If the kohlrabi does not have greens, buy about five ounces of greens (spinach, kale, Swiss chard, etc.) This dish freezes well.
​
Nutrition per serving (1/6th of recipe - no salt added): 74 Calories; 5g Fat; 2g Protein; 7g Carbohydrates; 3g Fiber; 32mg Sodium

All-Purpose Seasoning

Makes about 2 Tablespoons
Recipe adapted from learningherbs.com

​
Ingredients:
  • 2 teaspoons oregano
  • 1 teaspoon rosemary
  • 1 teaspoon fennel (optional)
  • 1 teaspoon thyme
  • 1 teaspoon salt
  • 1/2 teaspoon granulated garlic
Picture
Directions:
  1. Grind all spices together so that all herbs are a similar size. Store in a jar with a tight lid in a dark place.
  2. Shake before using.
  3. Delicious in above recipe and on meats and in other vegetable dishes.

~​Guest Post by Bastyr University Masters of Nutrition Student Nancy Miller
​

Resources:
1. http://nutritiondata.self.com/facts/vegetables-and-vegetable-products/2467/2
2. https://www.ncbi.nlm.nih.gov/pubmed/15035868
2 Comments

Cooking for One or Two & Cooking on a Budget

10/1/2018

0 Comments

 
Check out Amanda's segment on King 5's New Day Northwest and find the recipes below! 
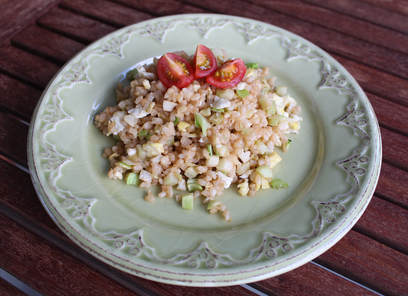
Quick Fried Rice

Makes 2 Servings

Ingredients:
  • 2 eggs
  • 1 Tablespoon olive oil
  • 1 cup riced broccoli
  • 1 cup riced cauliflower
  • 10 ounces cooked brown rice or frozen/pre-cooked 
  • 1 tsp garlic powder
  • 2 Tablespoons low-sodium soy sauce
Picture
Directions:
  1. Microwave brown rice for 3 minutes (skip this step if your rice is already hot).
  2. Meanwhile, heat a skillet over medium heat. Add olive oil when pan is hot and crack two eggs into the pan. Gently scramble eggs until eggs are completely cooked. Set eggs aside. 
  3. Using the same pan, add broccoli, cauliflower, rice, garlic powder, and soy sauce. Stir fry rice mixture on medium heat for 1-2 minutes. Add eggs to rice mixture. Enjoy! 
  4. Optional: garnish with chopped or sliced tomatoes. 
Nutrition per serving: 410 Calories; 12.5g Fat; 14g Protein; 45g Carbohydrates; 5g Fiber; 460mg Sodium
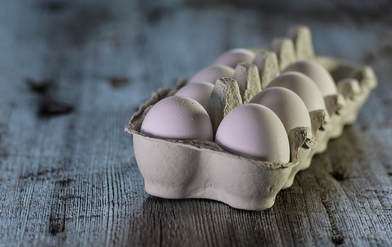
Eggs To-Go

Ingredients:
  • 1 egg
  • 1/4 cup spinach
  • 1 Tablespoon feta cheese
  • Ground black pepper, to taste
​Directions:
  1. Place spinach at the bottom of a mug. Add feta cheese and crack an egg on top. 
  2. Cover and microwave for 1 minute. Optional: season with black pepper. Enjoy! 
  3. Make this a balanced meal by pairing with fruit or whole grain toast. 
Picture
Nutrition per mug: 90 Calories; 6g Fat; 7g Protein; 0g Carbohydrates; 0g Fiber; 184mg Sodium
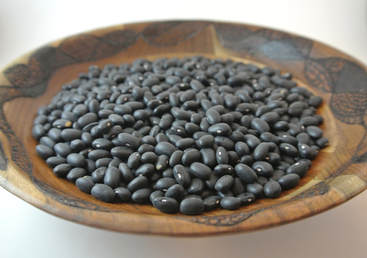
Black Bean Tacos

Makes 2 Servings

Ingredients:
  • 1 (15 ounce) can no salt added or low-sodium black beans, rinsed and drained
  • 1 1/2 teaspoons olive oil
  • 1/4 teaspoon garlic powder
  • 1/4 teaspoon ground cumin
  • 1/4 teaspoon chili powder
  • 1/4 large lime, juiced
  • 2 Tablespoons cheese of choice, shredded
  • 2 (6 inch) corn tortillas
  • 2 Tablespoons fresh cilantro, chopped
  • Optional toppings: plain nonfat Greek yogurt, lettuce, chopped tomatoes
Picture
Directions:
  1. Heat olive oil in a saucepan over medium heat. Add beans, garlic powder, cumin, and chili powder. Stir gently and cook for 5 minutes. 
  2. Remove from heat and add lime juice and cilantro. Stir mixture.
  3. Place tortillas in a microwave and cover with a damp paper towel. Heat for 30-45 seconds, or in 30 second increments until tortillas are soft. 
  4. To build tacos: Place tortillas on a plate and fill each tortilla with 1 tablespoon cheese and 1/4 cup bean mixture. Top with your favorite toppings! 
  5. Tip: Use leftover beans for salads, soups, omelets, or quesadillas. 
Nutrition per 2 tacos: 295 Calories; 7g Fat; 13g Protein; 45g Carbohydrates; 11g Fiber; 259mg Sodium
0 Comments
    Picture

    SD Blog 

    A place for our consultant Registered Dietitian Nutritionists (RDNs) to share nutrition science, yummy and healthy recipes, tips on seasonal ingredients, and other nutritional musings. Enjoy!  

    ​Megan Ellison,
    ​MS, RDN, CSOWM, CDE Founder

    Categories

    All
    Diabetes
    Dinners
    Farmers' Market
    Food Preparation
    Food Preservation
    Grocery Shopping TIps
    Gut Health
    Hydration
    Lunches
    Proteins
    Seasonal
    Snacks
    Sweets
    Veggie Sides
    Wellness
    Whole Grains

    Archives

    October 2024
    May 2024
    February 2024
    November 2023
    October 2023
    June 2023
    April 2023
    March 2023
    February 2023
    December 2022
    October 2022
    June 2022
    May 2022
    April 2022
    March 2022
    February 2022
    January 2022
    December 2021
    November 2021
    September 2021
    May 2021
    March 2021
    February 2021
    January 2021
    November 2020
    October 2020
    June 2020
    April 2020
    March 2020
    February 2020
    January 2020
    November 2019
    October 2019
    August 2019
    July 2019
    June 2019
    May 2019
    April 2019
    March 2019
    February 2019
    January 2019
    December 2018
    November 2018
    October 2018
    September 2018
    August 2018
    July 2018
    May 2018
    March 2018
    February 2018
    January 2018
    November 2017
    September 2017
    August 2017
    July 2017
    June 2017
    May 2017
    April 2017
    March 2017
    January 2017
    December 2016
    November 2016
    October 2016
    September 2016
    August 2016
    July 2016
    June 2016
    May 2016
    April 2016
    February 2016
    January 2016
    November 2015
    October 2015

    RSS Feed

Providing Expert Nutrition Services to the Greater Puget Sound Region. 
Newsletter
Photo from jeffreyw
  • HOME
  • About
    • Philosophy
    • Our Team
    • Locations
    • Telehealth
  • Work With Us
    • Nutrition Counseling
    • Clinics & Businesses
    • Contact
  • Blog
  • Giving & Receiving